Audio Editing: Essential Techniques for Music Producers
Last Edited: May 27, 2026

Audio editing transforms raw recordings into polished, professional tracks. It is the foundational step that shapes everything before mixing and mastering even begins. Yet many producers blur the lines among all three stages, treating them as interchangeable parts of a single process. That misunderstanding can cost you hours of wasted effort and muddy results. This guide breaks down the core tasks, DAW workflows, loudness standards, and expert pitfalls to help you build real, repeatable editing skills that actually move your productions forward.
Key Takeaways
| Point | Details |
|---|---|
| Editing vs. mixing | Audio editing is about shaping and preparing tracks, not balancing or finalizing them. |
| DAW workflow essentials | Using a timeline, regions, and non-destructive methods helps avoid errors and maintain flexibility. |
| Loudness matters | Normalization ensures consistent playback and adheres to platform distribution standards. |
| Avoid common mistakes | Crossfades and elastic audio techniques can fix clicks and prevent unnatural transitions. |
| Expert advice | Don’t rely on untested software benchmarks; practical experience is the best guide. |
Defining Audio Editing in Music Production
Audio editing sits at the very beginning of your post-recording workflow. Before you touch a fader or apply a limiter, edit your raw material to clean up mistakes and arrange your recorded clips into a coherent structure. Think of it like sculpting. You start with rough material and carve it down to something intentional before you even think about finishing.
A key nuance worth understanding early: editing, mixing, and mastering are three completely separate stages, each with a distinct purpose. Mixing balances the individual elements of your session, adjusting levels, panning, and effects so all the parts sit together. Mastering takes the finished stereo mix and prepares it for distribution, applying final limiting, EQ, and loudness correction. Editing happens before both of those stages, and confusing them leads to messy sessions and costly rework.
“Editing is not just cutting audio. It is making decisions about what your listener hears and what they never will.”
| Stage | Primary focus | When it happens |
|---|---|---|
| Editing | Cleaning, arranging, and refining recorded clips | After recording, before mixing |
| Mixing | Balancing levels, panning, and effects | After editing |
| Mastering | Final loudness, EQ, and distribution prep | After mixing |
Understanding where editing fits is critical for producers who want to build efficient workflows. Jumping into mixing with unedited, noisy, or mistimed recordings is like painting over a cracked wall. You will always see the problem underneath. Start by exploring essential audio editing techniques to build that strong foundation. If you are also working on your home studio setup, learning about producing music from home will help you connect the full production pipeline.
Core Audio Editing Tasks and Techniques
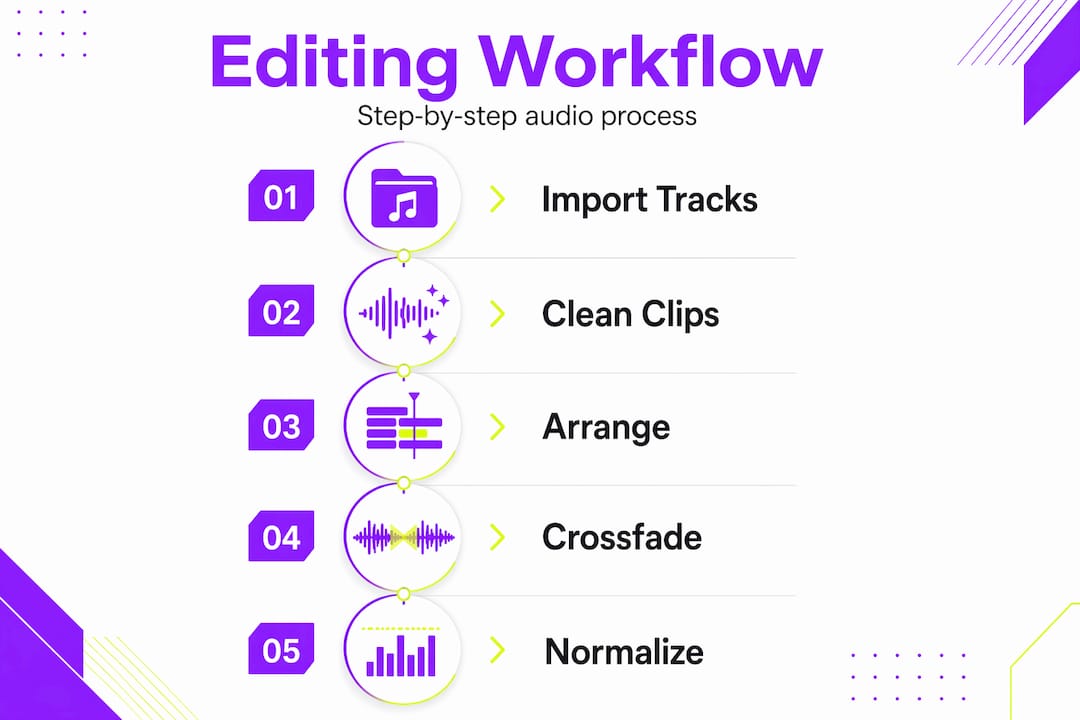
Once you understand where editing fits, the next step is knowing what editing actually involves. The range of tasks goes far beyond simply cutting audio at the beginning and end of a clip. Common audio editing tasks include trimming, cutting, comping, click-and-pop repair, time alignment, denoising, and loudness normalization. Each task serves a specific purpose, and mastering them all gives you full control over your raw recordings.
Here is a breakdown of the most important tasks you will use regularly:
- Trimming and cutting: Removing silence, breaths, or mistakes from the start and end of clips. This keeps your session clean and your timeline readable.
- Comping: Combining the best sections from multiple takes into one seamless performance. Vocalists and guitarists especially benefit from this approach since you capture several takes and cherry-pick the best phrases.
- Click and pop repair: Targeting unwanted transients or noise artifacts caused by hardware interference, mouth sounds, or bad punch-in points. Most DAWs include tools for this.
- Time alignment: Snapping recordings to the grid or to other instruments to fix rhythmic drift. Drum samples and live recordings often need this treatment to sit tightly in the mix.
- De-noising: Removing background noise like hum, room tone, or HVAC sounds without affecting the core audio signal.
- Gain staging: Adjusting the level of clips before they even reach your mixer channel. Proper gain staging prevents distortion and gives your mixing engineer clean headroom to work with.
Non-destructive editing is one of the most powerful concepts in modern DAW workflows. When you work non-destructively, your original audio files stay untouched. Every trim, fade, or stretch you apply is simply a set of instructions the DAW follows during playback. This means you can undo, revert, or try a completely different approach at any point without losing your raw recordings. For a deeper look at audio editing best practices, you will find that these non-destructive techniques are central to every professional workflow.
Crossfades are one specific non-destructive tool worth highlighting. When you cut between two clips, a hard cut can introduce a click or pop, especially if the waveform is not crossing zero at the edit point. A short crossfade, even as little as 5 to 10 milliseconds, blends the edges of both clips and eliminates that artifact. Get into the habit of adding small crossfades to every edit, and your audio will sound cleaner without any additional processing. You can dig into more specific editing tasks explained to sharpen your understanding of these micro-level techniques.
Pro Tip: Always zoom in close to your edit points before making a cut. You want to see the waveform in detail to place your cut at or near a zero crossing, which dramatically reduces the chance of clicks and pops.
Working With DAWs: Tools and Workflow Essentials
A Digital Audio Workstation is where all your editing actually happens. Audio editing in a DAW uses waveform and timeline operations along with multitrack editing, meaning you work with separate clips and tracks for different instruments, vocals, and sounds. The timeline view gives you a bird’s-eye view of your entire session, while zooming into the waveform editor lets you make precise micro-edits at the sample level.
Here are the essential steps for building a tight editing workflow inside your DAW:
- Organize your session first. Label every track, color-code instrument groups, and create clear folder structures before you start editing. A messy session makes editing harder and slower.
- Set your sync points. Identify key rhythmic anchors in your recording, such as kick drum hits or the first beat of a chorus, and align them with the grid. Everything else lines up from there.
- Work region by region. Edit one section at a time rather than scrubbing through the whole session. Tackle the intro, then verse, then chorus as separate tasks.
- Use snap to grid for tight edits. Most DAWs let you snap clips to beat positions, which significantly speeds up time alignment.
- Apply elastic audio or time-stretching sparingly. Modern DAWs include algorithms that let you stretch or compress audio without changing pitch. Use this for subtle fixes, not dramatic overhauls.
- Save multiple session versions. Before any major edit pass, duplicate your session file. This preserves your safety net without cluttering your main session.
| DAW feature | What it does | Best used for |
|---|---|---|
| Clip gain | Adjust the level before the channel fader | Gain staging individual clips |
| Elastic audio / Flex | Stretch or compress audio in time | Time alignment, tempo correction |
| Crossfade editor | Blend edges between two clips | Removing clicks at edit points |
| Comp tool | Layer and select the best take sections | Vocals, guitar, solo instruments |
| Noise reduction | Reduce background noise in recordings | Dialogue, acoustic recordings |
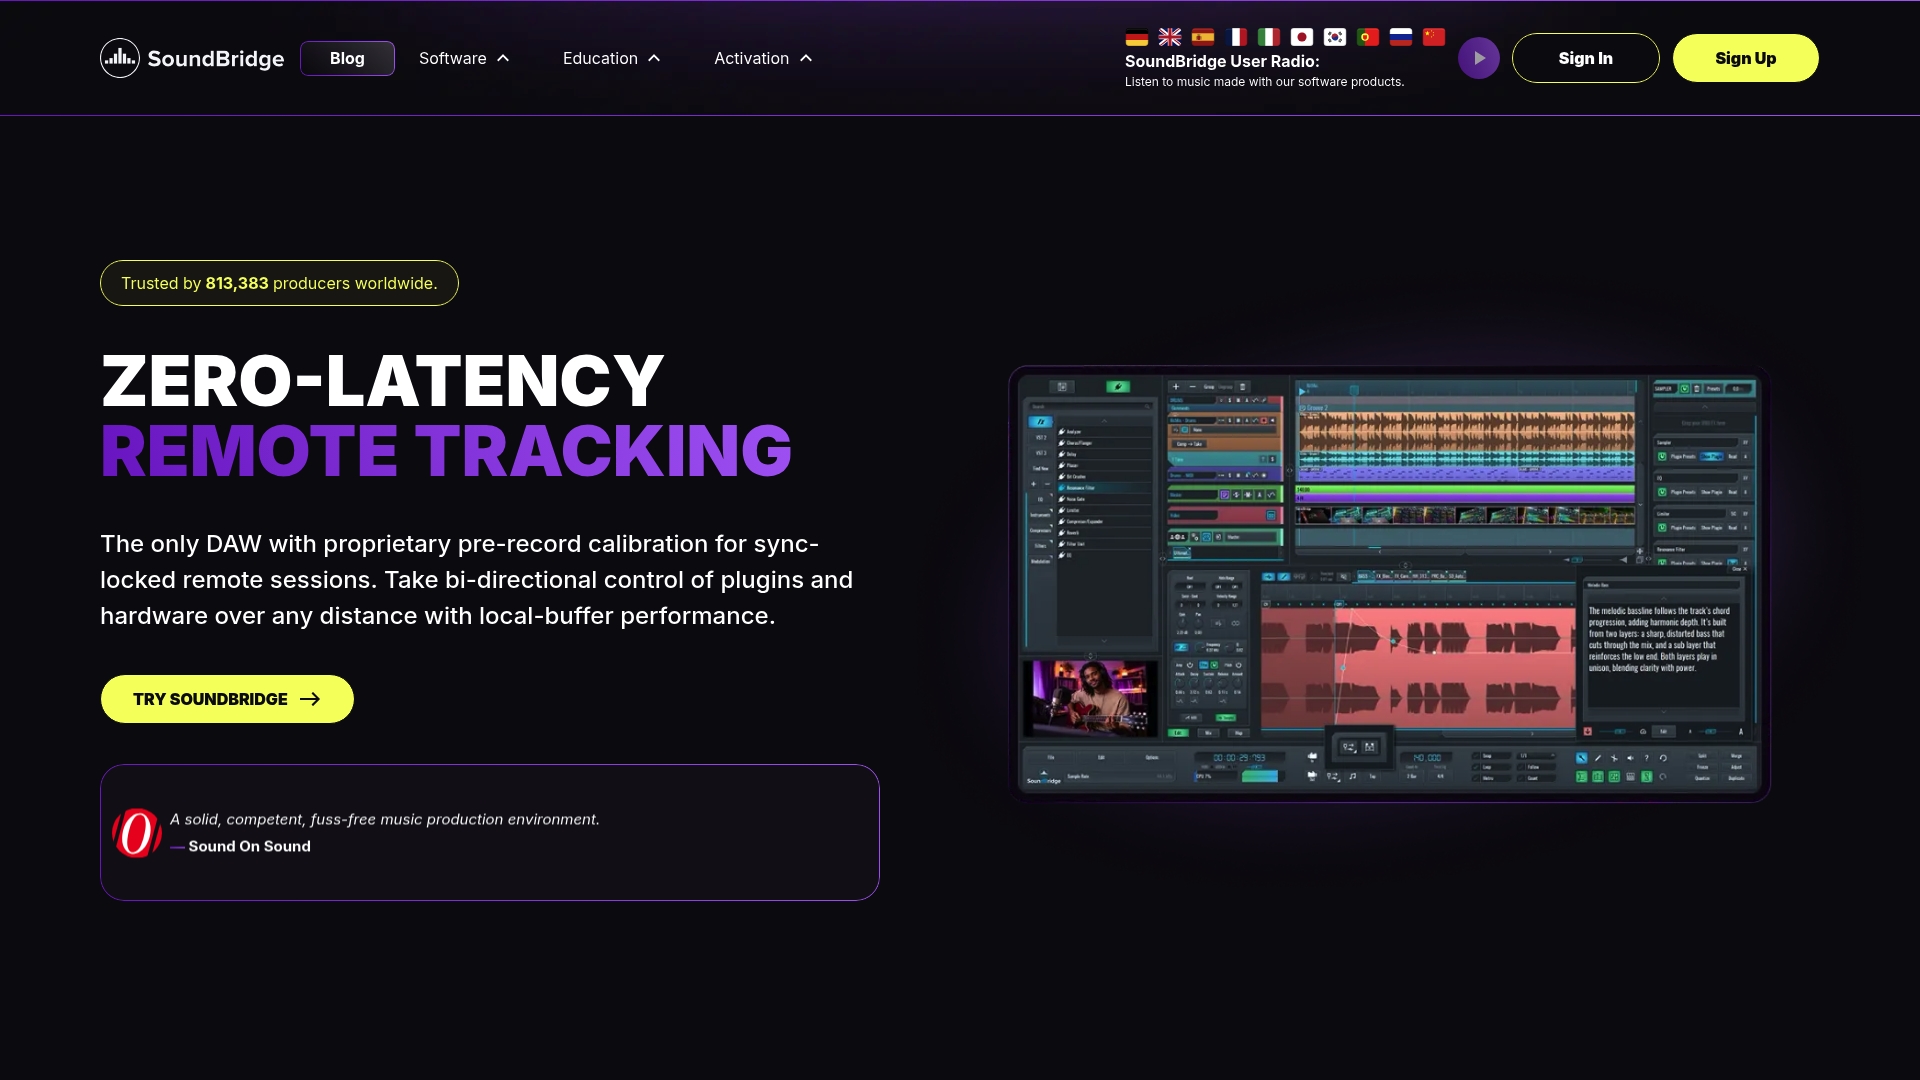
Working in a zero-latency DAW like SoundBridge gives you the responsiveness you need for precise editing, without frustrating delays between your actions and the audio feedback. This matters especially when you are nudging clips by a single millisecond to achieve perfect time alignment.
Pro Tip: Use keyboard shortcuts for every common edit action: trim, split, fade, nudge, and zoom. Once you internalize shortcuts, your editing speed doubles, and you stay focused on the creative decisions rather than hunting through menus.
Loudness Normalization: Preparing Audio for Distribution
Getting your edited audio to the right loudness level is one of the final steps in the editing process and one that many producers overlook until it is too late. Loudness normalization uses the LUFS methodology to measure and adjust your audio so that playback levels stay consistent across different streaming platforms and devices. LUFS stands for Loudness Units Full Scale, and it measures the perceived loudness of audio over time, not just peak levels.
Different platforms have different loudness targets, and understanding them keeps your music from sounding too quiet or getting slammed by automatic gain reduction:
- Spotify: Normalizes to approximately -14 LUFS for integrated loudness
- Apple Music: Targets around -16 LUFS
- YouTube: Uses -14 LUFS as its reference level
- Apple Podcasts: Recommends -16 LUFS for podcast audio
- Tidal: Masters quality streaming at approximately -14 LUFS
If your master is significantly louder than the targets, the platform will automatically turn it down. If it is quieter, it may be brought up, thereby amplifying background noise. The goal is to deliver audio that lands close to the platform’s target, so normalization processing has minimal impact on your sound.
Use a loudness meter plugin in your DAW to monitor your integrated LUFS throughout the editing and mixing process. Do not wait until you have mastered it to check the loudness. Making major-level adjustments late in the signal chain causes more problems than catching them early. Revisit normalizing loudness as part of your regular editing checklist, and you will always deliver platform-ready audio.
Key loudness facts to keep in mind:
- Peak levels should never exceed -1 dBFS true peak to avoid intersample clipping on streaming platforms
- Integrated LUFS measurement reflects the loudness of the whole track, not just the loudest moment
- Short-term LUFS helps you spot sections that spike louder than the overall average
Expert Tips: Avoiding Editing Pitfalls
Even experienced producers run into the same recurring mistakes when editing. Knowing what to avoid is just as valuable as knowing what to do. Clicks, pops, and unnatural transitions are best handled with crossfades and non-destructive time-warping (elastic audio) rather than hard cuts and destructive editing. The moment you process your audio destructively, you give up the ability to revisit that decision.
Here are the most common editing pitfalls and how to sidestep them:
- Destructive editing without backups: Always work non-destructively and keep your original files safe. If you must render or bounce a clip, save the original first.
- Ignoring time alignment: Even slightly out-of-time recordings create a muddy, undefined low end. Take the extra minutes to align drum mics, bass DI, and overdubs to the grid.
- Over-processing noise removal: Aggressive denoising can introduce artifacts that sound worse than the original noise. Apply it gently and use A/B comparison to catch artifacts early.
- Skipping crossfades: Hard cuts between clips create audible glitches. A crossfade costs you less than a second and solves the problem immediately.
- Editing without zooming in: You cannot make precise edit decisions at a zoomed-out view. Always zoom to the waveform level before trimming or splitting.
- Not listening back after every edit: Trust your ears, not just your eyes. The waveform can look clean while the audio has issues you only catch on playback.
Elastic audio is a particularly powerful tool for producers dealing with live recordings or imperfect takes. Rather than deleting and re-recording a slightly rushed guitar phrase, you can warp the timing of individual notes to sit exactly on the beat. This preserves the energy of the performance while correcting the rhythm. Stay up to date on editing techniques to keep your toolkit current.
Pro Tip: After completing an edit pass, step away from the session for a few minutes, then listen back with fresh ears. You will catch problems you missed while deep in the editing process.
Audio Editing Wisdom: What Most Guides Miss
Here is an honest perspective that most tutorials skip over. Audio editing is not primarily about knowing every feature of the software. It is about making thousands of small, intentional decisions that serve the music. The producer who spends two hours agonizing over the perfect comp for a vocal takes longer than the one who makes confident, fast choices based on feel and experience.
Real editing skill comes from repetition. You will make bad edits. You will place a crossfade in the wrong spot and not notice until the mix sounds off. You will overcompress a clip while removing noise, losing the texture of a live recording. Those mistakes are exactly how you build judgment. Every error teaches you something a tutorial cannot.
One area worth calling out is benchmark comparisons. Be skeptical of articles claiming precise comparisons of latency or RAM usage for audio editing software. Many benchmark claims lack transparency and are not backed by peer-reviewed or widely recognized test methodology. The numbers look authoritative, but they often reflect very specific hardware configurations or test conditions that do not apply to your setup. Trust your hands-on experience in your own session more than any chart you read online.
Focus instead on mastering editing techniques that improve your workflow in practice: zooming into edit points, using crossfades consistently, keeping sessions organized, and listening critically after every pass. These habits compound over time and produce results that no software specification can guarantee.
Take Your Editing to the Next Level
If you are ready to put these editing principles into practice, SoundBridge has the tools and guidance to help you get there. Built for music producers at every stage of their journey, SoundBridge combines an intuitive interface with powerful editing capabilities designed for real-world sessions.
Whether you are working through your first vocal comp or refining a complex multitrack arrangement, the editing tutorial library on SoundBridge gives you hands-on, step-by-step guidance you can apply immediately. And with SoundBridge’s professional DAW platform supporting zero-latency processing, remote collaboration, and high-fidelity audio up to 192kHz, you get everything you need to edit with confidence, from your first trim to your final master-ready deliverable.
Frequently Asked Questions
What does audio editing do in music production?
Audio editing prepares recorded tracks by cleaning, arranging, and refining them before mixing and mastering, shaping raw performances into polished material.
What tools are commonly used for audio editing?
Most producers use DAWs for waveform and multitrack editing, with SoundBridge offering an intuitive, feature-rich platform alongside other industry options.
How does loudness normalization work?
Loudness normalization measures audio using LUFS-integrated levels, so playback volume stays consistent across streaming platforms like Spotify and Apple Music.
Can I fix audio mistakes like clicks and pops during editing?
Yes, crossfades and non-destructive elastic audio tools inside your DAW handle clicks, pops, and unnatural transitions cleanly without damaging your original recordings.
Are benchmark tests reliable for comparing audio editing software?
Many software benchmarks are low-confidence and lack peer review, so hands-on testing in your own workflow is more reliable than published comparison charts.
Recommended
MASTER MUSIC PRODUCTION
Expert-led courses designed to take you from fundamentals to finished tracks.

HOUSEFrom bouncy bass and solid kicks, this course teaches you the most modern House music production techniques needed to succeed and stand out.

TRAPQuit sounding like generic Trap and produce something World with hints of the Far East. Create ethnic soundscapes to put your Trap ahead of the curve.

AMBIENTProduce relaxing, sophisticated psy-influenced ambient. Psychedelic and relaxing to listen to, create meditative soundscapes to put your listeners in Zen.