

Audio Effects Explained: A Beginner's Complete Guide
Last Edited: Jul 2, 2026

Audio effects are signal-processing tools that alter the core properties of an audio signal, including its dynamics, frequency content, spatial character, and time-based behavior. Every polished track you hear relies on five main effect families: dynamics, spectral, time-based, modulation, and harmonic/distortion effects. Knowing how each family works, where it belongs in your signal chain, and when to reach for it is the difference between a mix that sounds flat and one that pulls listeners in. This guide gives you that foundation, from basic definitions to professional routing strategies.
What Are the Main Types of Audio Effects and How Do They Shape Your Sound?
Audio effects explained in their simplest terms: each effect targets one of four audio qualities. You are either changing time, tone, space, or dynamics. Every plugin or hardware unit you will ever use fits into one of those four categories, even if its name sounds exotic.
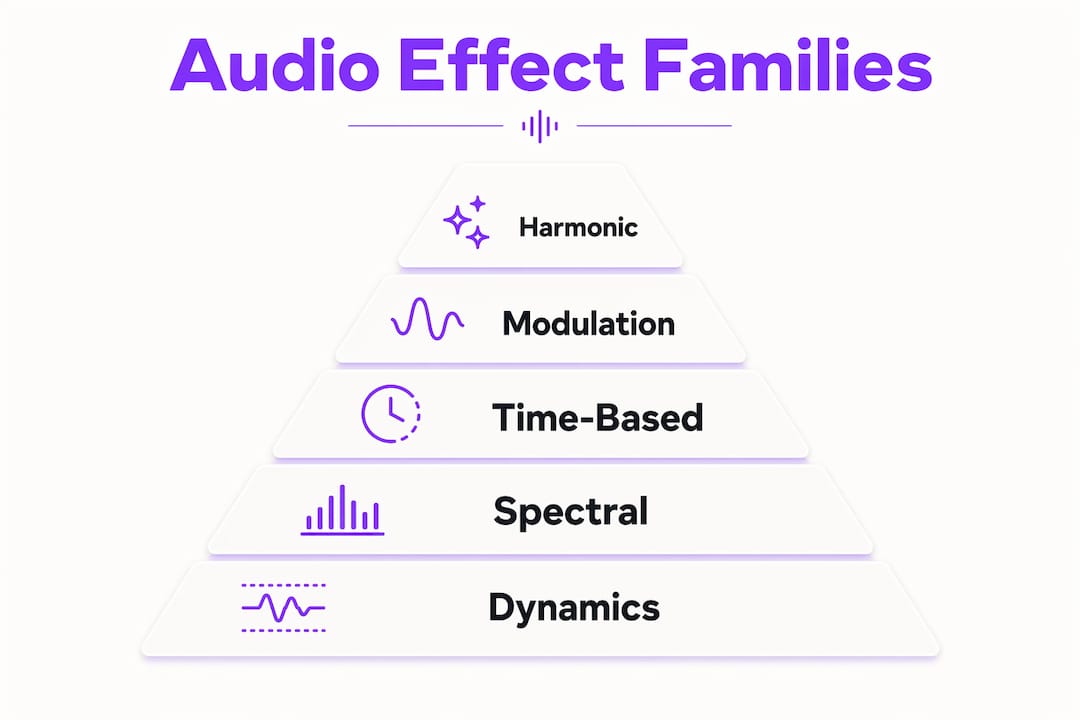
Here is a breakdown of the five professional effect families:
-
Dynamic effects control volume over time. Compression reduces the gap between loud and quiet moments, giving your kick drum punch and your vocals consistency. Limiting acts as a hard ceiling, preventing clipping. Gating cuts out unwanted noise between notes, keeping your recordings clean.
-
Spectral effects shape frequency content. Equalization (EQ) is the primary tool here. Corrective EQ removes problem frequencies, such as a boomy low-mid buildup. Tonal EQ adds character, such as a high-shelf boost to add air to a vocal. Filters sweep or cut entire frequency bands for creative effect.
-
Time-based effects create space and depth. Reverb simulates acoustic environments, from a tight room to a vast cathedral. Delay repeats your signal at set intervals, adding rhythm and dimension. These two effects do more to place a sound in a three-dimensional space than any other processing.
-
Modulation effects add movement and width. Chorus thickens a sound by layering slightly detuned copies. Flanger and phaser sweep through phase relationships, creating that swooshing, jet-like quality you hear on classic rock guitars and synth pads.
-
Harmonic and distortion effects add grit and character. Saturation gently clips the signal, adding warm harmonics the way analog tape or tube gear naturally does. Bitcrushing reduces bit depth for a lo-fi, crunchy texture popular in hip-hop and electronic music.
Pro Tip: If you are unsure which effect to reach for, ask yourself one question first: am I trying to change the time, tone, space, or dynamics of this sound? That single question narrows your choices immediately.
How to Use Audio Effects Effectively in a Typical Music Production Workflow

Effect order is not a preference. It is a technical decision that directly affects your sound. The professional processing sequence runs like this: corrective EQ first, then dynamics, then tonal EQ, then saturation, then modulation, and finally time-based effects. Each stage builds on the one before it. Compressing a signal before you remove problem frequencies means your compressor reacts to frequencies you plan to cut anyway.
Insert Effects vs. Send/Return Effects
The routing method you choose shapes both your sound and your CPU load. Insert effects process 100% of the signal on a single track. EQ, compression, and saturation belong here because every track needs its own independent treatment. Send/return effects route a portion of the signal to a shared effect bus, which is ideal for reverb and delay.
Time-based effects like reverb and delay belong on send buses, not inserts. Placing a reverb insert on every individual track creates clutter and unnecessary CPU strain. A single shared reverb bus gives your entire mix a unified acoustic space.
| Routing type | Best for | Key benefit |
|---|---|---|
| Insert | EQ, compression, saturation, gating | Independent per-track control |
| Send/Return | Reverb, delay, chorus | Shared space, lower CPU load |
| Parallel | Heavy compression, distortion | Adds density without losing transients |
The 100% Wet Rule applies to every send effect without exception. Set your reverb or delay unit to output only the processed signal. The dry signal stays on the source track. Breaking this rule causes comb filtering, which makes your audio sound hollow and thin.
Parallel processing is a third routing option worth learning early. You split the signal into a dry path and a wet path, apply heavy processing to the wet path, and then blend the two. This adds density and character while preserving the natural transients of the original recording.
Pro Tip: Bypass your entire effect chain on a track and listen to the raw signal. Then re-enable each effect one at a time. If you cannot hear a clear improvement from a specific plugin, remove it. Every effect in your chain should earn its place.
Common Mistakes Beginners Make When Applying Audio Effects
Overusing effects is the single most common mistake in beginner mixes. Adding reverb to every element, stacking multiple distortions, or running heavy modulation on the full mix creates mud. Effects improve clarity, depth, and emotional impact only when applied with restraint and purpose.
Here are the most frequent traps and how to avoid them:
- Skipping corrective EQ. Creative effects amplify everything in the signal, including problems. Remove resonant frequencies and noise before you add saturation or reverb.
- Misusing parallel processing. Blending a heavily compressed parallel signal at too high a level flattens your mix’s dynamics. Keep the wet signal lower than you think you need it.
- Ignoring send levels. Reverb on a send bus is only as controlled as the send level on each track. Ride those send levels the same way you automate volume faders.
- Plugin hunting instead of problem-solving. Choosing the right effect starts with identifying what quality you want to change: time, tone, space, or dynamics. Searching for “the best reverb plugin” without that clarity wastes time and produces inconsistent results.
- Never checking the bypass. Regularly bypass your effects to confirm the processing is actually improving the sound, not just making it louder or busier.
Pro Tip: Start every mix session with a clean, unprocessed listen. You will hear problems more clearly before your ears adjust to the processed sound.
How to Choose the Right Audio Effects for Your Music Style
Effect selection is both a creative and a technical decision. The right starting point is always identifying which audio quality you want to change. Once you know that, the category of effect becomes obvious.
Genre shapes your effect palette significantly. Heavy saturation and aggressive compression define rock and metal mixes, giving guitars and drums their density and aggression. Lush, long reverbs and shimmering modulation define ambient and cinematic music, creating those wide, meditative soundscapes that pull listeners into another world. House and techno rely on sidechain compression for that pumping, rhythmic energy. Lo-fi hip-hop leans on bitcrushing and vinyl simulation for warmth and texture.
When evaluating plugins or hardware, focus on three things:
- Sound quality. Does the effect sound good on your specific material? A great compressor on drums may sound wrong on vocals.
- CPU efficiency. Complex convolution reverbs and linear-phase EQs cost more processing power. Know your system’s limits.
- Workflow fit. An effect you understand and can set up quickly is more useful than a complex one you rarely touch.
Start with the native effects inside your DAW. They are free, well-integrated, and often underrated. Developing your ear on simple tools before buying premium plugins builds better instincts. You can always explore audio editing techniques to sharpen your understanding of how effects interact with your raw recordings.
What Are Parallel Processing and Sidechaining in Audio Effects?
Parallel processing and sidechaining are two techniques that separate intermediate producers from beginners. Both give you dynamic control that static effect settings cannot achieve.
Parallel processing works by routing your signal to two paths simultaneously. The dry path stays untouched. The wet path receives heavy processing, such as aggressive compression or thick saturation. You then blend the two paths. The result adds density and character without crushing the natural feel of the original performance. Parallel compression on drums is the classic example: you get the punch and sustain of heavy compression while the transients of the dry signal keep the kit sounding alive and dynamic.
Here is how to apply these techniques in any DAW:
- Parallel compression: Duplicate your drum bus or send it to an aux track. Crush the aux with a fast attack and high-ratio compressor. Blend it back under the dry signal at around 20–40% to taste.
- Parallel distortion: Route a clean guitar or synth to a second channel. Apply heavy saturation or overdrive to the second channel only. Blend for grit without losing the original clarity.
- Sidechain reverb ducking: Sidechain routing dynamically reduces reverb tail volume whenever the vocal is active. This keeps the reverb audible between phrases without masking the vocal during delivery. Static EQ cuts cannot do this because the vocal is not always present.
- Sidechain compression for rhythm: Route your kick drum’s signal as the sidechain input for a compressor on your bass or pad. The compressor ducks the bass every time the kick hits, creating that pumping, rhythmic energy central to electronic music.
Pro Tip: When setting up sidechain reverb ducking, use a slow attack and medium release on the compressor. A fast attack cuts the reverb too abruptly, making it sound unnatural. A slow attack lets the reverb bloom briefly before ducking, which sounds more musical.
You can go deeper on upward and downward compression to understand how dynamic control shapes the feel of your entire mix.
Key Takeaways
Audio effects fall into five functional families, and placing each one correctly in your signal chain is the single most important skill in mixing.
| Point | Details |
|---|---|
| Five effect families | Dynamics, spectral, time-based, modulation, and harmonic effects cover every processing need. |
| Signal chain order | Run corrective EQ first, then dynamics, tonal EQ, saturation, modulation, and time-based effects last. |
| Insert vs. send routing. | Use inserts for EQ and compression; use send buses for reverb and delay to unify mix space. |
| 100% Wet Rule | Always set send effects to 100% wet to prevent comb filtering and a hollow sound. |
| Parallel processing | Blend a heavily processed wet path with a dry path to add density without losing natural dynamics. |
Why Effects Are Really About Storytelling, Not Just Sound
Most beginners treat audio effects as corrective tools. You fix the noise, tame the harshness, add a little reverb, and call it done. That approach produces clean mixes, but not memorable ones.
The shift happens when you start thinking about effects as emotional tools. A long, dark reverb on a vocal does not just add space. It creates distance, loneliness, or mystery depending on the song. A bit-crushed snare does not just sound lo-fi. It signals a specific era, a specific attitude. Every choice of effect is a statement about what the music means.
What changed my own approach was learning the five effect families as a framework rather than a checklist. Once I understood that every effect targets time, tone, space, or dynamics, I stopped hunting for plugins and started making decisions. That clarity made mixing faster and more intentional.
The other thing worth saying: multitrack recordings without effects sound flat and dry. That is not a flaw in the recording. It is an invitation. The effects are where you finish the story the performance started. Use them with intention, and your mixes will say something.
— Wake
SoundBridge: Your Environment for Mastering Audio Effects
Putting these concepts into practice requires a DAW that gets out of your way and lets you focus on the sound. SoundBridge is built for exactly that, with an interface that makes effect routing, parallel processing, and send/return setup straightforward for producers at every level.

SoundBridge supports high-fidelity audio processing at up to 192kHz sample rates, so every effect you apply sounds exactly as intended. Whether you are building your first compression chain or setting up a sidechain reverb bus, the platform gives you the tools to work like a professional from day one. Start with the 2026 DAW guide to understand how a full-featured workstation brings all these audio processing effects together in one place.
FAQ
What are the five main types of audio effects?
The five main families are dynamics, spectral, time-based, modulation, and harmonic/distortion effects. Each targets a specific audio quality: volume control, frequency shaping, spatial depth, movement, or tonal character.
What order should audio effects go in a signal chain?
The professional sequence runs corrective EQ first, then dynamics, tonal EQ, saturation, modulation, and time-based effects last. This order prevents compressors and reverbs from reacting to frequencies you plan to remove.
What is the 100% Wet Rule for send effects?
The 100% Wet Rule means setting your reverb or delay unit to output only the processed signal on a send bus. The dry signal stays on the source track, preventing comb filtering that causes hollow, thin audio.
What is parallel processing in audio production?
Parallel processing splits a signal into a dry path and a heavily processed wet path, then blends both. This technique adds density and character while preserving the natural transients of the original recording.
How does sidechain routing improve mix clarity?
Sidechain routing dynamically reduces an effect, such as reverb, whenever a trigger signal, such as a vocal, is active. This creates space in the mix over time in a way that static EQ cuts cannot achieve.
Recommended
MASTER MUSIC PRODUCTION
Expert-led courses designed to take you from fundamentals to finished tracks.

HOUSEFrom bouncy bass and solid kicks, this course teaches you the most modern House music production techniques needed to succeed and stand out.

TRAPQuit sounding like generic Trap and produce something World with hints of the Far East. Create ethnic soundscapes to put your Trap ahead of the curve.

AMBIENTProduce relaxing, sophisticated psy-influenced ambient. Psychedelic and relaxing to listen to, create meditative soundscapes to put your listeners in Zen.