

Five Layering Tricks Using the SoundBridge Sampler
Last Edited: Jul 17, 2025
In this post, we will share five ways to use layering inside the SoundBridge sampler—techniques that help us shape sound more effectively, add punch, depth, width, or simply bring more character to a track. These five layering tricks in SoundBridge are quite useful in many situations. Layering sounds is one of those techniques that’s simple in theory but powerful in practice.
Let’s get right into it.
1. Adding Punch to a Kick with a Hi-Hat Layer
The first trick is layering a kick with a short hi-hat to add a bit of top-end bite. Since kicks are usually all about the low end, they often lack clarity—especially on smaller speakers like phones or laptops.
Here’s what we do: we load a kick sample into the sampler, set it in a loop, and then switch to Layer Mode. We drop in a short hi-hat on top of it, then shape the hi-hat envelope—short decay, no sustain, tight release. We also apply a high-pass filter to remove mids and lows, keeping just the sparkle on top. Sometimes we even add a bit of pitch envelope to give it a touch of movement.
It’s all still in one channel, but the kick feels sharper and more defined.
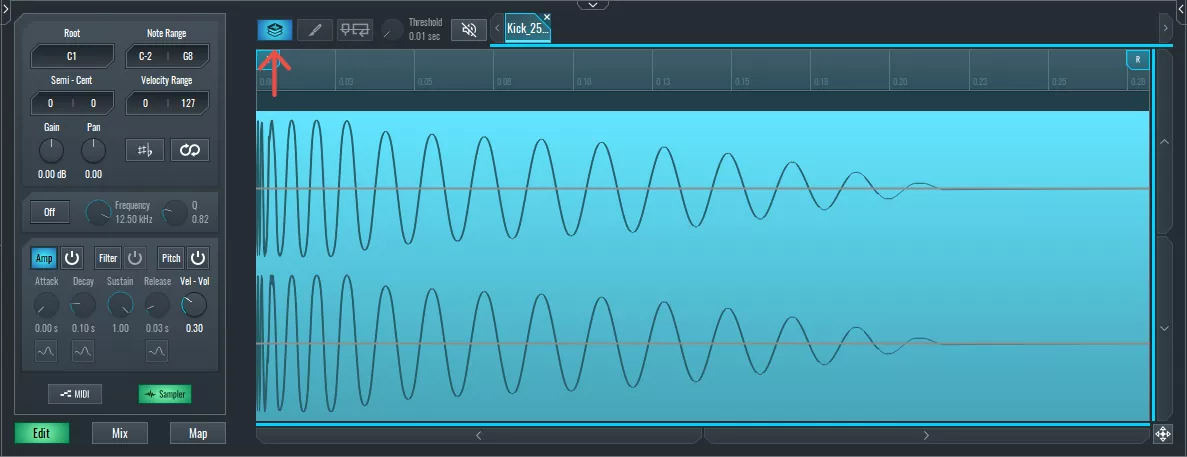
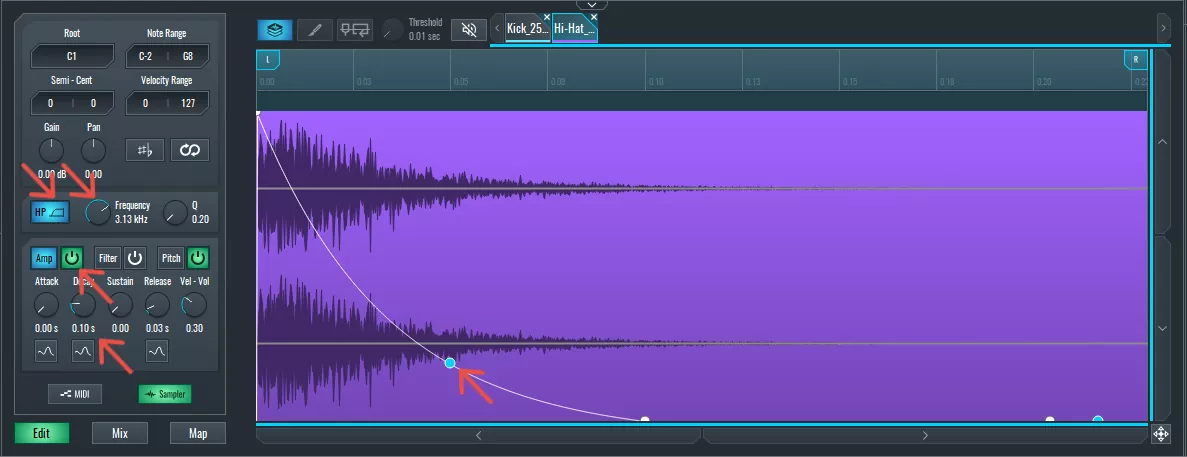
~ Kick with a Hi-Hat Layer
2. Adding Texture to a Hi-Hat with Filtered Noise as a Layer in SoundBridge
Sometimes hi-hats feel too clean or sterile. To fix that, we will layer them with a soft touch of white noise or ambience using the SoundBridge sampler.
Then, we will duplicate the hi-hat MIDI pattern, then layer the main hi-hat with a filtered white noise sample. It doesn’t need to be loud—just enough to add some subtle movement. We shape the amp envelope so it’s short and snappy, filter out the lows, and sometimes tweak the release for a bit more tail.
That small layer brings life to the sound—making it feel more human and less flat.
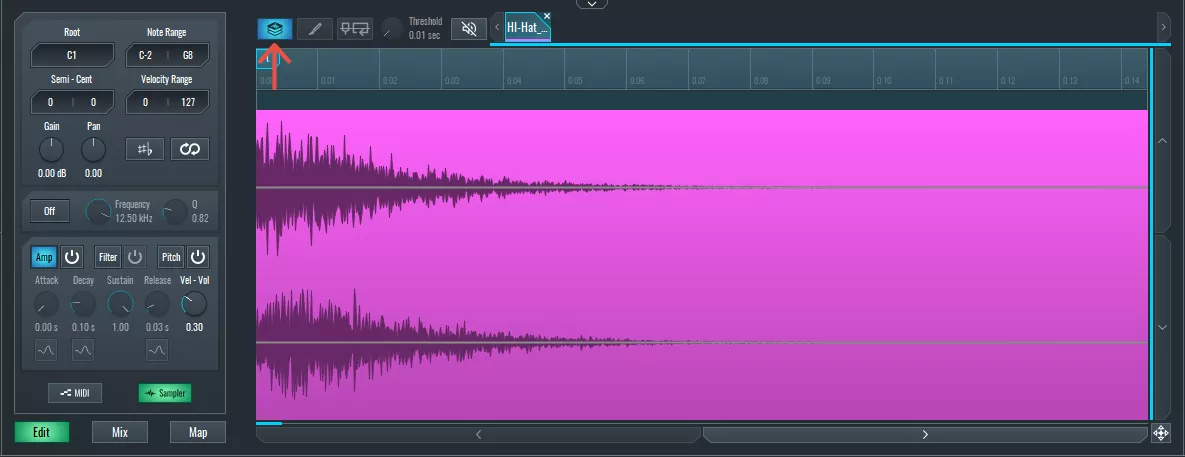
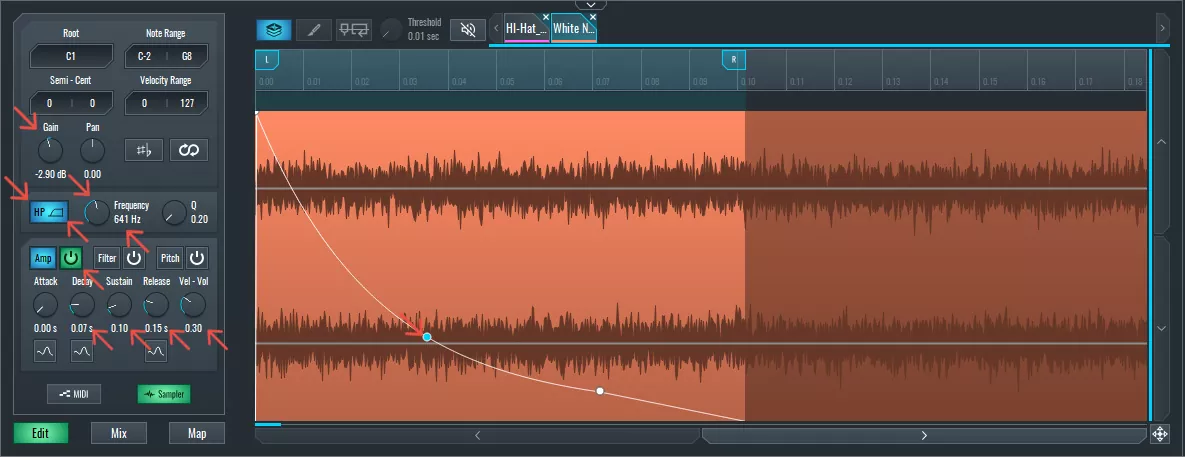
~ Hi-Hat with a Noise Layer
3. Combining Melodic Sounds as Creative Layers – Piano + Synth
This is one of our favorite creative layering tricks in SoundBridge. Let’s say we have a piano sample that sounds nice but a bit dry, and a synth with texture but not much body. When we layer them together, we get something much richer.
We will start by loading the piano and setting the root note to match the sample. Then drop the synth on top, match its pitch, and write a short melody. From there, we tweak the envelopes of both layers, balance their levels, and sometimes add filter movement on the synth side.
What we get is a blend of two vibes—organic and synthetic—that we can shape independently.
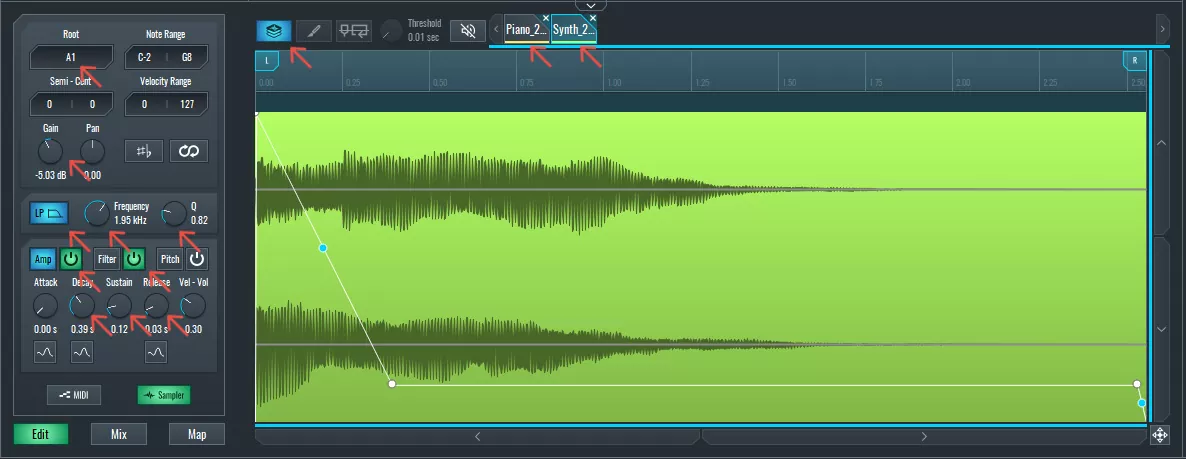
~ Piano witha Synth Layer
4. Building a Custom Impact using Layering (Low + Mid + High Layers)
Here, we’re layering three samples as a trick to create one big custom impact sound. One sample covers the sub or low hit, another adds the midbody, and a third brings in the high-frequency splash.
After dropping each one into the sampler, we filter them so they don’t clash—low-pass for the sub, high-pass for the top—and carefully balance their volumes. Sometimes we also adjust the start point of the mid or high sample to align the transients more precisely.
The result? A powerful, full-spectrum hit that’s tailored to our mix, all within a single sampler channel.
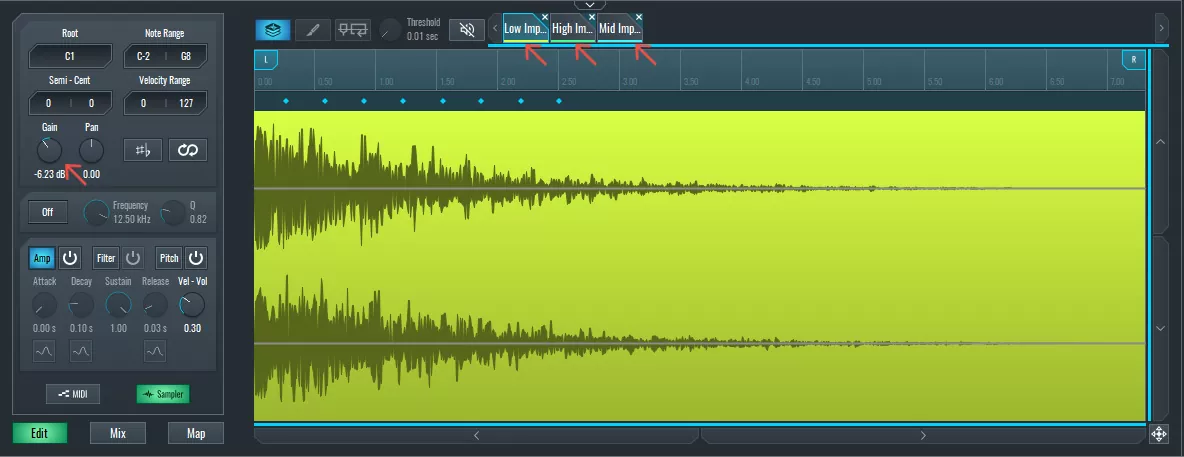
~ Impact Sound Layered
5. Stereo Widening Trick with Layered Pitch
And the last layering technique is a little stereo trick used to fake width from a mono sample.
We take the same sample, duplicate it, and pan one layer left and the other right. Then we detune one of them just slightly—around 0.16 semitones. This subtle pitch difference tricks the ear into perceiving stereo width.
It works especially well on short sounds like toms or percs, and it saves us from having to reach for external stereo plugins.
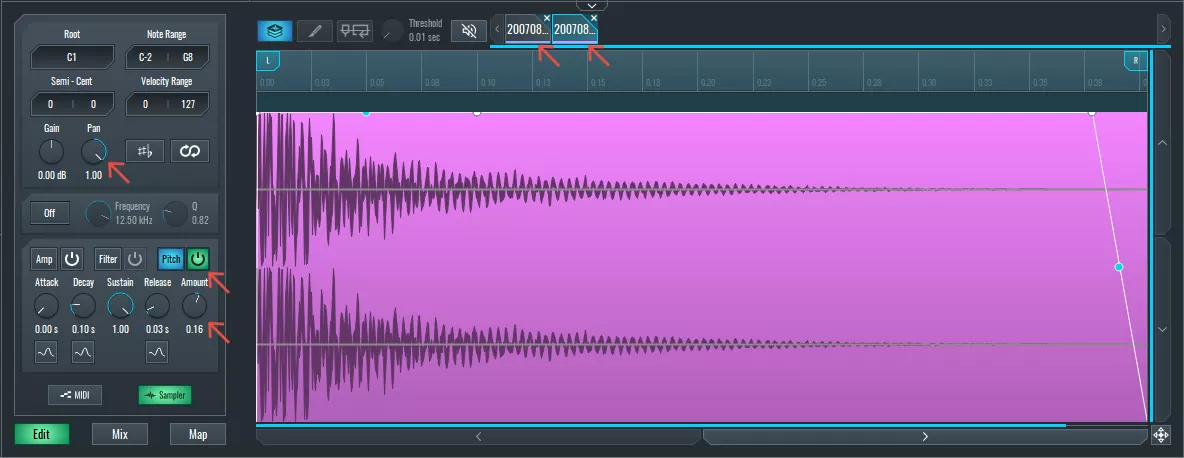
~ Stereo Layered Snare
If you liked this article on audio processing, here are some more on the same subject:
MASTER MUSIC PRODUCTION
Expert-led courses designed to take you from fundamentals to finished tracks.

HOUSEFrom bouncy bass and solid kicks, this course teaches you the most modern House music production techniques needed to succeed and stand out.

TRAPQuit sounding like generic Trap and produce something World with hints of the Far East. Create ethnic soundscapes to put your Trap ahead of the curve.

AMBIENTProduce relaxing, sophisticated psy-influenced ambient. Psychedelic and relaxing to listen to, create meditative soundscapes to put your listeners in Zen.