

Budget Foley Recording Basics for Beginners: Get Editorial Ready Stems
Last Edited: Sep 16, 2026
To record usable Foley at home, make your sound source dry and close to the microphone, keep takes short and slated, and capture at the industry-standard sample rate and bit depth for film and video projects. Even a modest recorder and a closet full of blankets can produce editorial-ready sound if you control the room and work in a repeatable capture-for-editing workflow. The gear matters less than the discipline behind it.
TL;DR:
- Using a small-diaphragm condenser microphone is most versatile for capturing a range of Foley sounds, from cloth and paper to impacts.
- Recording at 48 kHz and 24-bit depth in a controlled environment with short, labeled takes improves editing efficiency and sound quality.
- Simple DIY room treatments and avoiding handling noise are crucial for clean recordings, with props placed on stands rather than handheld close to the mic.
- Matching shoes and surfaces for each Foley cue, along with capturing multiple intensity variants, enhances realism and flexibility in editing.
- Organizing files with detailed names and exporting separate stems at 48 kHz/24-bit simplifies post-production and improves workflow efficiency.
Foley Recording Basics: What Gear Actually Matters
You don’t need a sound stage to get started. You need a microphone that suits the job, a way to record it cleanly, and a few accessories that keep noise out of the signal. That’s the whole equation.
Microphones fall into three practical categories for Foley work. A small-diaphragm condenser mic picks up fine texture, which makes it the workhorse for cloth movement, paper, and small props. A dynamic mic handles loud impacts (slams, heavy footsteps, punches) without distorting the way a sensitive condenser can. A shotgun mic narrows its pickup pattern, which helps when you’re isolating one prop in a room that isn’t perfectly quiet. If you’re buying one mic to start, a versatile small-diaphragm condenser covers the widest range of Foley categories.
You also don’t need a full interface right away. A portable handheld recorder with built-in mics can produce usable results for footsteps and simple props, though minimal setups mean more cleanup later since you lose some control over gain staging and stereo width. Once you’re recording regularly, an audio interface paired with a dedicated mic gives you better preamp quality, phantom power for condensers, and the flexibility to run two mics at once, which matters the moment you start capturing close and room stems together.
Here’s what rounds out a functional Foley kit:
- A boom or mic stand frees your hands for prop work and keeps the mic at a consistent distance take after take.
- A shock mount isolates the mic from stand vibrations and footfall rumble that a clip alone won’t stop.
- XLR cables (get two if you’re running a stereo close/room pair) with enough length to keep the interface out of the room you’re recording in.
- Closed-back headphones so you can monitor without your headphones bleeding into the mic.
- A pop filter or foam windscreen, less for wind and more for the breath and handling noise that shows up during close prop work.
Every item on that list is inexpensive compared to the mic itself. The mistake most beginners make isn’t buying a cheap mic. It’s skipping the shock mount and shooting the boom stand handheld, which bakes handling noise into every single take.
Foley Recording Basics: DAW Settings and Simple Workflows
Set your digital audio workstation’s project sample rate to 48 kHz before you record anything. That’s the industry standard for film and video work, and recording at 44.1 kHz (the common music-streaming rate) forces an unnecessary sample-rate conversion later, which can introduce artifacts an editor will notice. Pair it with 24-bit depth, which gives you enough headroom to catch a loud prop hit without clipping while still preserving detail in quiet cloth movement.
A minimal but effective routing setup looks like this: two tracks, one for a close mic capturing dry texture and one for a room mic capturing ambiance, both recording simultaneously. Set your input gain so that peaks sit around -12 to -6 dB, leaving room for surprises. Before each take, record a spoken slate stating the scene, cue, and take number directly onto the track. It takes three seconds and saves an editor from guessing which unlabeled footstep file belongs to.
You don’t need an expensive DAW to do any of this. Prioritize a program that offers:
- Native video import, so you can watch the scene while you record to it.
- True multitrack recording, not just a single mono lane.
- Fast, simple export to WAV with metadata intact.
- A free or low-cost entry tier while you’re still learning the workflow.
When you export, name files with enough information that an editor never has to open them to know what’s inside: something like Scene04_Footsteps_Sneaker_Wood_Take3_Medium.wav. Deliver as 48 kHz/24-bit WAV files organized by scene folder. That single naming habit will save more editing time than any plugin you buy.
How Do You Treat a Small Room for Foley Recording?
Room acoustics matter more than most beginners expect, and often more than the microphone itself. A bare bedroom with parallel walls creates flutter echo that a cheap mic can’t fix and an expensive one won’t hide. The good news: simple DIY treatment closes most of that gap. Hang moving blankets on the two walls facing each other, place a rug on hard floors, and stack couch cushions or a mattress behind your recording spot to reduce reflections.
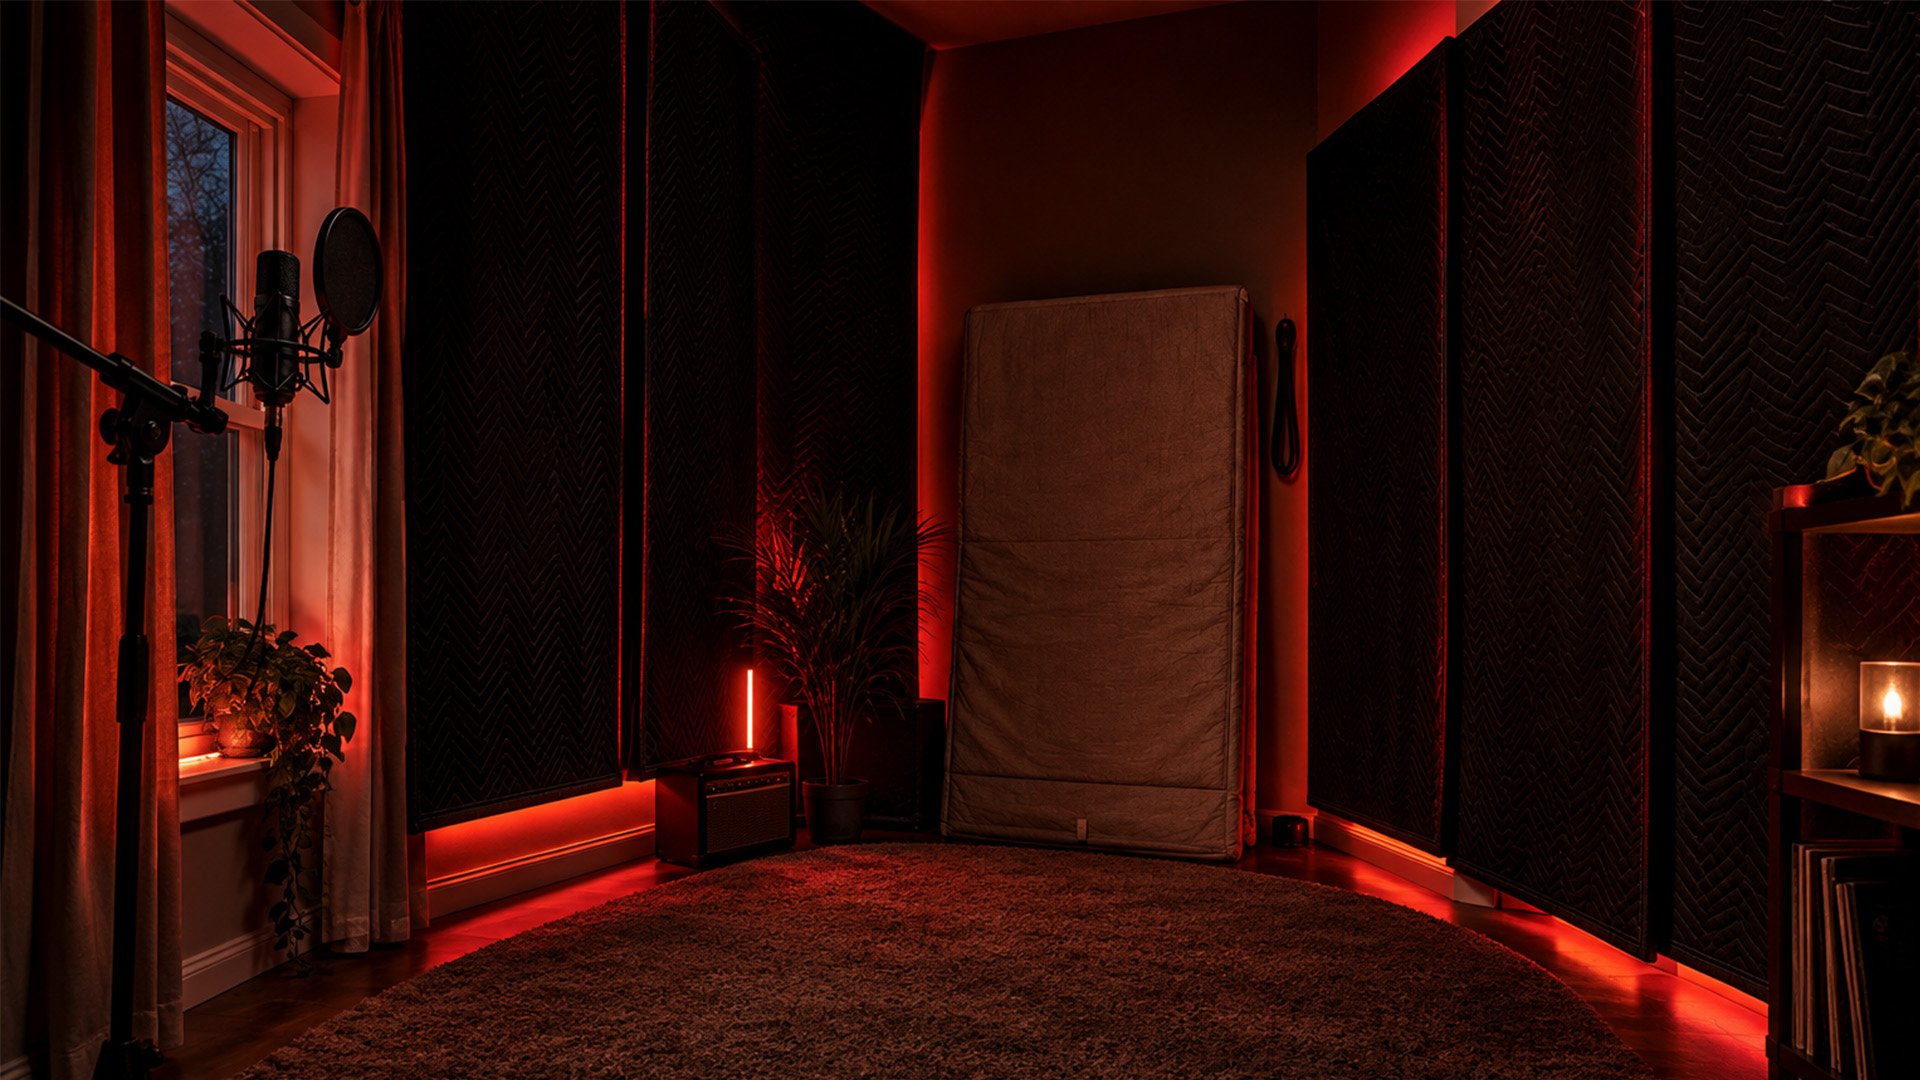
Before you hit record, walk the room and kill every noise source you can find: HVAC vents, refrigerator hum from the next room, phone notifications, even a computer fan running behind you. A closet full of clothes, oddly enough, often makes one of the best amateur Foley booths in a house. The clothes act as natural sound absorption on all sides.
Mic placement depends on what you’re capturing. For small props like cloth rustle, paper, or keys, keep the mic 10 to 30 centimeters away to maximize direct sound and minimize room reflections. For footsteps, back off to 1-2 feet, since standing directly over the mic emphasizes the low-frequency thump at the expense of the natural transient snap.
If you want ambiance in your final mix, capture it deliberately: place a second mic 6 to 10 feet back to record the room tone as its own stem, separate from your dry close mic. Keep the close mic as your primary editorial asset. The room stem is a seasoning, not the main dish.
Pro Tip: Record 10 seconds of pure room silence at the start of every session. It gives you a noise print you can use for cleanup later, and it tells you instantly whether that refrigerator hum you thought you killed is still bleeding into the take.
What Does a Good Foley Recording Session Look Like?
A Foley session that produces usable results starts before you ever touch record. Here’s the routine that keeps a beginner session on track:
- Spot the scene. Watch the footage once with a notepad and mark every sound cue you need to cover. Foley traditionally splits into three categories: feet, movement (cloth and body), and specifics (props). Sorting your cue sheet this way keeps you organized when you’re switching between shoes, jackets, and coffee mugs in the same scene.
- Slate every take. State the scene number, cue, and take count out loud before recording. It takes seconds, and it’s the single habit that separates a usable session from a folder of mystery files.
- Record short. Keep footstep time at 1 to 4 seconds and movement time at 3 to 10 seconds. Long continuous takes feel efficient in the moment but force an editor to hunt through minutes of audio to find a single clean footfall.
- Capture variety. Record light, medium, and heavy intensity variants of the same action. Editors need options to match on-screen energy, and you won’t know which variant fits until you’re cutting to picture.
- Check phase. When running two mics on the same source, a thin or hollow sound usually means they’re out of phase. Flip polarity on one track and listen again.
Realism often comes from imperfection. A slightly loose, expressive take often reads better on screen than a metronomic, technically perfect one, because real footsteps and real cloth movement don’t follow a grid. When you sync footsteps to a picture later, nudging them a few milliseconds off the beat usually sounds more human than snapping them to a perfect quantization grid.
Pro Tip: Angle the mic slightly off-axis from your prop rather than pointing it dead center. It reduces plosive-style thumps from sudden impacts and still captures full texture.
Foley recording setups built around short, slated, and varied takes consistently produce more usable material per session than long unstructured recordings, because an editor can scan and select material faster when every file is short, labeled, and purpose-built.
Building a Surface Matrix for Foley Sound Effects
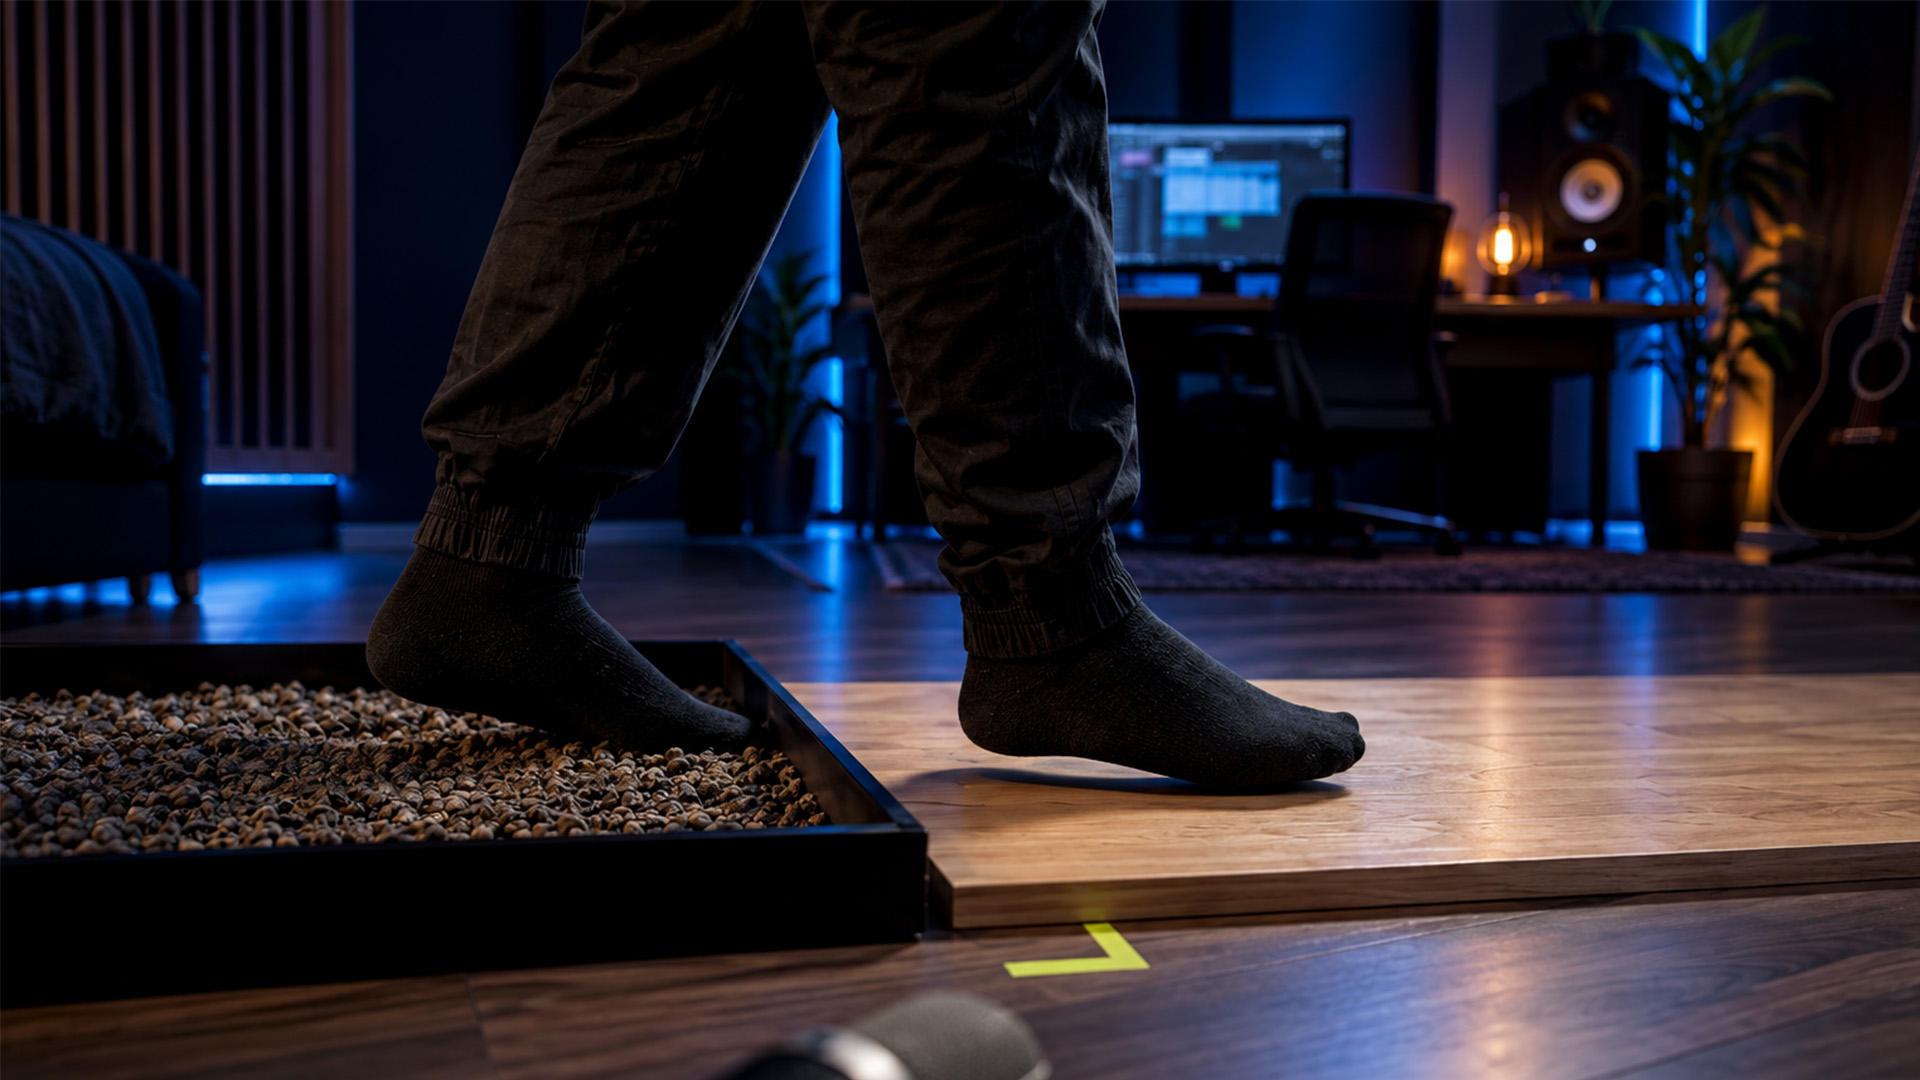
A surface matrix is a portable collection of materials that lets you recreate footsteps and prop contact sounds on demand without tearing up your actual floor. Beginners often build one from a wooden frame filled with swappable materials: a section of hardwood, a tile square, a bed of gravel, and a scrap of carpet, covering most common footstep needs. Building trays this way lets you reuse the same surfaces across sessions, rather than rebuilding your setup every time a script calls for gravel.
Props deserve the same creative approach. A few reliable substitutes worth knowing:
- Cornstarch in a leather pouch, squeezed rhythmically, convincingly mimics the crunch of snow.
- Coins shaken in a small tin stand in for jingling keys or loose change.
- Celery snapped near the mic is the classic bone-break substitute.
- A wallet full of playing cards, flexed and released, mimics the creak of leather or small cracks.
Shoe matching matters more than most beginners realize. The character on screen wearing sneakers needs a different footstep than one wearing dress shoes or boots, and swapping your own footwear to match theirs, on the correct surface, does more for realism than any plugin. Record each surface and shoe combination at multiple intensities (a slow walk, a fast walk, a run) so you’re not stuck trying to pitch-shift a single take into five different paces during editing.
How Do You Edit and Clean Up Foley Recordings?
Raw takes are never the final product. The step from recorded audio to editor-ready Foley follows a fairly consistent path:
- Comp your hero takes. Listen through your variants and pick the cleanest, most natural-sounding performance for each cue. Don’t default to the technically perfect one if a looser take reads better against picture.
- Trim and fade. Cut each file tight to the action, with a few-millisecond fade-in and fade-out to avoid clicks at the edit points.
- De-click and apply light noise reduction. Address pops from prop handling and any residual hum, but stay conservative. Aggressive noise reduction strips texture along with noise.
- EQ to avoid dialogue conflict. Roll off unnecessary low-mid buildup (roughly 200 to 500 Hz) where dialogue lives, so your footsteps and cloth movement sit underneath the voice track instead of muddying it.
- Layer for depth. Combine your close mic’s attack, a body layer if you recorded one, and a touch of the room mic for space. Reach for compression only if intensity varies too much between takes, and use reverb sparingly, matching it to the on-screen environment rather than applying it by default.
For deeper technique on the cleanup stage itself, a closer look at essential audio editing techniques covers the trim, fade, and de-click workflow in more depth than a Foley-specific guide can. If you’re also balancing Foley against dialogue and score, the audio mixing step-by-step walks you through level relationships that keep effects from fighting the mix.
Export everything at 48 kHz/24-bit WAV, organized into folders by scene, with your close and room stems kept as separate files rather than pre-mixed together. That separation is what lets an editor rebalance your work without asking you to re-record anything.
Pro Tip: Deliver a “safety” version of every hero take at a slightly lower level alongside your main export. It gives the editor a fallback if the primary file clips during a later mix pass.
Foley Recording Basics: A Starter Checklist and Budget Kit
You can start today with almost nothing and improve gradually. Think in tiers:
- Very low budget: a smartphone or basic handheld recorder, a closet lined with clothes as your booth, and free DAW software.
- Modest budget: a small-diaphragm condenser mic, a basic USB audio interface, a boom stand, and moving blankets for acoustic treatment.
- Recommended setup: the modest kit plus a second mic for a dedicated room stem, a shock mount, and closed-back headphones for accurate monitoring.
Before every session, run through this quick sequence:
- Kill every noise source in the room (HVAC, fridge, phone).
- Set your DAW project to 48 kHz/24-bit.
- Record a room-tone reference and a spoken slate.
- Check input levels on a test take before committing to the real one.
- Capture close and room stems together on separate tracks.
If your first session sounds thin, check for phase cancellation between two mics first. If it sounds noisy, hunt down HVAC or refrigerator hum before blaming the microphone. If takes feel unusable in the edit, the fix is almost always shorter takes and better slating, not better gear.
Fundamental Foley Sound Categories You Need to Know
Foley work traditionally breaks into three buckets, and understanding them shapes how you plan every session. Feet covers all footstep work: walks, runs, turns, and starts and stops, matched to the actor’s shoe type and the surface they’re walking on. Movement, sometimes called “moves,” covers cloth rustle, body shifts, jacket creaks, and the small physical noises a body makes just by existing on screen, sounds an on-set boom mic almost never catches cleanly. Specifics covers everything else: door handles, coffee cups, gunshots, punches, and any discrete prop interaction tied to a specific visual moment.
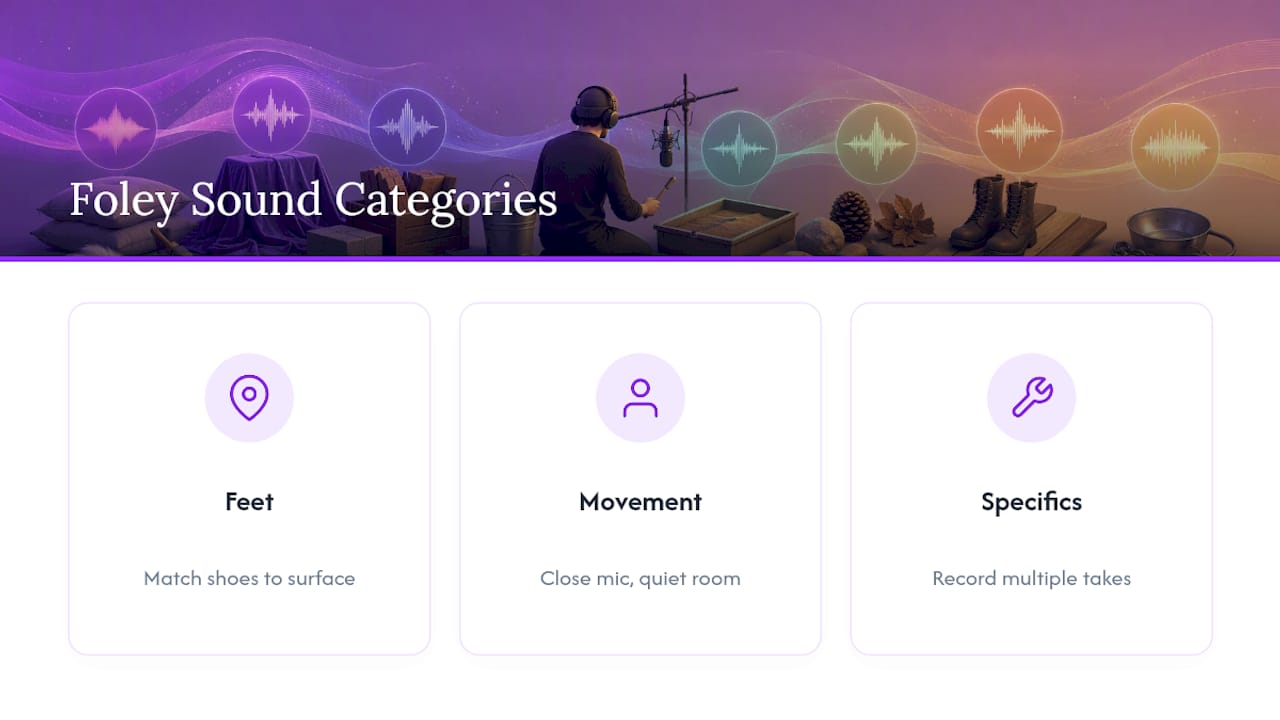
Each category demands a different recording approach. Feet require a consistent surface and matched footwear across an entire scene. Movement often requires closer mic placement, since cloth sound is subtle and easily buried in room noise. Specifics tend to be one-off events where you’re better served recording several takes of the same action than trying to nail it in one perfect pass.
Knowing which bucket a cue falls into before you start recording saves setup time. You’ll want your footstep surface matrix ready for a feet-heavy scene, a quiet close mic and stillness for a dialogue-heavy movement scene, and a flexible prop table for a specifics-dense action sequence. Beginners who skip this categorization tend to record everything the same way, then wonder why their cloth movement sounds thin, or their footsteps sound disconnected from the floor.
Techniques for Creating Realistic Foley Sound Effects
Realistic Foley starts with matching physical logic, not clever processing. If a character walks on gravel, the surface has to actually be gravel. Substitutes work (cornstarch for snow, celery for bone breaks) precisely because they mimic real physical texture, not because a plugin fixed a wrong recording afterward.
Performance discipline matters just as much as material choice. Foley is closer to acting than to simple audio capture, which means rehearsing an action to picture before recording it produces far more convincing timing than guessing at speed and rhythm cold. Watch the scene, walk through the motion once without recording, then commit.
Recording multiple intensity variants is another technique beginners underuse. A single “footstep” file rarely matches every emotional beat in a scene. Recording a light, medium, and heavy version of the same action gives you material that can shift with the drama on screen instead of sounding identical no matter what’s happening.
Layering adds the final push toward realism. A single mic capturing a single pass rarely sounds as full as a close mic’s attack blended with a touch of room ambiance underneath it. That said, restraint matters: over-layering muddies a sound that should feel simple and direct, especially for quick cues like a door click or a coin drop. The goal isn’t maximum density. It’s the right amount of texture for what’s happening on screen.
How Do You Sync Foley With Picture and Timing Cues?
Syncing starts with the spotting session, where you mark exact frame or timecode references for every cue before recording anything. That reference point lets you align a recorded footstep with the frame where a foot actually contacts the ground on screen.
Once you’re editing, resist the instinct to snap every hit to a perfectly even grid. Micro-nudging timing slightly off the beat usually reads as more human than mathematically perfect placement, because real human movement never lands on a grid either. A few milliseconds of natural variance between steps sells the illusion far better than rigid quantization.
Watching the picture while you record, rather than recording blind and syncing afterward, cuts this work down dramatically. If your DAW supports native video import, use it every time. Performing to the actual scene means your timing is close from the first take, and you’re only making small adjustments afterward instead of rebuilding sync from scratch. For cues where you can’t perform live to picture (a complex action sequence, for instance), recording several takes at slightly different tempos gives you options to stretch or nudge into place without pitch-shifting artifacts creeping in.
Common Challenges in Foley Recording and How to Fix Them
Every beginner runs into the same handful of problems, and most have simple fixes.
Thin or hollow-sounding recordings almost always trace back to phase issues between two mics on the same source. Flip the polarity on one track and listen for the fuller sound to return.
Excess room noise bleeding into every take usually means an HVAC vent, a fridge, or a fan you didn’t notice during setup. Walk the room in silence before you record and hunt for it with your ears, not your eyes.
Footsteps that don’t match the on-screen actor typically come from a surface or shoe mismatch. Dress shoes on hardwood sound nothing like sneakers on carpet, and no amount of EQ closes that gap convincingly.
Takes that are unusable in the edit are almost never a gear problem. They’re a workflow problem: takes ran too long, weren’t slated, or weren’t varied enough in intensity to match the scene’s emotional range.
Noise contaminating prop recordings often comes from gripping props too close to the mic or shifting your stance mid-take. Mount props on a boom or stand whenever possible, rather than holding them directly in front of the capsule.
None of these problems require better equipment to solve. They require slowing down, testing before committing, and building habits (slating, short takes, room checks) that make a session predictable rather than a gamble.
What Does a Foley Artist Actually Do in Post-Production?
A Foley artist’s job sits between the sound editor and the picture itself: watching a locked cut, performing physical sounds to match it, and delivering material that a re-recording mixer can blend into a final soundtrack. On professional productions, this usually happens on a dedicated Foley stage with pits of different surfaces built into the floor, but the underlying job is identical to what you’re doing at home: match sound to picture, take by take, cue by cue.
Collaboration runs in both directions. The Foley artist works from a spotting session, often built alongside a supervising sound editor, that lists every cue a scene needs. After recording, the Foley editor takes those raw performances, comps the best takes, cleans them, and slots them into the broader sound design alongside dialogue, music, and hard effects. That’s why slating and clear file naming matter so much: a Foley editor working on someone else’s raw takes needs to identify and place material fast, without guessing.
Even working solo, adopting that same division of labor between performer and editor sharpens your results. Record like a performer focused on matching picture, then switch hats and edit like someone who’s never heard the takes before, judging only what actually cuts cleanly to the scene.
Wake’s Perspective: Where Beginners Actually Lose Sessions
The mistakes that sink a beginner Foley session are rarely about gear. They’re about discipline: skipping the slate, recording one long continuous take instead of short slotted ones, or ignoring a hum that seemed minor until the edit exposed it. Fix those three habits, and a cheap mic will outperform an expensive one used carelessly.
A DAW with native video support, straightforward stem exports, and multitrack recording removes a lot of the friction that causes those mistakes in the first place, which is part of why SoundBridge’s approach to remote collaboration matters even for solo Foley work. Watching the picture while you record and exporting stems an editor can actually use isn’t a luxury. It’s the difference between a session that gets used and one that gets re-shot.
— Wake
Record and Export Foley-Ready Stems With SoundBridge
SoundBridge gives you a faster path from raw take to editor-ready stem than juggling a separate recorder, converter, and editing program. Its native video import lets you watch a scene while you record Foley directly to picture, and its multitrack routing handles a close mic and room mic simultaneously without extra setup.

Every project can run at 48 kHz/24-bit, matching the film and video standard covered earlier, so there’s no conversion step between your recording session and delivery. Export close and room stems separately, named and folder-organized exactly the way an editor expects. The free tier gives you enough to test the workflow on a real scene before deciding whether the paid features (higher sample rates, expanded collaboration tools) are worth adding. If you want the fuller picture of how a DAW fits into this whole workflow, SoundBridge’s guide to digital audio workstations is a solid next stop, and you can start a project directly from the SoundBridge homepage whenever you’re ready to record your next scene.
Sources
- Sound On Sound — Universal Audio SC1 review (notes on standards)
- Gear4Music blog — Foley recording (spotting and categories)
- Krotos Studio blog — Foley recording
- Shure — Everything you need to know about Foley recording
Recommended
MASTER MUSIC PRODUCTION
Expert-led courses designed to take you from fundamentals to finished tracks.

HOUSEFrom bouncy bass and solid kicks, this course teaches you the most modern House music production techniques needed to succeed and stand out.

TRAPQuit sounding like generic Trap and produce something World with hints of the Far East. Create ethnic soundscapes to put your Trap ahead of the curve.

AMBIENTProduce relaxing, sophisticated psy-influenced ambient. Psychedelic and relaxing to listen to, create meditative soundscapes to put your listeners in Zen.