

How to Bend Pitch with Delay Like Tape Machines
Last Edited: Jul 17, 2026
Most producers treat the delay as a simple echo tool; it repeats a signal, places it in space, and controls how long it lasts. In tape-based systems, delay is not static. The playback speed directly affects both time and pitch. As the delay time increases, the repeats slow down and drop in pitch. When the time is reduced, the repeats speed up and rise in pitch. This creates a distinct movement in the tail that feels organic and musical, rather than mechanical. It is not just an echo anymore; it becomes part of the sound design. In this tutorial, we'll show you how to bend pitch with a delay.
This behavior opens up a completely different way of using delay. Instead of placing it behind a sound, you can reshape, stretch, or push it forward. Drum hits can dissolve into slowed-down textures, while synth sounds can build tension by rising in pitch as the delay tightens. These transitions are especially effective in electronic music, where subtle changes in motion can define the energy of a section.
In SoundBridge: DAW, you can recreate this approach by automating delay effects that respond smoothly to time changes. The key is not only in the effect itself, but in how you control it. High feedback allows the tail to sustain, while automation of the delay time introduces movement and pitch shift within that tail.
Listening in Context
In this tutorial, the process starts with a simple loop and a dedicated delay setup. From there, the focus shifts to understanding how time modulation affects pitch. We then look at practical examples on drum groups and synth sounds. The goal here is to understand how the elements behave in their raw state, especially the drums and synths.
Listening in context reveals where movement is missing. Drum hits may feel tight but short, with no tail connecting them, while synth sounds can feel static, ending abruptly without any continuation. These gaps are important, as they define where delay-based movement can be useful.
At this stage, nothing has changed. The goal is to identify moments where a delay tail could extend the sound or create a transition. This includes spaces between drum hits, the end of synth notes, or sections where the energy drops too quickly.
By establishing this reference, it becomes easier to recognize the impact once we introduce the delay and pitch-bend effects.
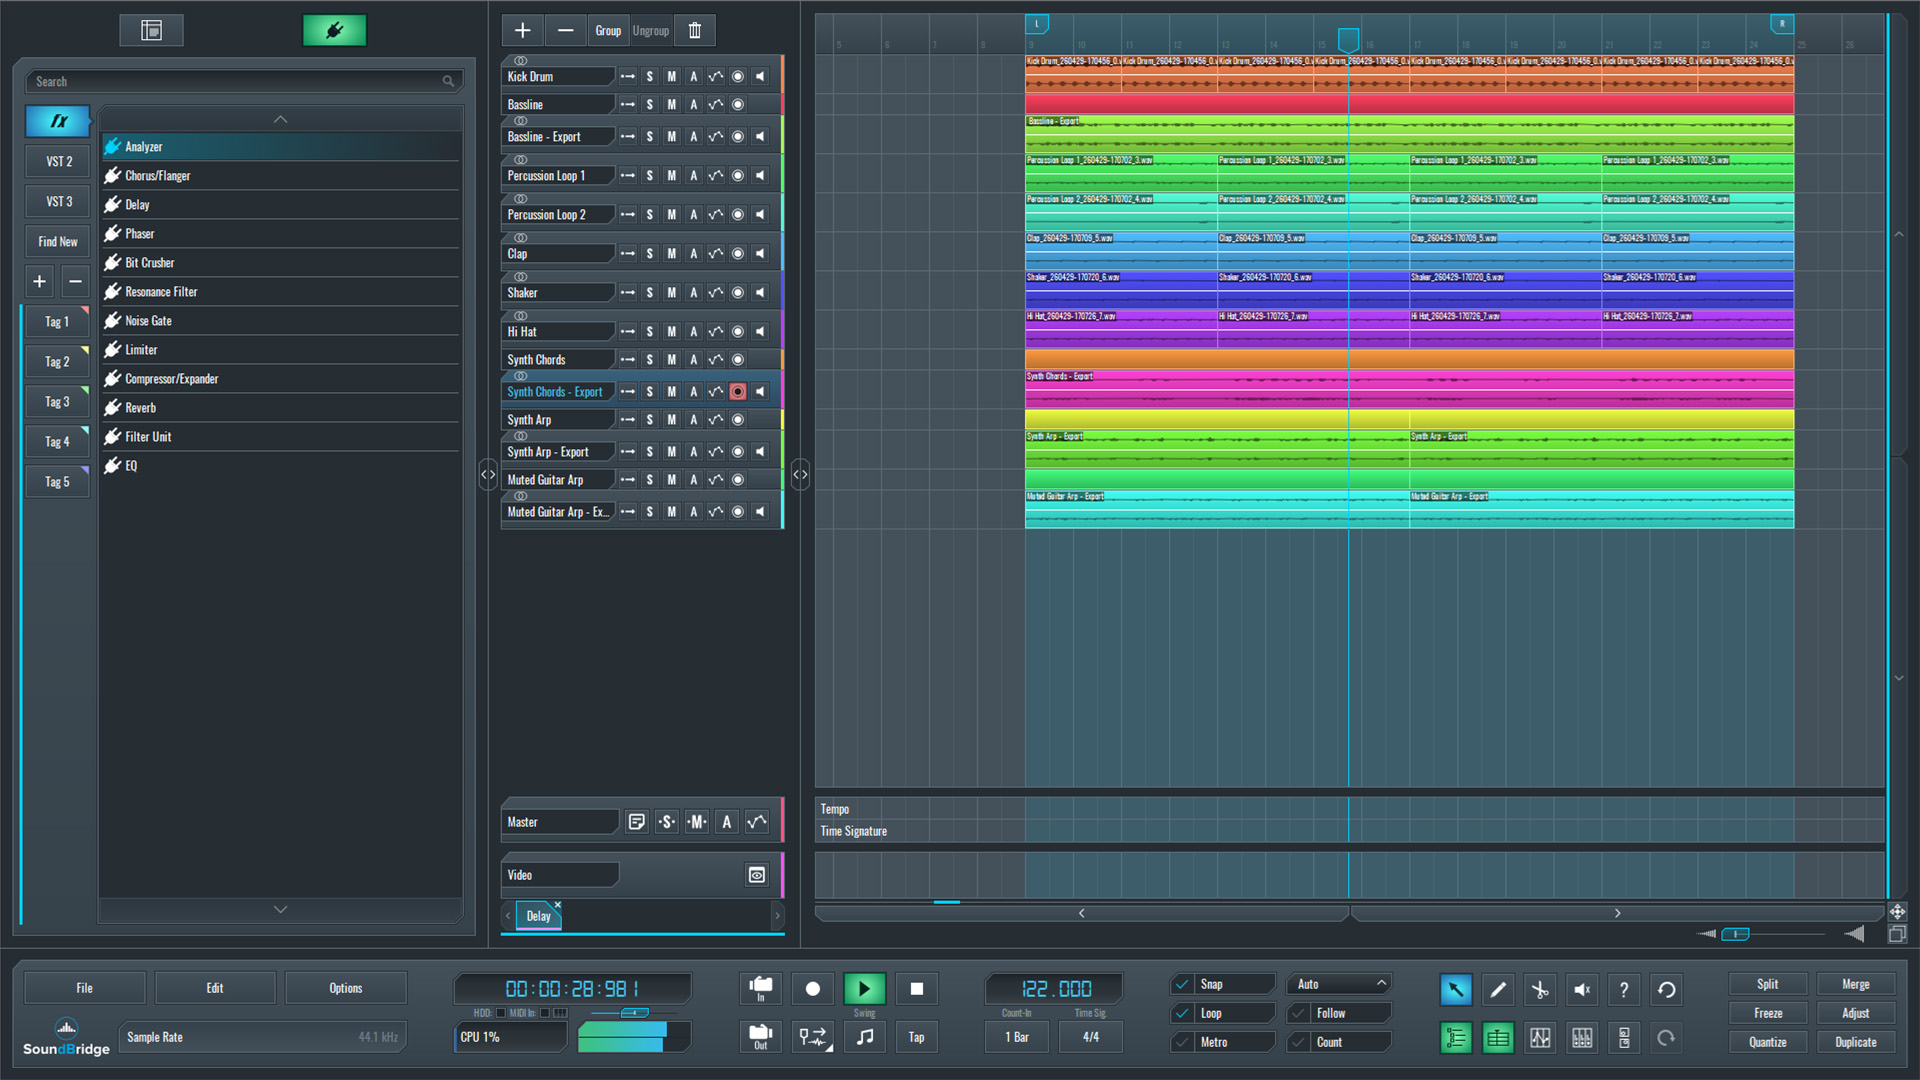
~Full mix - Unprocessed
Setting Up a Drum Group with Tape-Style Delay
To apply this technique in practice to a single bus, effectively combining their rhythmic content into a single track, the drum elements were first grouped. We routed the mid and high drum layers into a single bus. This routing effectively combines the rhythmic content into one controlled signal.
Working on a group channel makes the effect more cohesive. Instead of processing each drum individually, the delay responds to the groove as a whole, producing a more natural and unified result.
On this drum group, we inserted a delay effect. In this case, we used DelaySon by Sonimus, as it allows smooth time modulation and behaves similarly to a tape-style delay. This type of response is important because it ensures every change in delay time affects the pitch of the repeats.
At this stage, the delay had enough feedback to sustain the tail but remained concise. The goal here is not yet to create the effect, but to prepare the signal so we can shape it in the next steps.
With the drum group and delay in place, the foundation is ready for further processing, where the time modulation will be used to introduce movement into the tail.
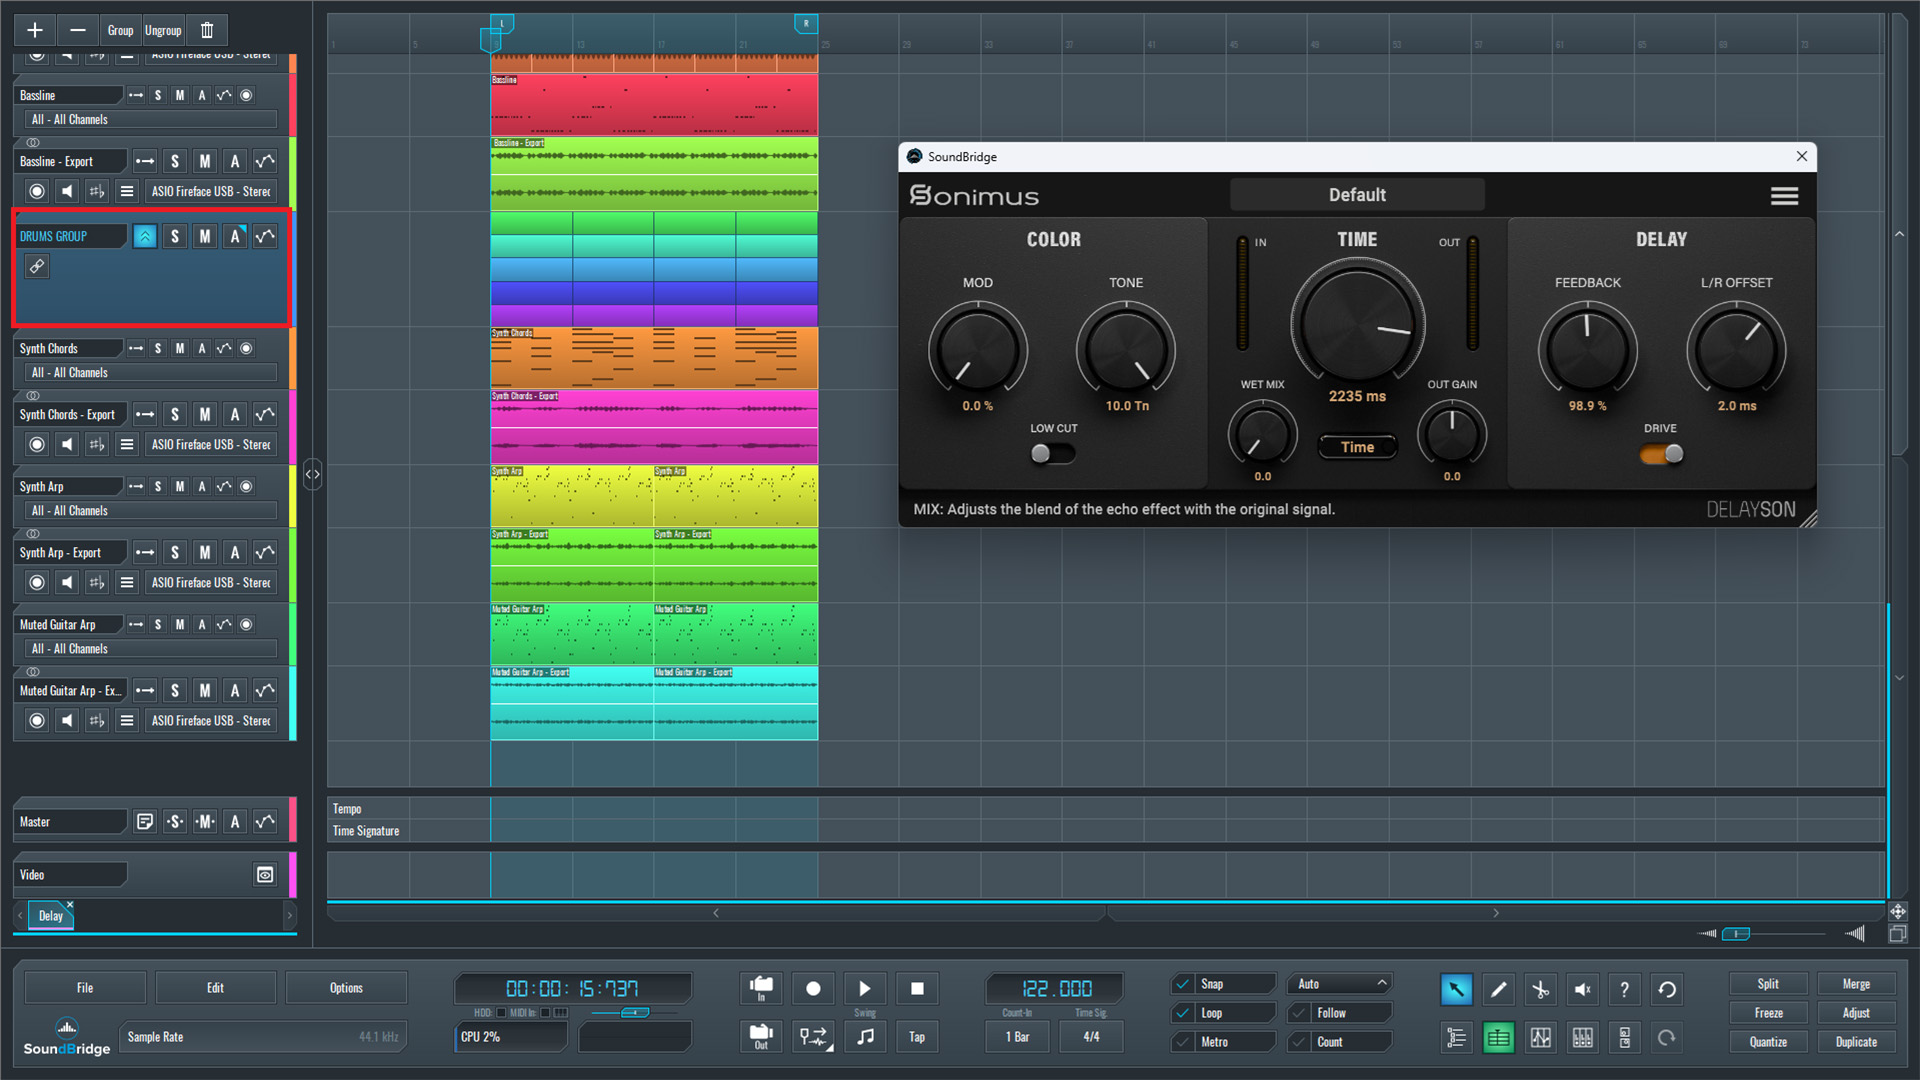
~Drums Group - Unprocessed
Automating Delay Time and Wet Signal for Pitch Bend Effect
With the delay in place, the next step was automating key parameters. Some settings remained fixed. We set the tone fully toward the high end to preserve the full spectrum. We kept feedback around 98%, high enough for a long tail but below the point of infinite feedback. A slight LR offset was added for subtle stereo variation, and drive was enabled to introduce saturation. Output gain stayed at 0.
The main focus was on automating time and wet mix. We initially set the delay time to an eighth note, around 490 ms at 122 BPM. From there, we gradually increased the time, causing the delay tail to slow down and drop in pitch, creating the tape effect.
At the same time, we raised the wet mix to around 30%, making the delay more audible after the dry signal fades without overpowering it. This results in a controlled tail that stretches and adds movement while the original groove remains intact.
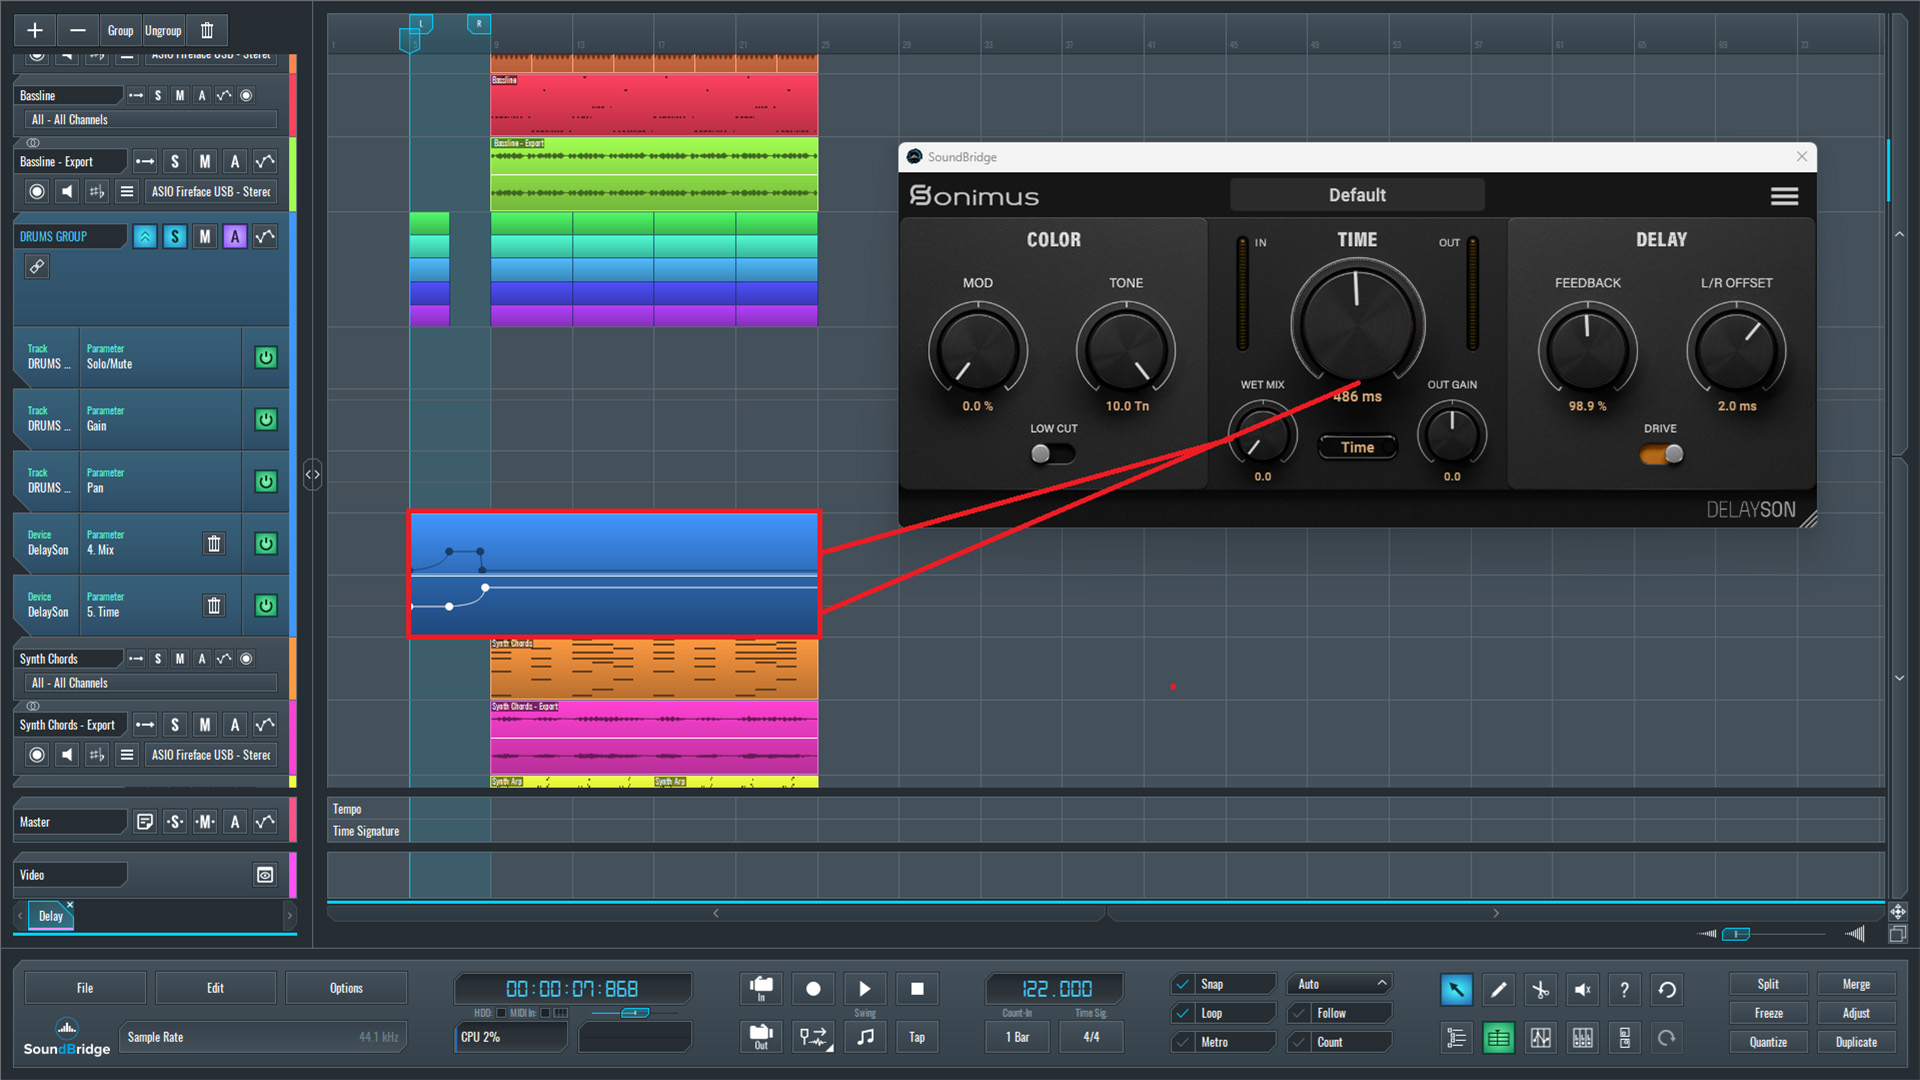
~Drums Group - Automated Parameters
Speeding Up Synth Chords with Delay Time Modulation
In the next step, we selected a short section from the synth chords channel and looped it to create a more compact, controlled segment. This makes it easier to clearly hear the effect of the processing without interference from the full arrangement.
The same delay setup was reused, again using DelaySon by Sonimus with identical base settings. This keeps the behavior consistent, allowing the focus to remain on how the automation changes the result.
In this case, we reversed the approach. Instead of increasing the delay time, the automation gradually reduced it from the initial value of around 490 milliseconds down toward zero. As the time decreases, the delay tail speeds up and rises in pitch.
This creates a lifting effect, where the sound feels like it is accelerating forward. Unlike the drum example, where the tail slows down and falls in pitch, this version builds tension and energy, making it suitable for transitions, build-ups, or leading into a new section.
The result is a concise upward movement in the delay tail, adding a sense of progression and motion while still directly tied to the original chord material.
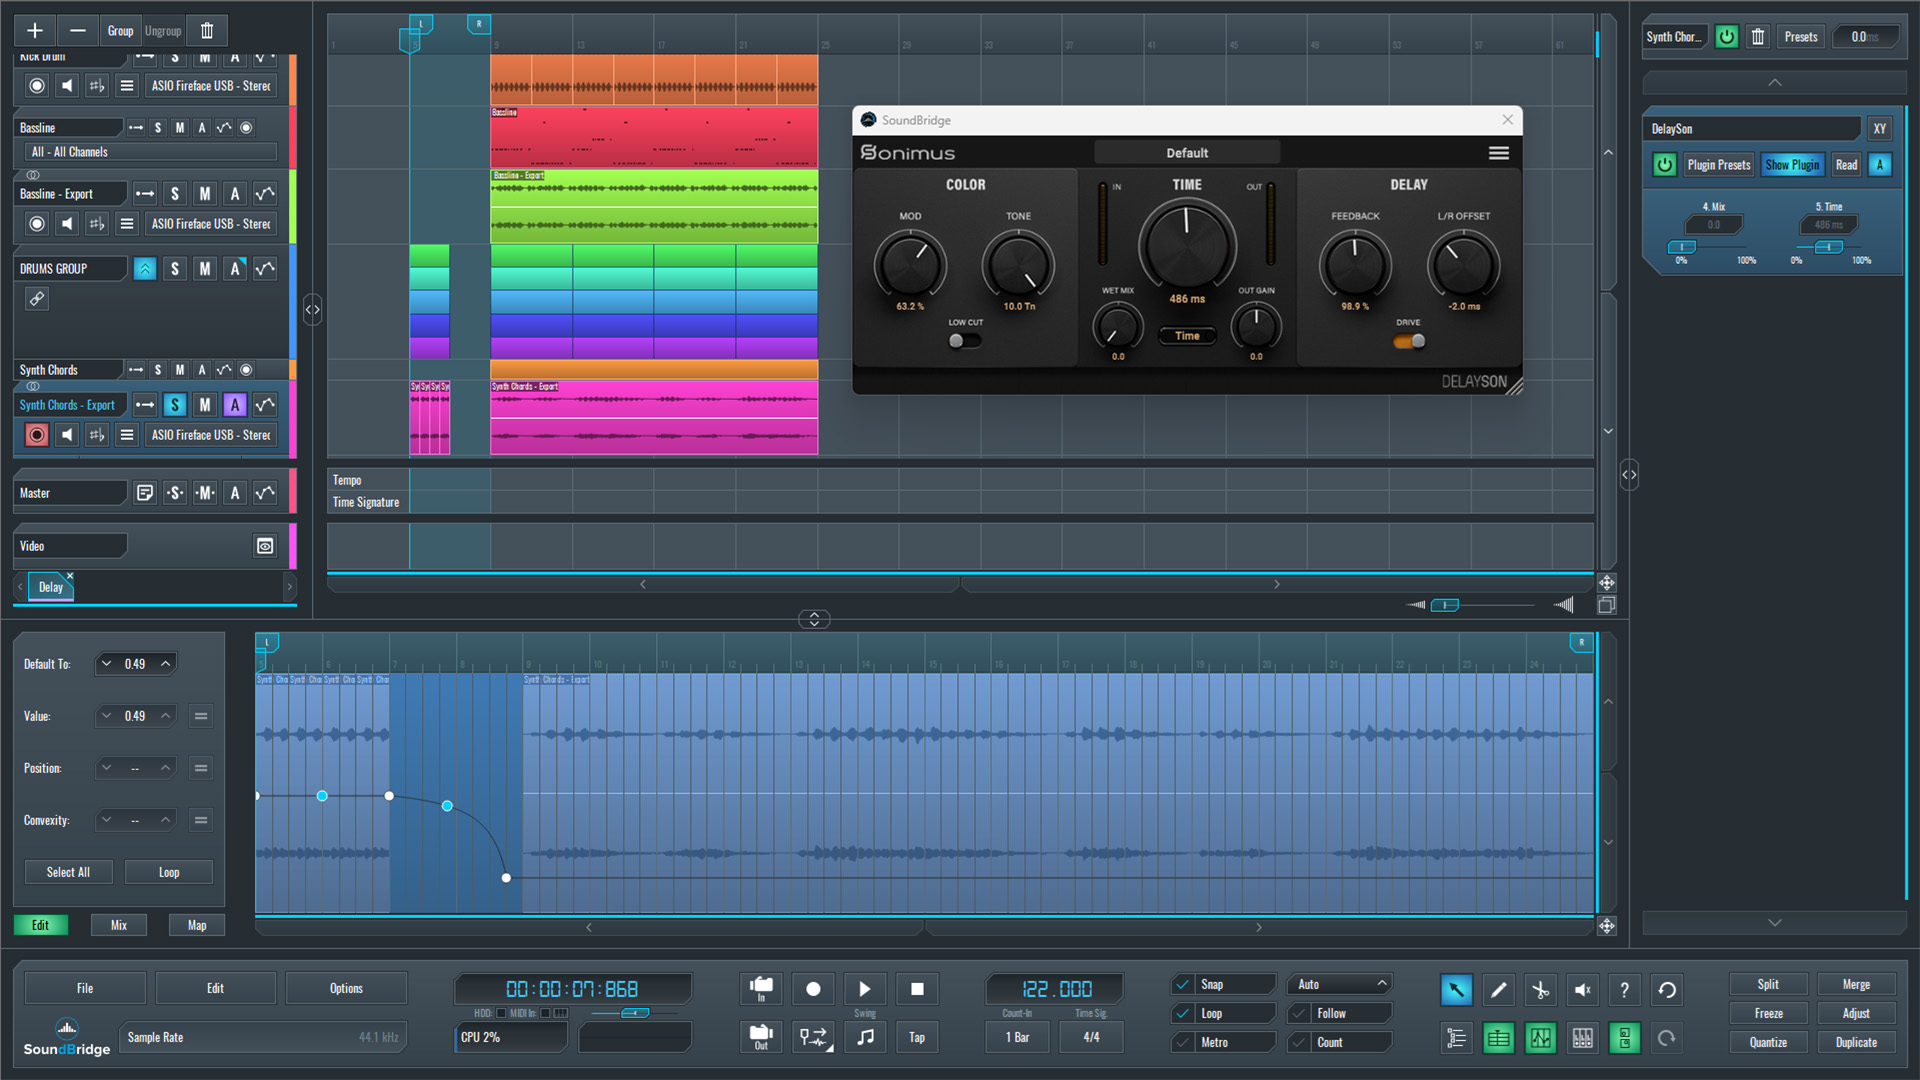
~Synth Chords - Automated Parameters
Our Full Pitch-Bend Delay Process In A Nutshell
For this type of effect, we intentionally placed the processing in a build-up section right before the drop. This is where delay-time modulation is most effective, as both techniques (slowing drum tails and accelerating synth chords) naturally increase tension and anticipation. To enhance this further, additional reverb was applied to both the drum group and the synth chords. The purpose of the reverb here is not subtle space, but expansion. As the delay tails stretch and shift in pitch, the reverb helps glue everything together, creating a wider and more immersive sound. Instead of hearing separate elements, the mix starts to feel like a single, evolving texture that leads into the drop.
We also introduced a white noise layer to reinforce this movement. Positioned carefully in the arrangement, it helps fill any remaining gaps and adds a consistent lift. Combined with the delay modulation, it contributes to a more continuous and controlled build, rather than a series of disconnected sounds.
At this stage, multiple processes are working together. The delay provides motion through time and pitch changes; feedback sustains the energy; reverb increases the sense of space; and white noise adds intensity. Each element has a clear role, and none of them need to be pushed too far individually to achieve a strong result.
Final Thoughts
The main takeaway is that delay can go far beyond a simple echo effect. When its time parameter is automated, especially in combination with high feedback, it becomes a powerful sound design tool. It can slow down, speed up, and reshape the tail of a sound in a way that feels organic and musical.
By applying these techniques in a controlled way, it becomes possible to create transitions that feel dynamic, engaging, and tightly connected to the track, rather than relying on generic effects.
~Full Mix - Elements Processed
If you liked this article, here are some more on the same subject:
MASTER MUSIC PRODUCTION
Expert-led courses designed to take you from fundamentals to finished tracks.

HOUSEFrom bouncy bass and solid kicks, this course teaches you the most modern House music production techniques needed to succeed and stand out.

TRAPQuit sounding like generic Trap and produce something World with hints of the Far East. Create ethnic soundscapes to put your Trap ahead of the curve.

AMBIENTProduce relaxing, sophisticated psy-influenced ambient. Psychedelic and relaxing to listen to, create meditative soundscapes to put your listeners in Zen.