How to Build a Massive Tom Sound
Last Edited: Jan 30, 2026
In this article, we'll focus on turning toms into a core element of your breaks and build-ups, and how to build a massive tom sound. We'll look at simple techniques that actually work in a real mix, the kind you can apply whether you're working with sampled drums, synthesized toms, or a combination of both. The goal isn't to make the loudest tom possible. The goal is to make our tom sound big and full without cluttering the track so that the build-up can breathe rather than choke.
Most producers don't think too much about toms. They grab a sample, drop it into the break, maybe add some reverb, and move on. In this case, the tom does its job, but that's about it. It marks a transition, fills a gap, and disappears once the drop hits. The problem is that in many tracks, especially in organic, tribal, or cinematic styles, the toms are a crucial element of the break. If they sound weak, flat, or disconnected from the rest of the track, the whole build-up loses energy, and no amount of risers or FX will fix that.
Oftentimes, the problem is that most producers treat the toms as individual sounds rather than as systems. One layer, one EQ, one reverb send. In isolation, the toms can sound good, but as the arrangement grows, they either get lost or start competing with the bass, pads, and the track's low-end energy.
Starting With the Full Context
Before processing, we'll start by listening to our short arrangement in SoundBridge DAW. This loop already contains most of the elements you'd expect in a finished track: drums, bass, harmonic layers, a build-up, and a drop. We haven't fully polished anything yet, but the structure and energy are already there. By listening in context, we establish a reference point. Every decision that follows, tuning, layering, dynamics, and spatial processing, will serve this arrangement, not break it.
While listening to the arrangement, pay attention to:
- How much space do we want the toms to fill in the break?
- Where the energy starts to build and where it drops.
- Whether the toms feel supportive or disconnected from the harmony.
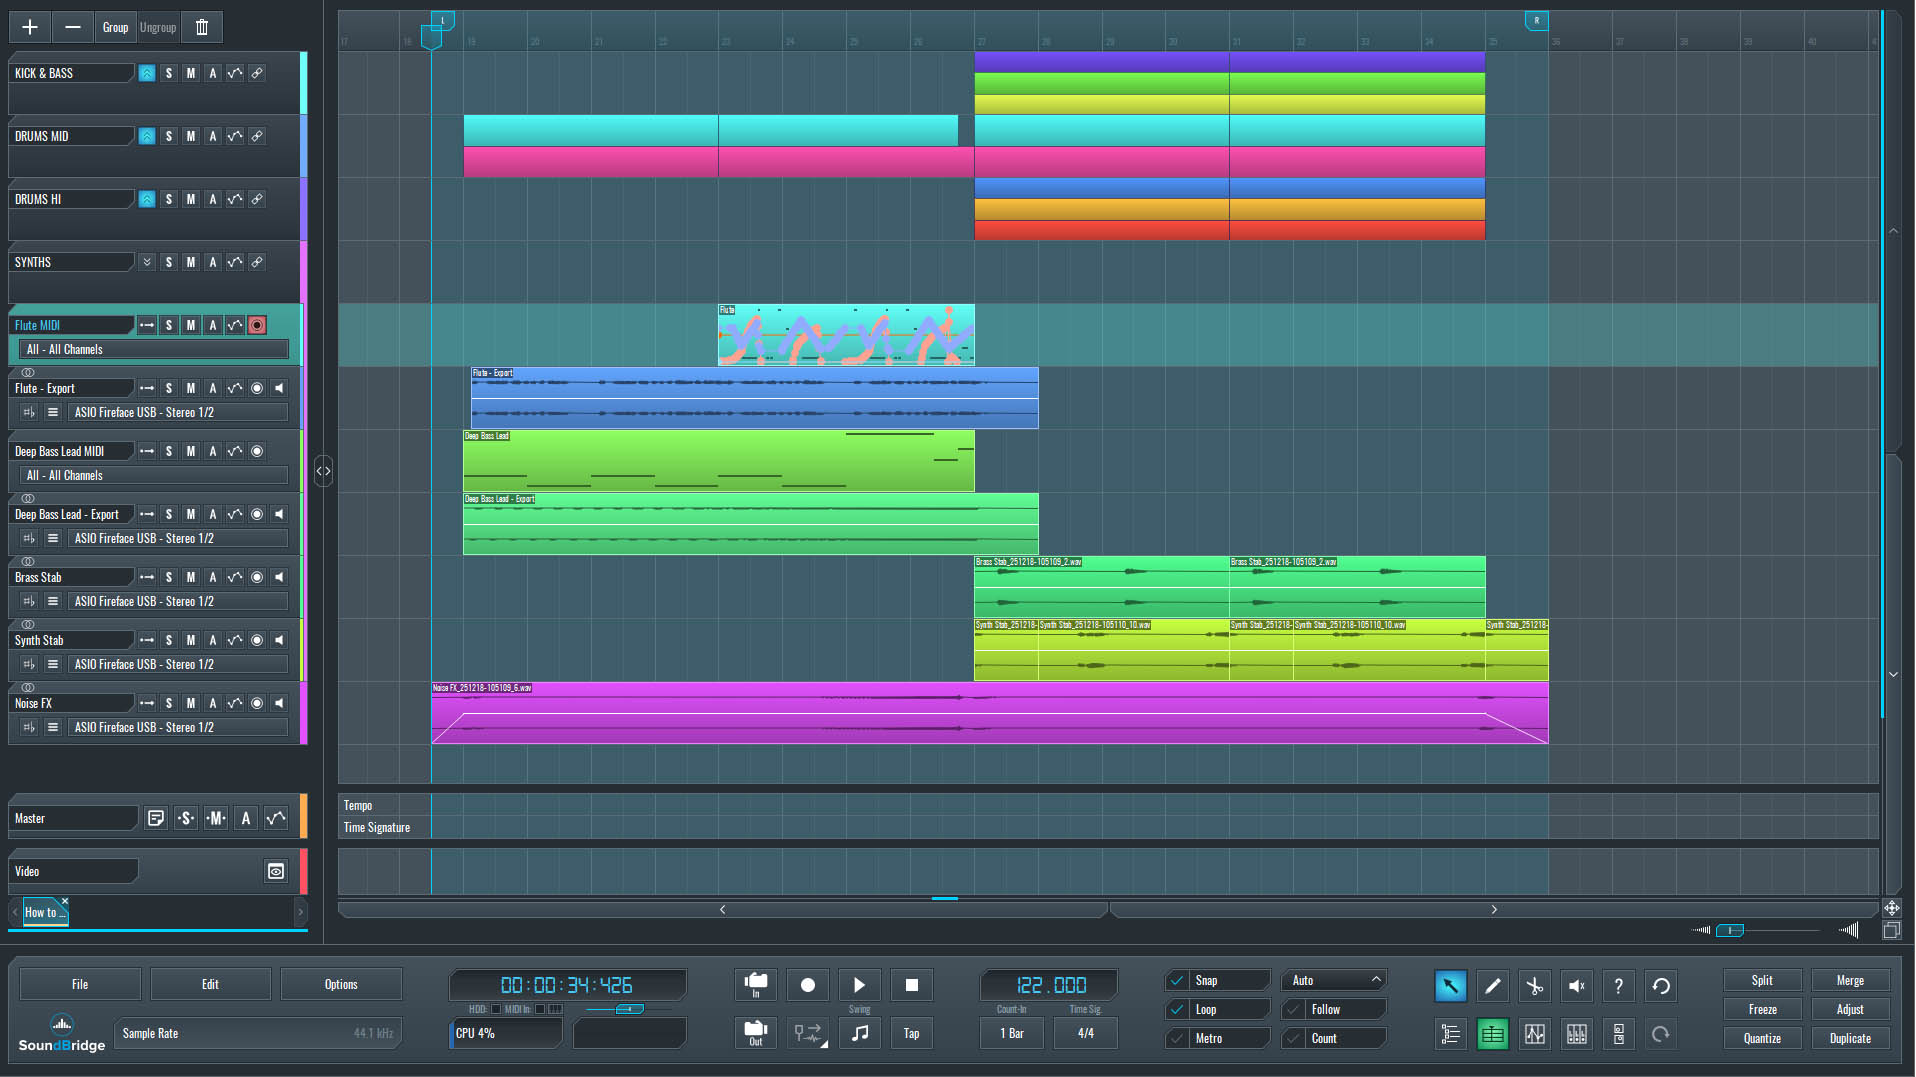
~Full Mix - Without Tom Sound.
Choosing the Root Tom
Every solid tom design starts with the root sound. Before layering, processing, or adding movement, we need a tom that already carries the right weight and character. This first layer will define how the entire tom section feels in the mix, so the goal here isn't perfection, but a strong foundation.
In a previous SoundBridge article, we looked at how to identify and retune the dominant pitch of percussive sounds using a multi-band frequency shifter. The same concept applies here. Even though toms are percussive, they almost always have a clear, resonant tone, and that tone plays a significant role in how they sit within the track.
We won't go into the whole tuning process in this article, but the idea is simple: identify the tom's dominant resonance and tune it to the track's key. In this case, the track is centered around F, so we'll tune the root tom to that same note.
Tuning the tom to the root doesn't make it melodic, but it does make it belong. The low end feels more stable, the break feels more intentional, and the toms no longer fight the harmonic content around them. From here on, every additional layer and processing decision will be built on top of this tuned foundation.
- Have a clear dominant resonance.
- Sit comfortably with the key of the track (F in this case)
- Feel solid before any heavy processing
Things to Have in Mind About the Root Tom
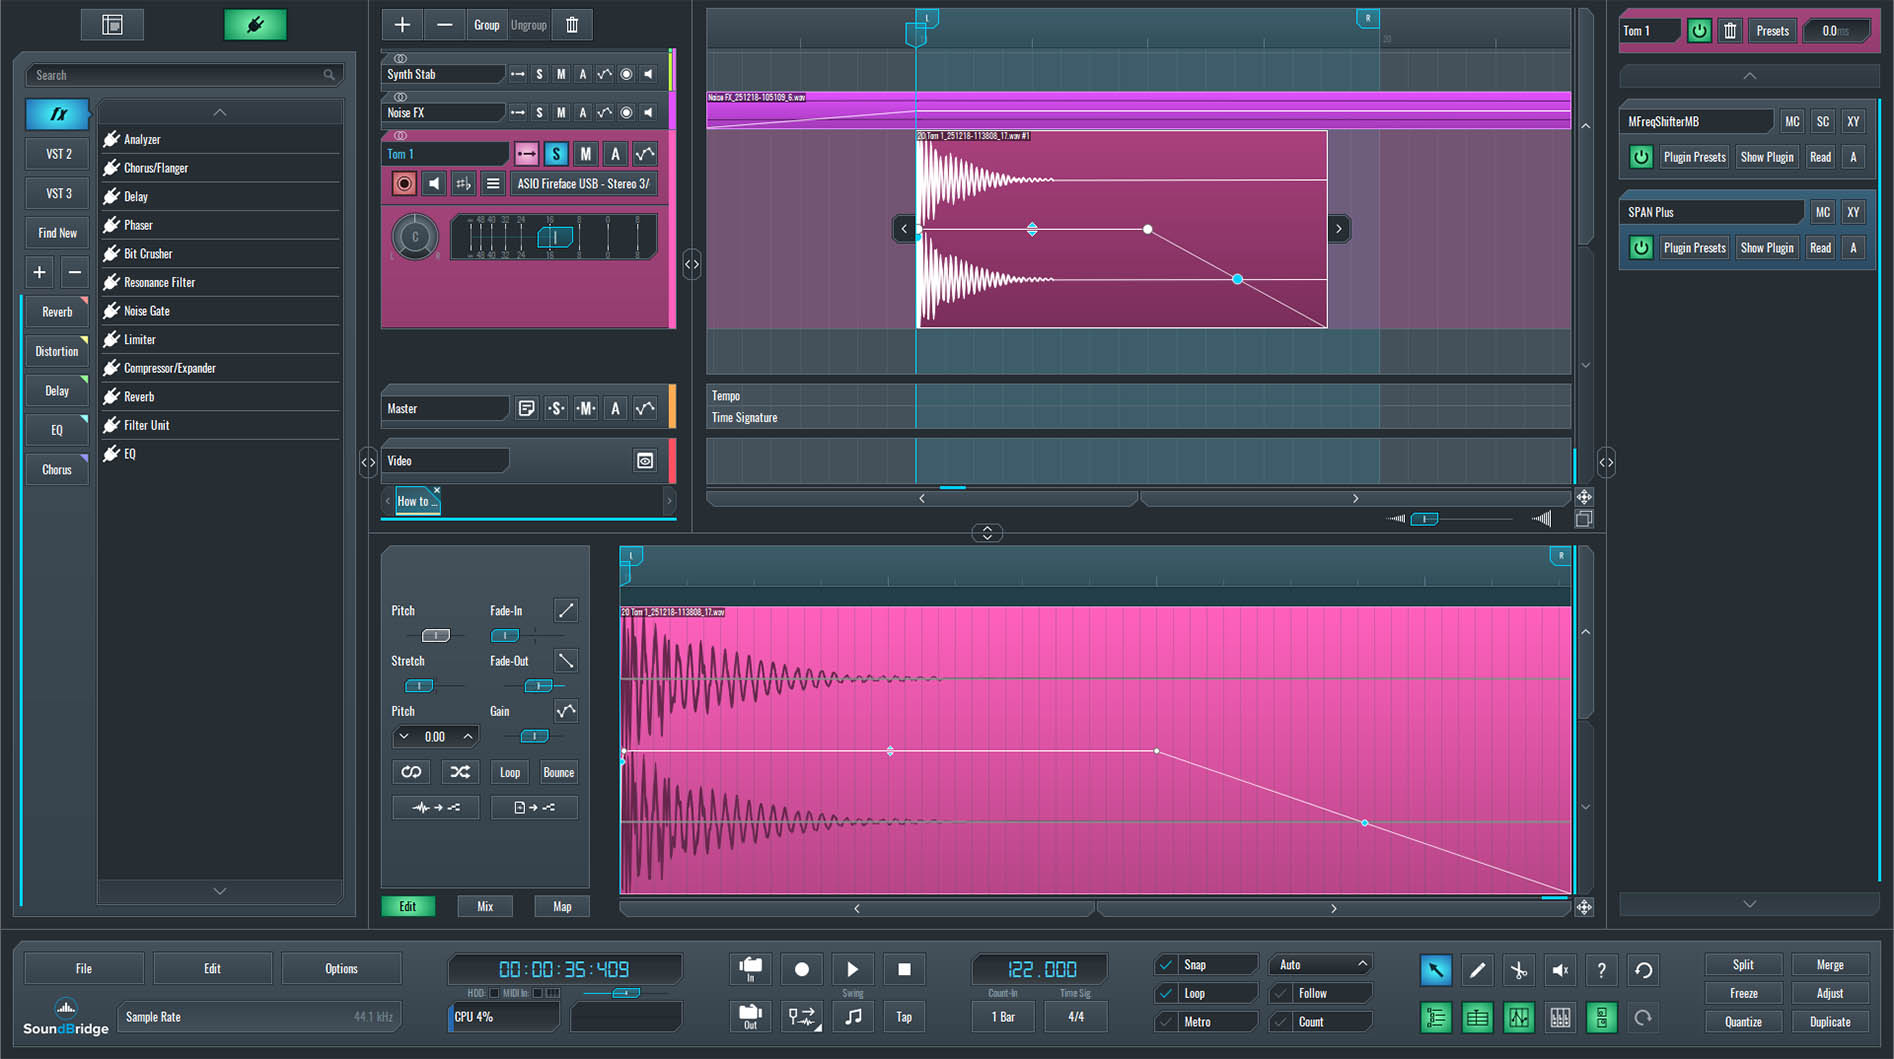
~Tom 1 Sound - Unprocessed.
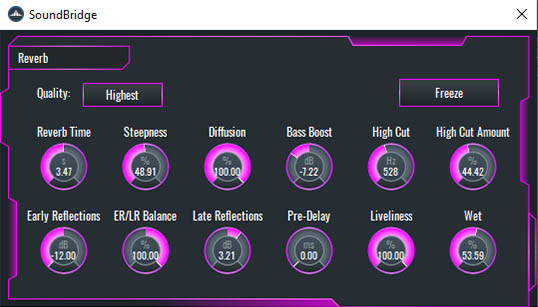
Once we have set the tuning, we'll start shaping space around this root tom using a long reverb. For this example, we'll be using SoundBridge's native reverb plugin. The reverb here isn't meant to push the tom to the back of the mix; it's there to extend the sound's body and create a sense of scale during the break. This reverb layer will become part of the tom itself, not just an effect on top of it.
~Tom 1 Sound - Processed With Reverb.
Adding Additional Layers to Build a Massive Tom Sound
With the root tom in place, the next step is layering. A single tom, even when well-tuned and processed, rarely feels big enough on its own in a complete arrangement. To add depth and complexity, we'll introduce two additional layers on top of the original one.
Instead of using two more toms, we'll combine one additional tom with a snare-like sound. The extra tom is slightly more open and tuned differently from the root, while the snare-type layer introduces more mid- and high-frequency information. The goal isn't to stack similar sounds, but to create contrast and extend the frequency range of the tom section.
Where the root tom provides weight and stability, the second tom adds movement and body, and the snare-like layer brings definition and presence. This combination helps the toms cut through the mix during the build-up without relying on excessive EQ or volume.
By layering sounds with different tunings and spectral focus, we avoid a rigid, static feel. Instead of a single dominant resonance, we get a broader harmonic spread that feels fuller and more controlled. This approach also improves translation across playback systems by distributing energy across low-, mid-, and high-frequency ranges.
At this stage, the focus remains on balance rather than on heavy processing. Each layer should be clearly felt, but none should dominate. When combined, the layers should behave like a single, cohesive instrument; more detailed, with wider stereo information and more impactful than any individual sound.
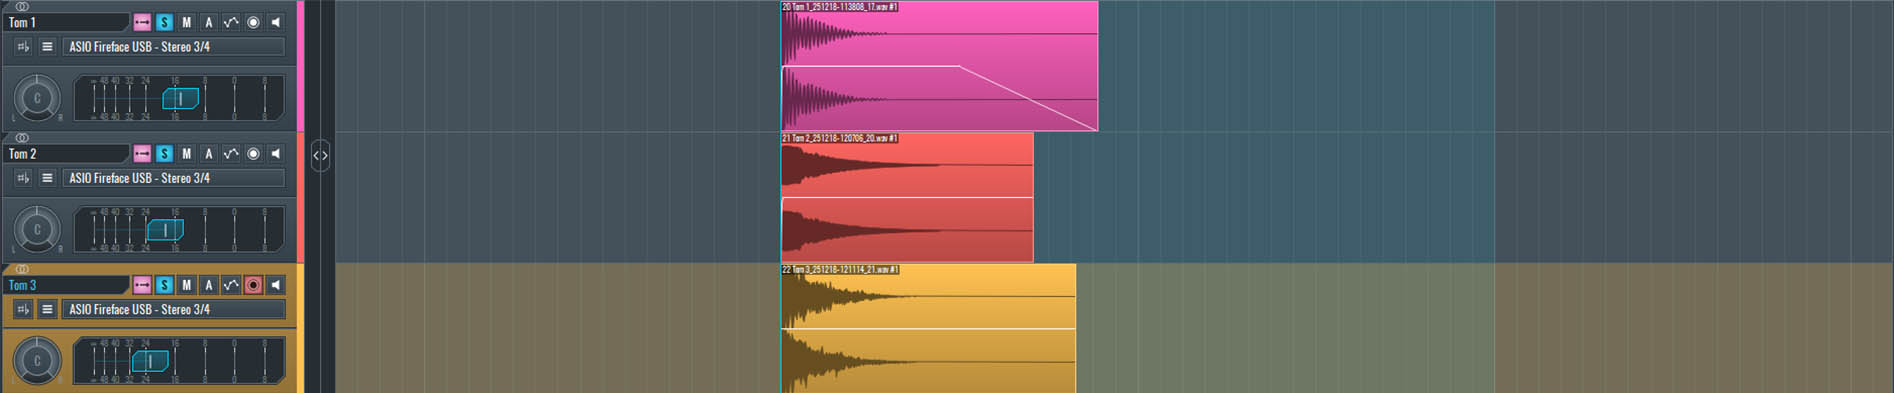
~Tom 1, 2 & Snare Layers - Unprocessed.
Adding Mid-Frequency Definition to Your Toms
To push the layering a bit further, we'll add two more supporting layers. The first one is a percussive element with a cleaner mid and high-mid focus. This layer doesn't add weight, its role is definition. It helps the tom hits read more clearly in the mix, especially once the arrangement opens up.
Each layer has a specific role:
- Root tom – low-end weight and stability
- Secondary tom – body and movement
- Snare-like layer – mid and high-frequency presence
- Percussive layer – clarity and articulation
- Noise layer – texture and air
Additionally, we'll introduce a dedicated noise layer. To do this, we'll use Vital, loading a noise sample from its internal sampler. The noise itself is kept very basic, and then shaped using Vital's amplitude envelope and internal effects. This layer isn't meant to be obvious or audible on its own, it's there to add texture, movement, and a sense of air around the toms during the build-up.
With these additional layers, the tom section starts to behave less like a single drum sound and more like a controlled noise-and-impact system. Low-end weight, midrange body, high-frequency definition, and texture all have their own space, making the final sound feel bigger and more intentional without becoming cluttered.
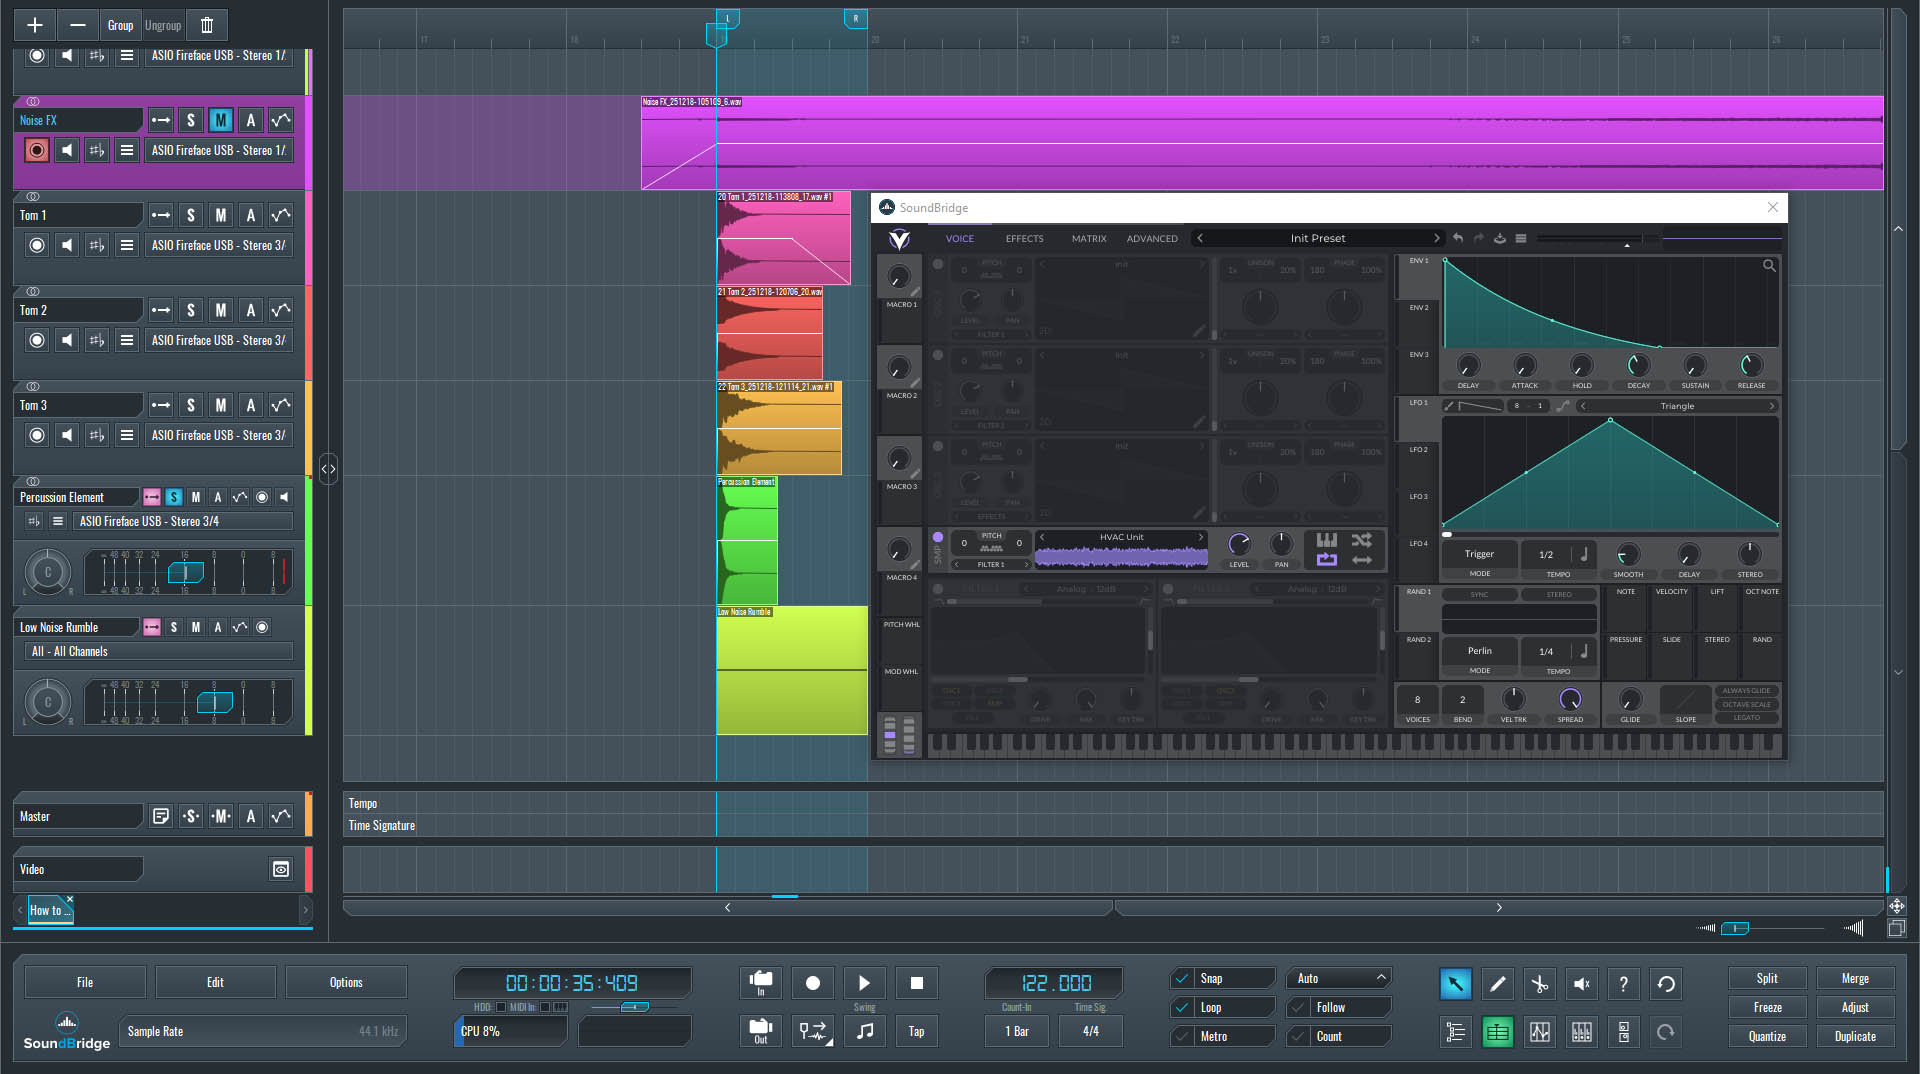
~Percussion Element - Unprocessed.
~Vital Noise Rumble - Unprocessed.
At this point, we'll listen to the full tom sound with all layers playing together.
~Full Layered Tom Sound - Unprocessed.
Group Processing the Tom Stack for a Massive Sound
Once all layers are in place, we'll route them into a single group and treat the toms as one instrument rather than a set of separate sounds.
In the group, we'll apply shared processing to integrate everything. Reverb helps unify the layers spatially, saturation adds density, EQ cleans up overlaps, and compression controls the overall dynamics. Each processor is used subtly, emphasizing cohesion over heavy shaping.
Once the sound is locked in, we'll use these layered toms to create a sequence that drives the build-up forward. By repeating and developing this sequence, the tom stack fills the space, builds tension, and naturally leads into the drop.
Group processing focuses on:
- Gluing layers into a single sound.
- Controlling overall dynamics.
- Shaping tone without over-processing.
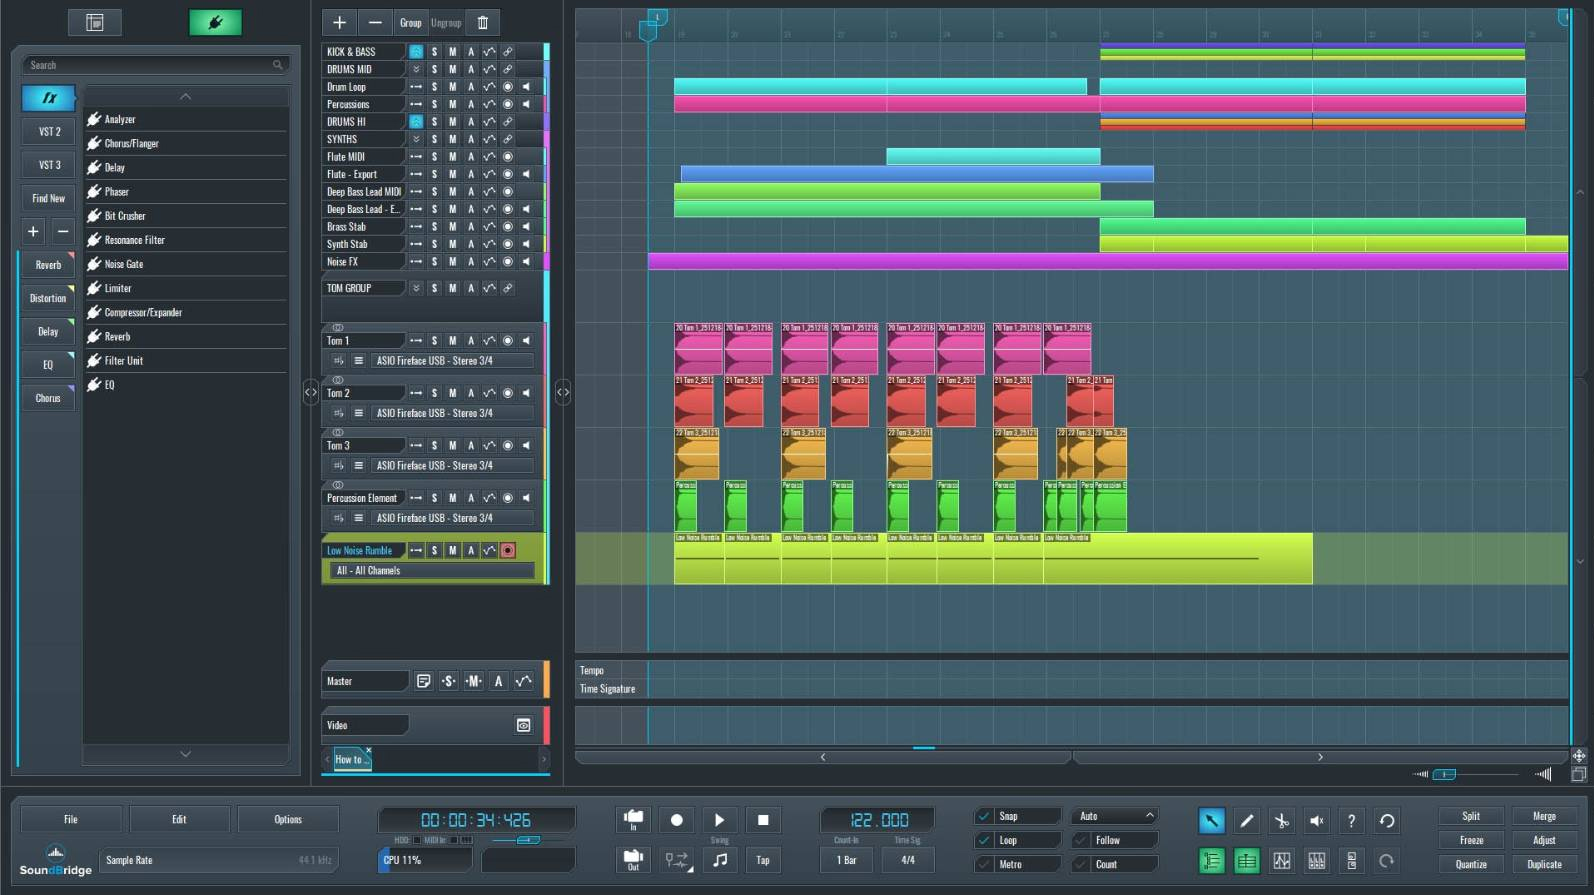
~Full Tom Sequence, Solo - Processed.
~Full Mix - Full Layered Tom Sound.
Using These Techniques to Build Your Own Massive Tom Sounds
Building a massive tom sound isn't about finding the perfect sample or stacking endless effects. It's about context, balance, and intention. When toms are tuned to the key, layered with purpose, and shaped as a single instrument, they stop being background percussion and start driving the track's energy.
By starting with a solid root tom, adding contrasting layers for body, definition, and texture, and processing everything at the group level, you create a sound that can carry an entire break or build-up on its own. The toms fill space, build tension, and guide the listener toward the drop without relying on overused risers or FX.
Most importantly, this approach keeps things flexible. The same principles apply whether you're working with organic drums, synthesized sounds, or fully processed audio. Once you think of toms as a system rather than individual hits, designing impactful build-ups becomes faster, cleaner, and more controlled.
The next time a break feels empty, or a build-up lacks momentum, don't add more elements. Start with the toms, and let them do the heavy lifting.
If you liked this article on sound design, here are some more on the same subject:
MASTER MUSIC PRODUCTION
Expert-led courses designed to take you from fundamentals to finished tracks.

HOUSEFrom bouncy bass and solid kicks, this course teaches you the most modern House music production techniques needed to succeed and stand out.

TRAPQuit sounding like generic Trap and produce something World with hints of the Far East. Create ethnic soundscapes to put your Trap ahead of the curve.

AMBIENTProduce relaxing, sophisticated psy-influenced ambient. Psychedelic and relaxing to listen to, create meditative soundscapes to put your listeners in Zen.