


How to Create Tension With Pitch Movement
Last Edited: Sep 4, 2026
Creating tension is one of the most important aspects of electronic music production. Tension helps create anticipation and gives the arrangement a sense of direction. This holds whether you are building toward a drop, introducing a new section, or preparing the listener for a breakdown. Without tension, transitions can feel flat and predictable, even when the sounds themselves are amazing. Many producers rely on risers, impacts, and transition effects to create energy. While these tools can be effective, one of the strongest ways to create tension is using pitch movement on sounds already part of the arrangement. Instead of introducing new elements, existing instruments can gradually evolve and intensify, creating a more natural and cohesive movement.
In this tutorial, we played a simple chord with Vital and transformed it using three different modulation techniques. Sidechain-style volume movement will introduce rhythmic energy, panning modulation will create stereo motion, and pitch automation will gradually increase tension as the section develops. Individually, these effects are relatively simple, but together they can transform a static chord into a powerful transition element.
The goal is not to create a complex sound design patch. We want to demonstrate how a basic sustained sound can become a dynamic tension-building tool. We'll be evolving a simple chord into an atmospheric element that naturally guides the listener toward the drop.
Listening to the Drop Section in Context
Before creating the tension sound itself, it is important to establish a clear destination for the listener. In this example, we created a short drop section inside SoundBridge: DAW, using drums, bass, and several melodic elements that together form the track's main energy point.
The first step is to listen to this section in context and understand how it feels on its own. We already have an established groove. The bass provides movement and weight, while the melodic elements define the drop's main musical identity. At this stage, everything sounds complete and functional, but there is very little preparation leading into it.
This is a common situation in many productions. The drop itself may sound strong, but without a proper build-up or tension element beforehand, its impact can feel reduced. The listener arrives at the destination without experiencing the journey that leads there.
Listening carefully to the drop section makes it easier to identify the kind of energy we want to create beforehand. The goal is not necessarily to make the drop louder or more aggressive, but to increase the contrast between the transition and the following section.
Throughout the rest of this tutorial, the focus will be on building that anticipation. And we'll create this tension using a sustained chord and a series of simple modulations in Vital. These techniques will gradually increase movement, width, and intensity. And this movement helps the listener naturally glide to the drop, making the payoff feel much more satisfying.
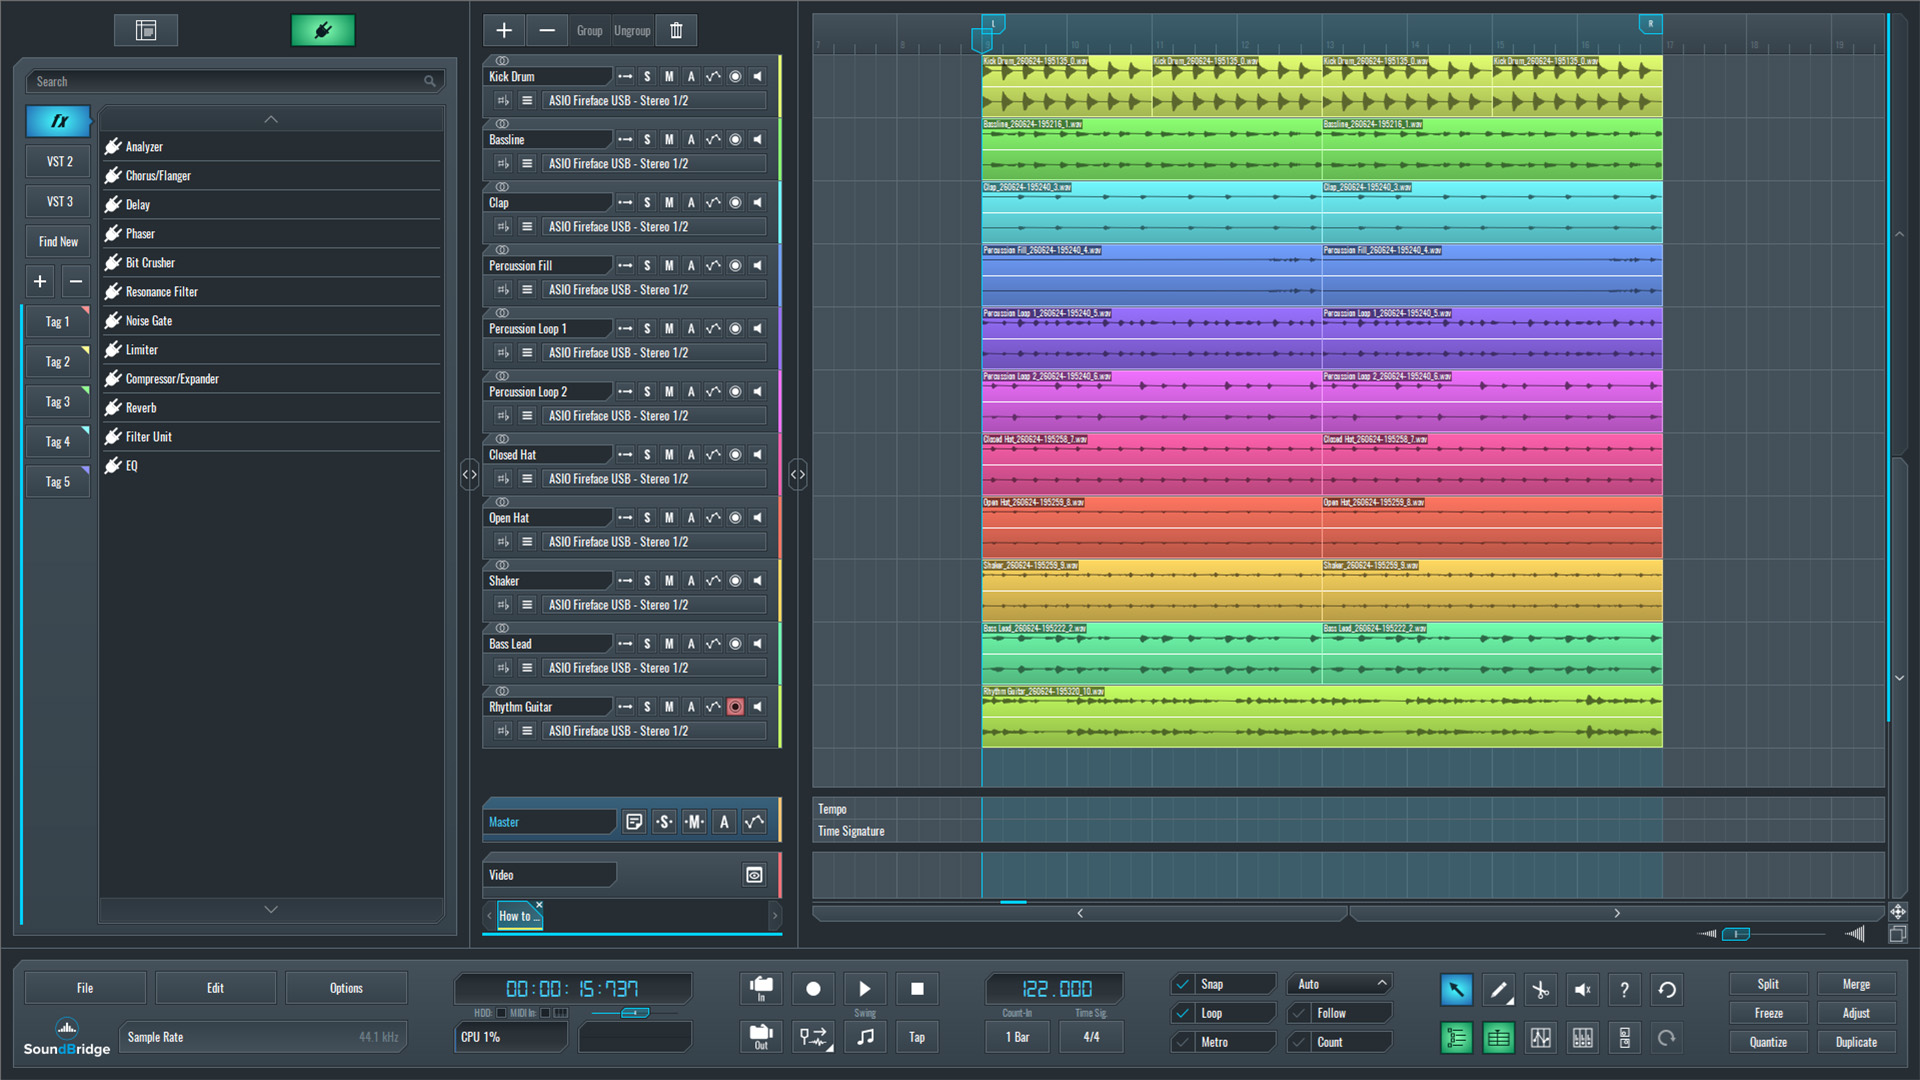
~Full Mix - Without Sustained Pad Sound
Creating the Base Pad Sound in Vital Before Adding Any Tension or Pitch Movement
To begin building tension, we created a simple pad inside Vital. The goal is not to design a complex patch, but to create a wide, sustained sound that will later serve as the foundation for all modulation and automation.
The patch uses two saw oscillators routed to Filter 1. To immediately create a wide stereo image, we hard-panned the first oscillator to the left and the second to the right.
The first oscillator has 8 unison voices and approximately 10% detune, providing the core of the sound. The second oscillator is slightly quieter, but uses 16 unison voices with around 25% detune, adding additional width and movement to the patch.
The amplitude envelope is very simple. Both decay and sustain are close to their maximum values, allowing the sound to remain stable for the entire duration of the chord. We introduced a small amount of attack to eliminate clicks at the start of the note. And finally, we kept the release relatively short so the sound is under control when playback stops.
At this stage, the patch already produces a wide, atmospheric pad that can fill a large portion of the mix. However, it is still completely static. In the following steps, we introduced various modulations to transform this simple sustained chord into a dynamic tension-building element.
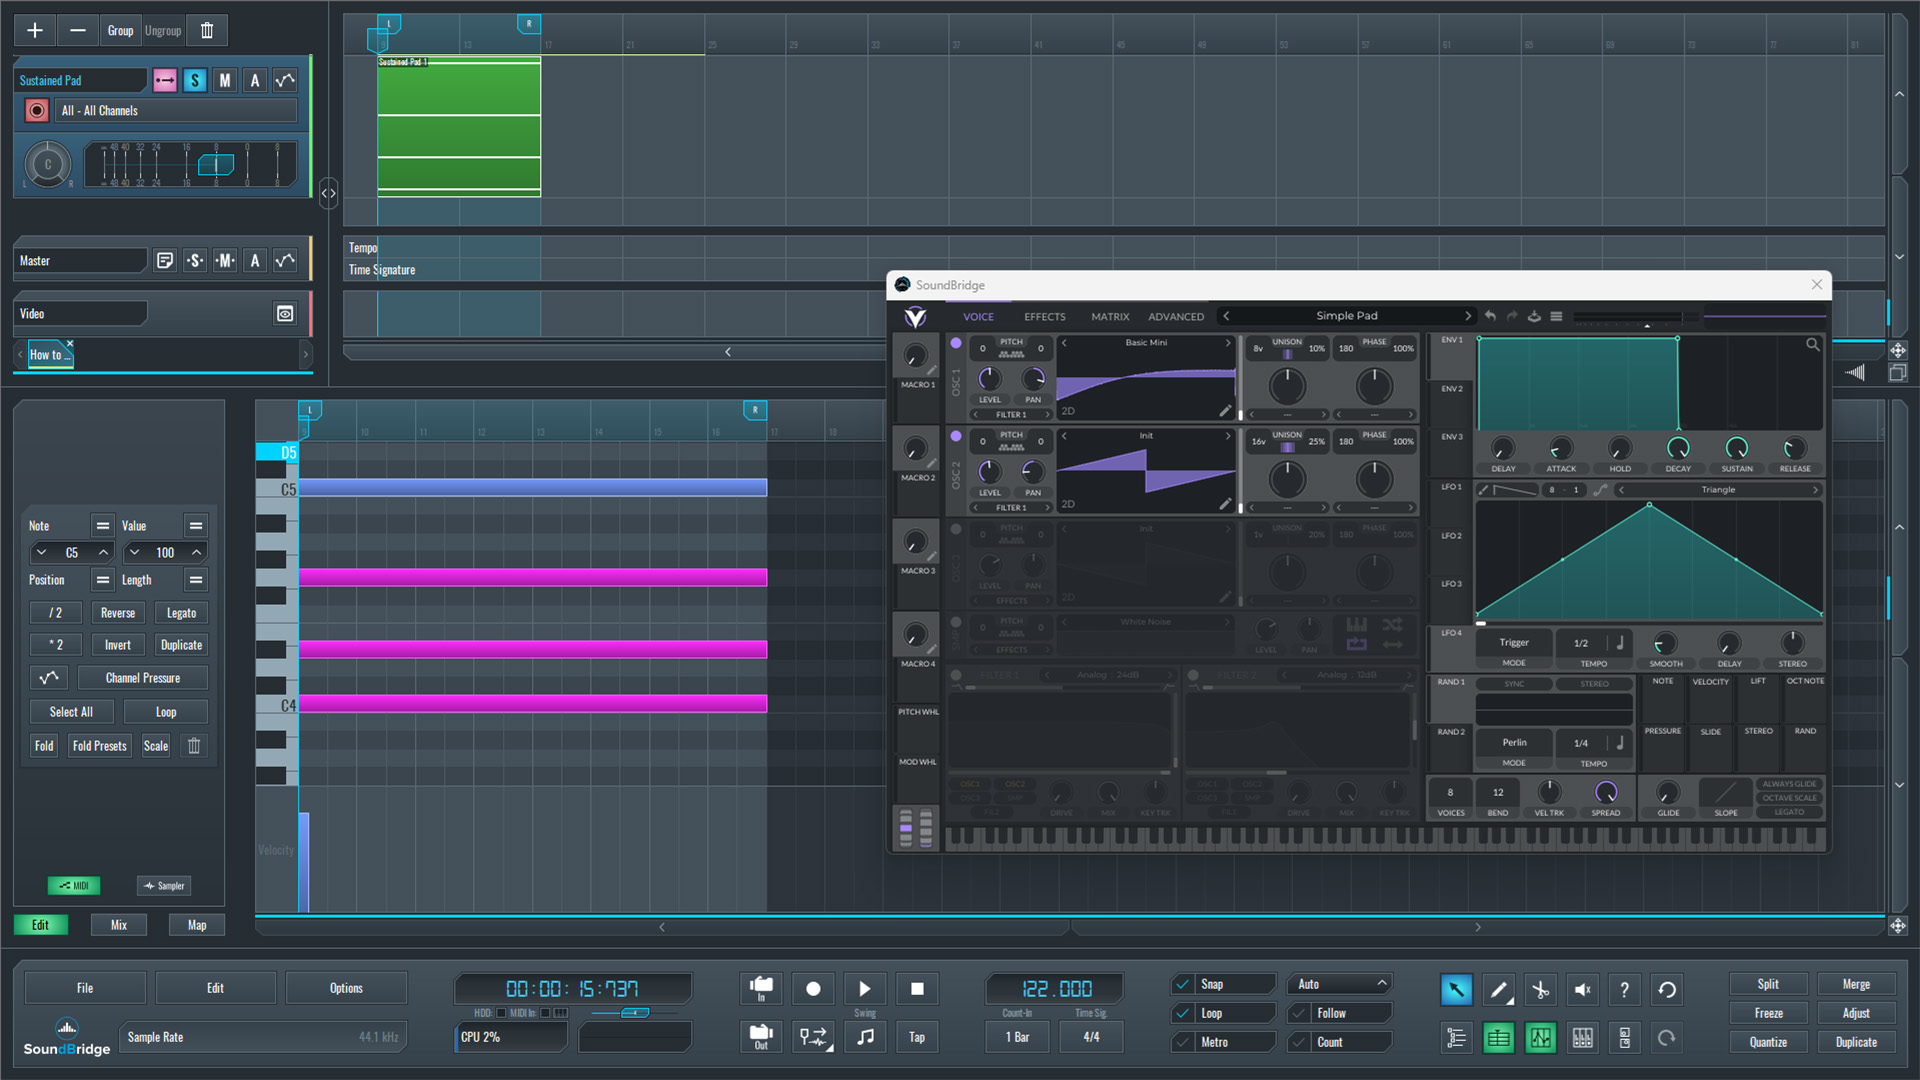
~Basic Synth Pad - Unprocessed (Solo)
Creating tension by adding Pitch, Volume, and Panning Movement
With the basic pad sound in place, the next step is introducing movement. To create a sidechain-style pumping effect, we assigned LFO 1 to the Level controls of both oscillators using the curve shown in the example.
Instead of synchronizing the LFO to the project tempo, we switched the rate to the Seconds mode. This makes the movement easier to automate later and often results in a more natural feel.
Next, we assigned LFO 2 to the panning controls of both oscillators. Once again, we used the Seconds mode instead of tempo sync. Since the oscillators are already positioned on opposite sides of the stereo field, the modulation creates a subtle left-right movement that keeps the sound evolving over time.
We kept the modulation amount around 50%, preventing the pad from moving too aggressively across the stereo image. Together, these two modulations add rhythmic pumping and stereo motion, transforming the static pad into a much more dynamic, tension-building element.
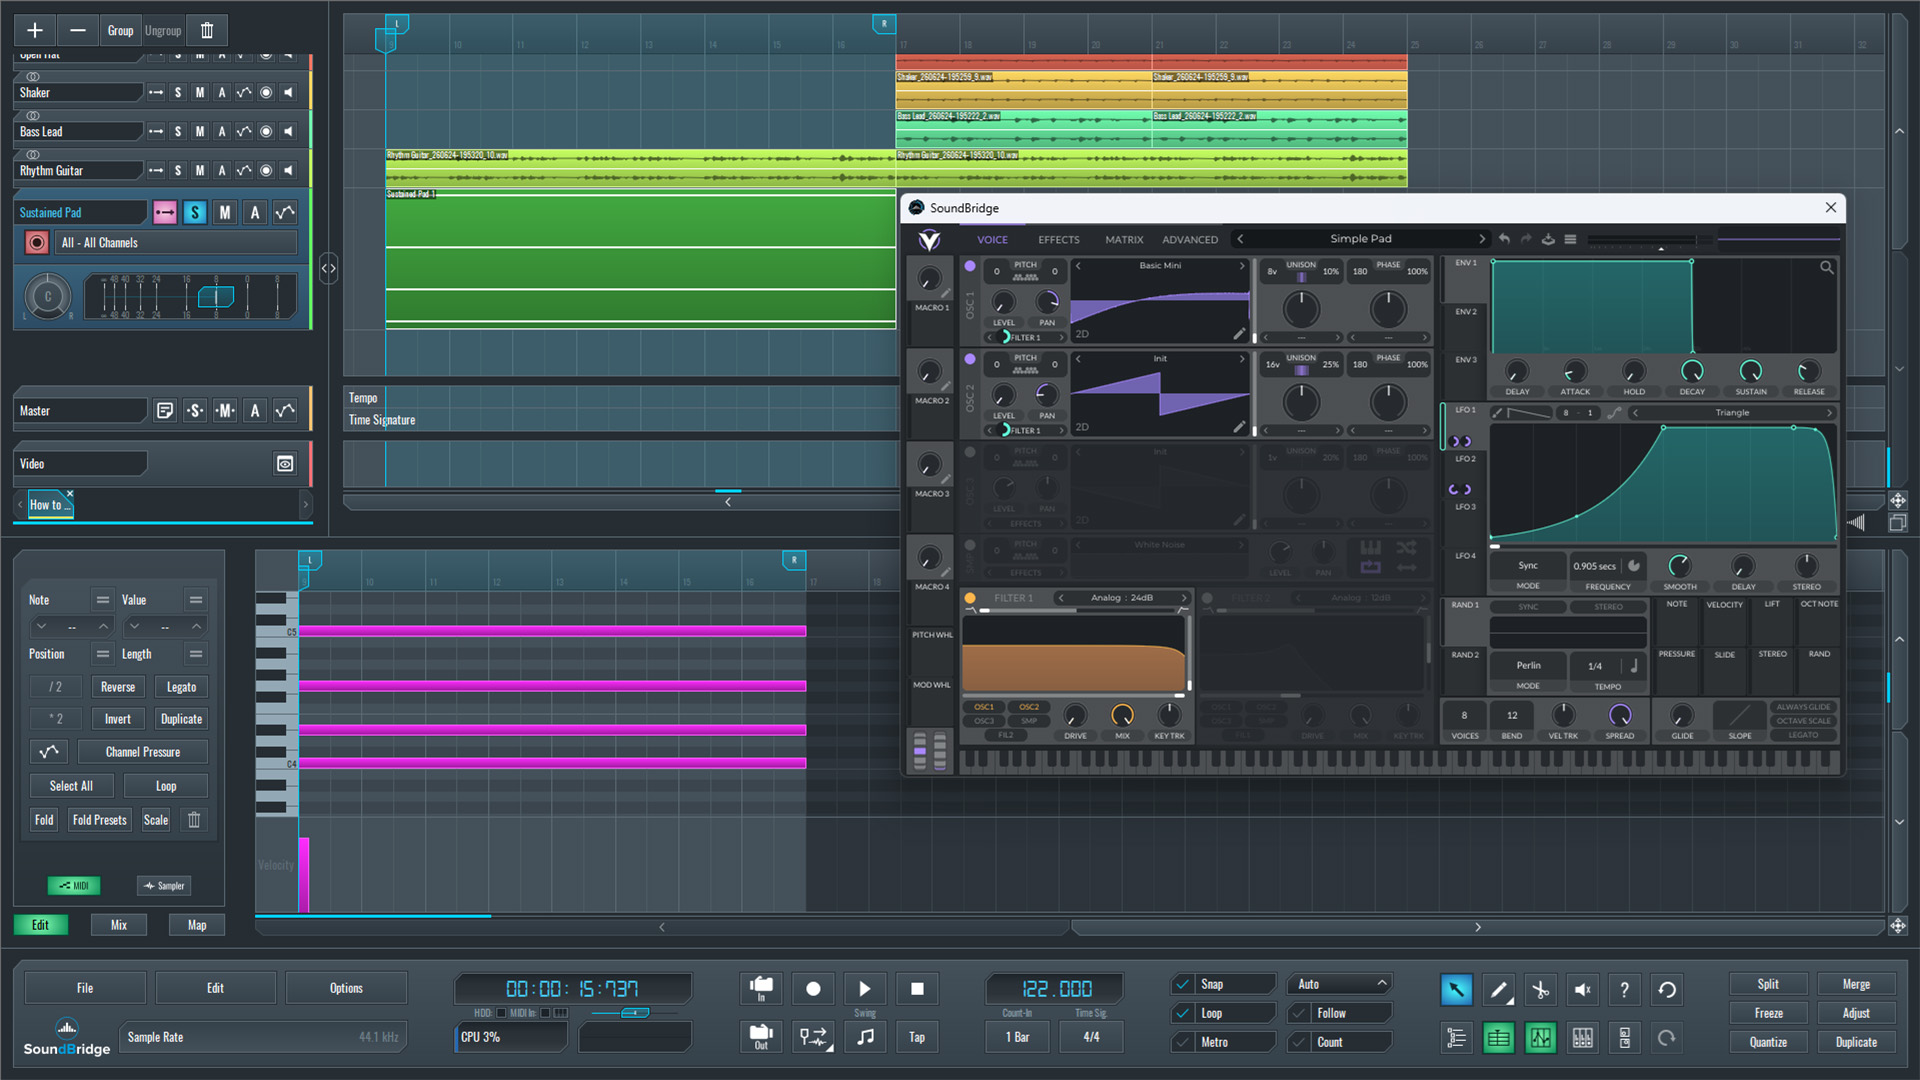
~Synth Pad - Osc Level & Panning Modulation (Solo)
Automating the Tension Build-Up
With the sound design complete, the final step is automating the key parameters that will gradually increase tension as the drop approaches.
The first automation targets the filter cutoff. Starting from a more filtered position, we slowly opened the cutoff throughout the build-up, allowing more high-frequency content to enter the mix and making the sound progressively brighter and more energetic.
Next, we automate both modulation sources. LFO 1, which controls the oscillator levels, and LFO 2, which controls the stereo movement, are gradually increased over time. This causes the pumping effect and stereo motion to become more noticeable as the transition develops.
We introduced the pitch automation via Vital's pitch-bend control. We set the bend range to +12 semitones, and during the final part of the build-up, the pitch slowly rises toward its maximum. This creates a classic riser effect and significantly increases the sense of anticipation before the drop.
Finally, we further enhanced the sound using Vital's built-in chorus, delay, EQ, and reverb effects. To add even more intensity near the end of the transition, we increased the delay feedback in the final moments before the drop, creating longer repeats and additional energy.
To evaluate the result, the processed pad is first played solo to make it easier to hear how the different modulations interact. After that, we played it back in the context of the full mix, along with the rhythm guitar and an additional white-noise riser. Combined together, these elements create a smooth and effective tension build that naturally leads into the drop.
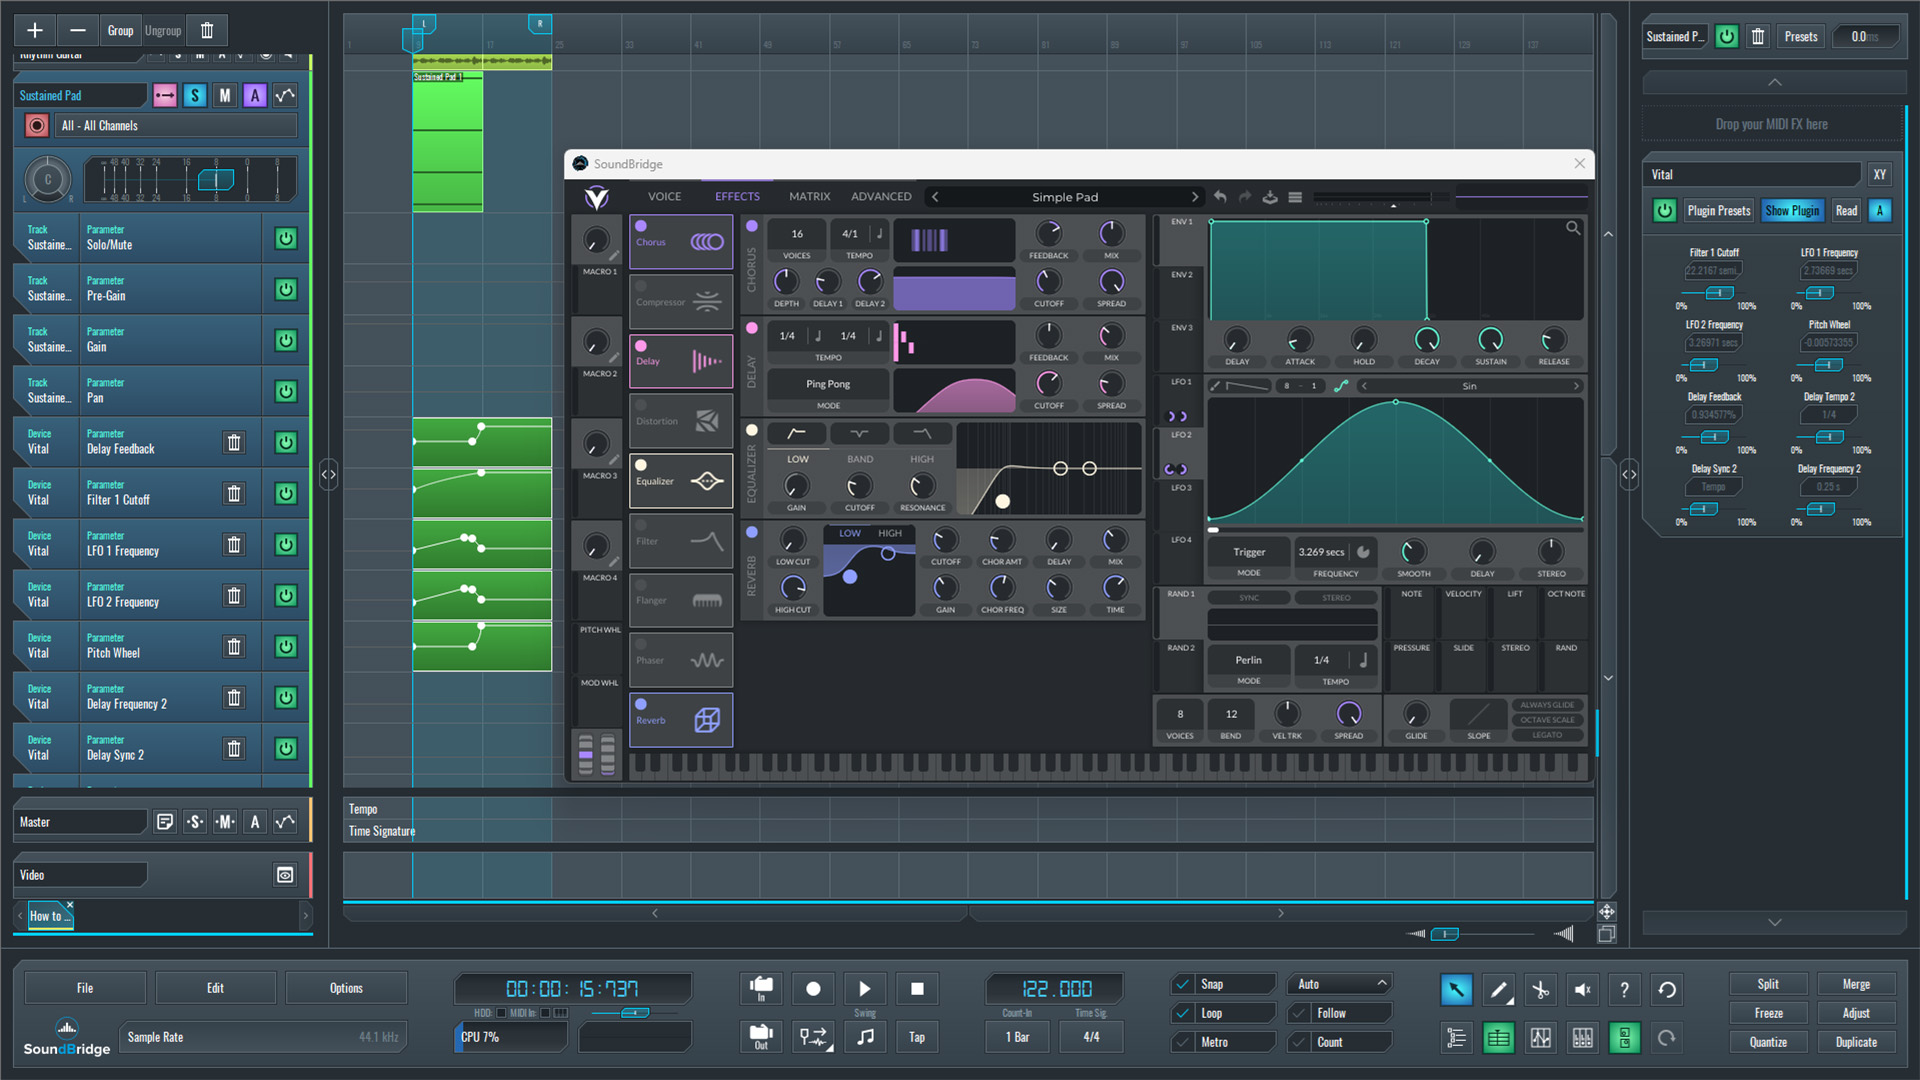
~Synth Pad - Fully Processed + Automation (Solo)
~Full Mix - With Processed Synth Pad
Final Thoughts
Creating tension does not always require complex risers, transition packs, or dozens of automation lanes. In many cases, a single sustained chord can serve as a powerful transition when paired with a few carefully chosen modulations.
In this example, the process started with a simple pad sound. Through volume modulation, stereo movement, filter automation, pitch-bending, and delay-feedback automation, the sound gradually evolved from a static chord into a dynamic, tension-building element. While each change is subtle on its own, together they create a strong sense of anticipation leading into the drop.
One of the biggest advantages of this workflow is that the tension comes from a sound that is already part of the arrangement. Instead of relying entirely on external effects, the transition feels more connected to the track's musical identity and integrates naturally with the rest of the production.
If you liked this article, here are some more on similar subjects:
MASTER MUSIC PRODUCTION
Expert-led courses designed to take you from fundamentals to finished tracks.

HOUSEFrom bouncy bass and solid kicks, this course teaches you the most modern House music production techniques needed to succeed and stand out.

TRAPQuit sounding like generic Trap and produce something World with hints of the Far East. Create ethnic soundscapes to put your Trap ahead of the curve.

AMBIENTProduce relaxing, sophisticated psy-influenced ambient. Psychedelic and relaxing to listen to, create meditative soundscapes to put your listeners in Zen.