

How to Design a Modern LFO Pluck Sound
Last Edited: Sep 25, 2026
Electronic music often relies on a few signature sounds that immediately define a track's character. One of the most recognizable examples is the modern LFO pluck sound design, a staple of Melodic House, Melodic Techno, and Progressive House productions. Rather than acting as a traditional lead, this type of sound sits between a pluck, a pad, and a rhythmic synth, adding both movement and energy to the arrangement.
What makes this style of pluck so effective is that it constantly evolves. Instead of remaining static, the sound breathes with the groove through filter modulation, carefully shaped envelopes, and rhythmic LFO movement. Combined with a wide stereo image and tasteful effects, even a simple melodic pattern can become a defining element of a track.
Although the final result may sound complex, the foundation is surprisingly straightforward. Most of the character comes from a well-balanced oscillator setup, a responsive filter, and a modulation system that gives the sound its distinctive pulse. Once these core elements are in place, effects such as distortion, chorus, delay, and reverb help polish the patch and make it sit naturally inside the mix.
In this tutorial, we'll design a modern LFO pluck from scratch using Vital. Starting with a simple MIDI sequence in SoundBridge: DAW, we will gradually build the patch using oscillators, unison, filter modulation, envelopes, and carefully selected effects. Along the way, each parameter will be explained to demonstrate not only how the sound is created, but also why each adjustment contributes to its final character.
Listening to the Groove in Context
Before designing the LFO pluck, the first step is to listen to the existing musical sequence in SoundBridge: DAW. For this example, we created a short groove using drums, bass, chords, and a few supporting elements, but without the lead sound we will design in this tutorial.
The goal is not to recreate a single preset, but to understand the principles behind this style of sound design. Once these techniques are understood, they can easily be adapted to create unique plucks that fit a wide range of modern electronic music productions
The sequence already establishes the rhythm, harmony, and overall energy of the track, making it easier to determine where the new pluck fits within the arrangement. At this stage, the mix feels balanced, but there is still space for a melodic element that can add movement and become the main focus of the groove.
Listening to the loop before introducing the new sound makes it much easier to understand the role the LFO pluck will play. Rather than filling every available space, it will complement the existing instruments, adding rhythm, texture, and a recognizable melodic character without overwhelming the mix.
With the groove established, the next step is to create the pluck sound from scratch in Vital and shape it into the lead element of the sequence.
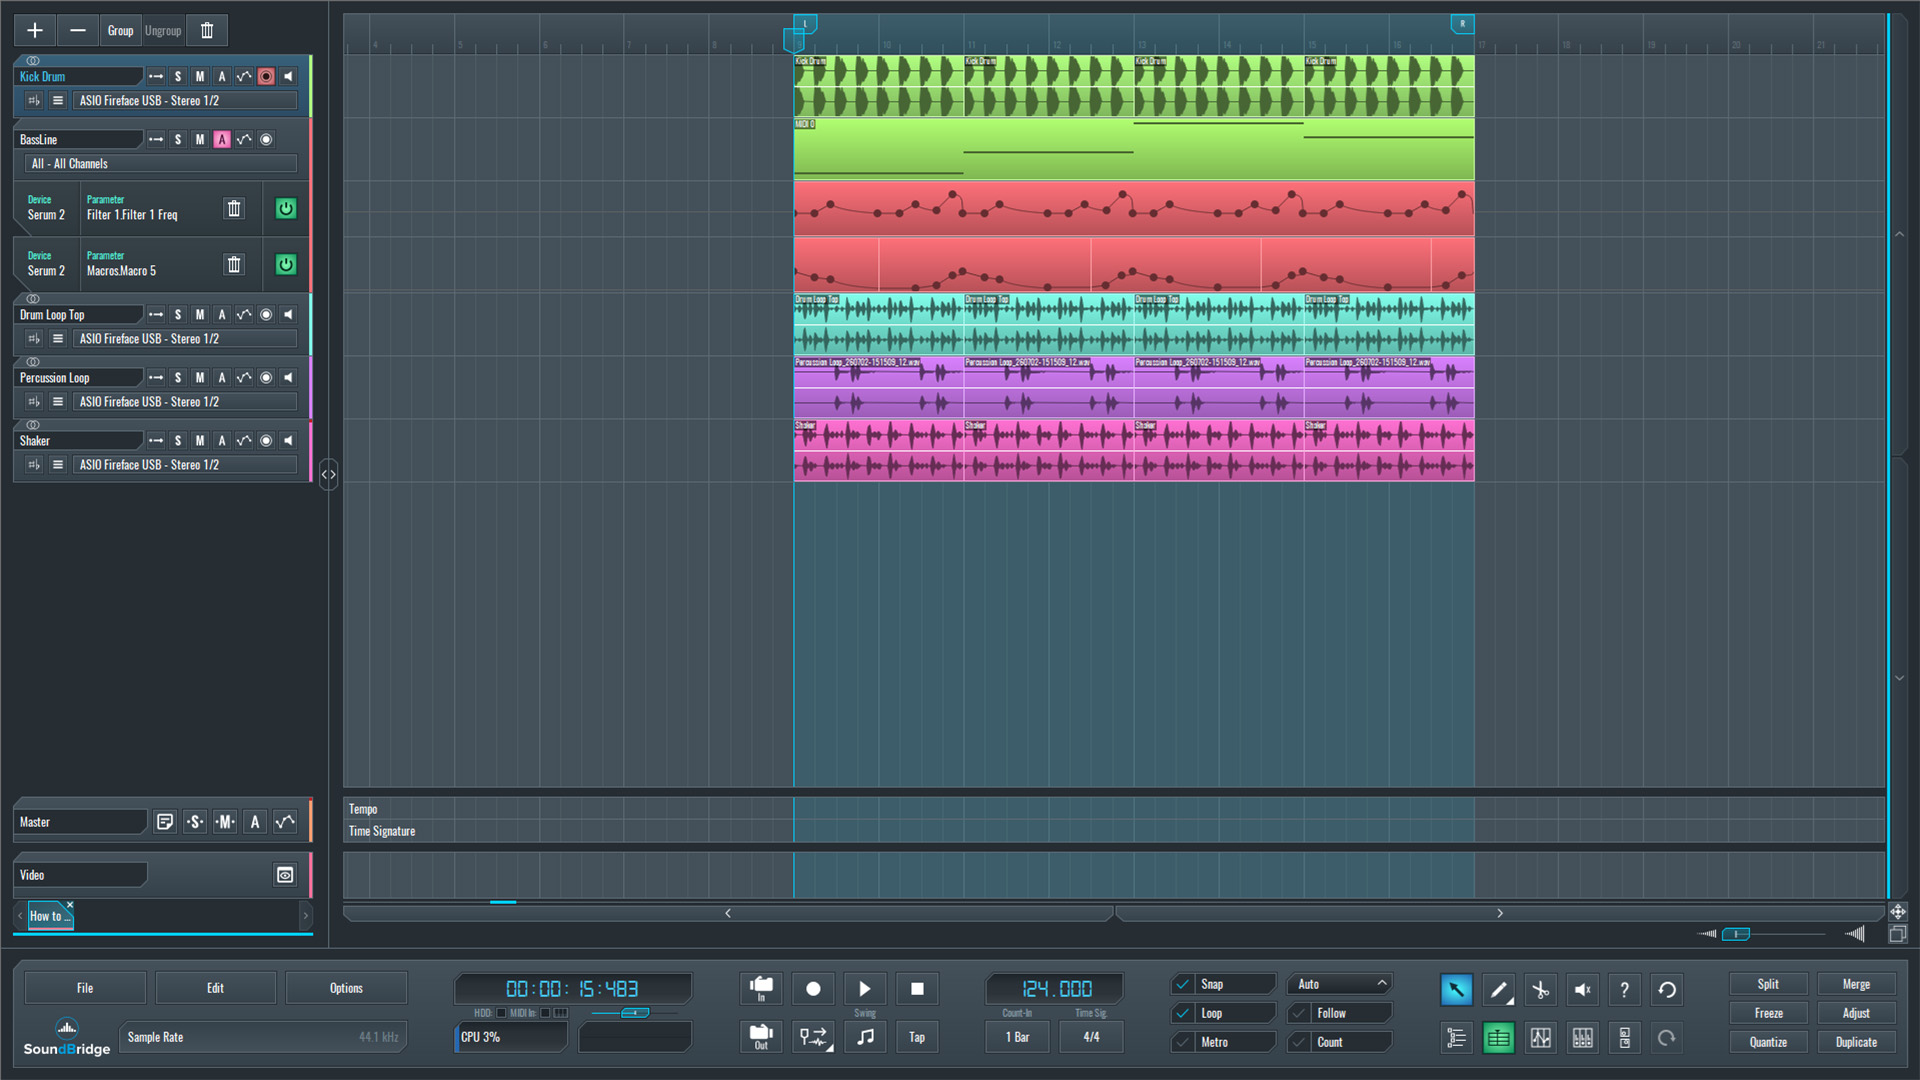
~Full Mix - Without LFO Pluck Sound
Starting with the Default Preset
With the groove established, the next step is opening a fresh instance of Vital using its default preset. Before making any changes, the chord progression created for this sequence is played back through the initialized patch.
At this stage, the sound is very basic and lacks the movement, width, and character needed for a modern LFO pluck. However, it provides the perfect starting point, allowing us to hear exactly how each adjustment shapes the sound throughout the design process.
From here, we'll begin building the patch step by step until it becomes the main melodic element of the groove.
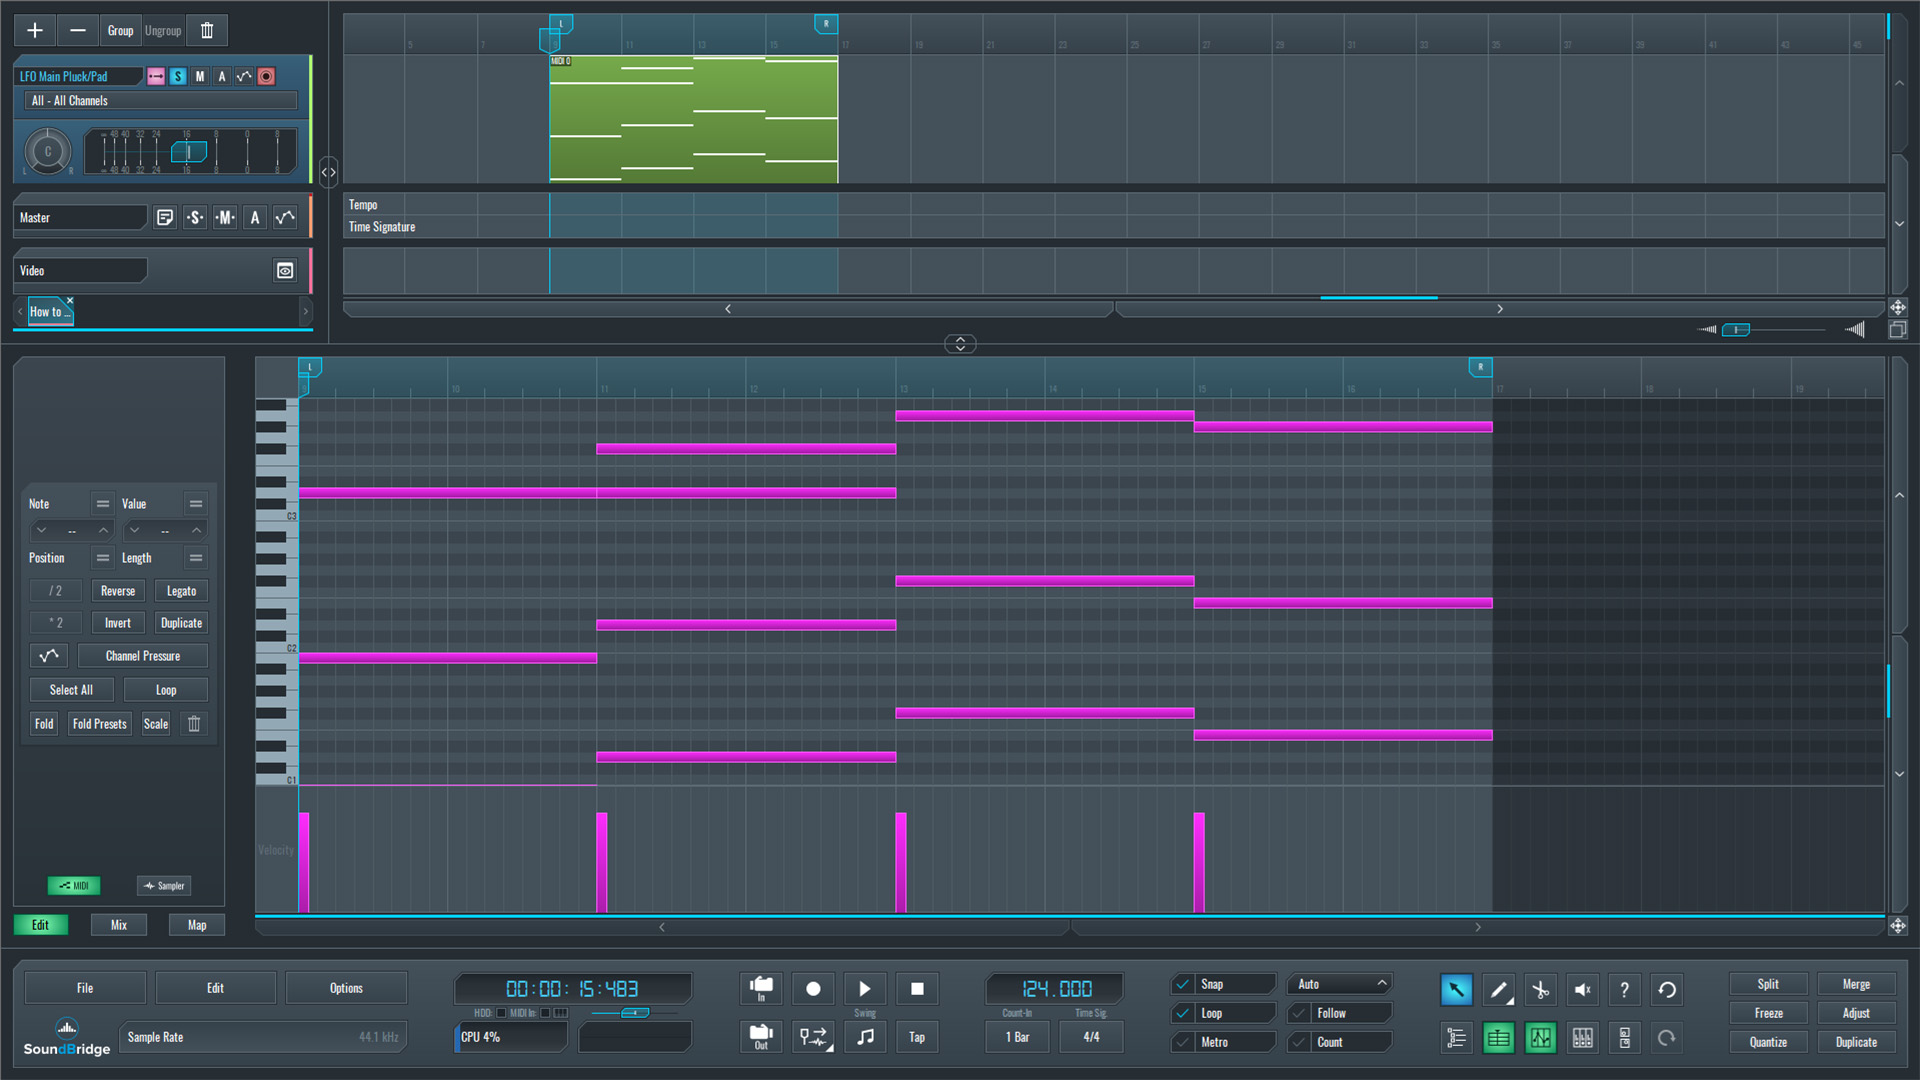
~LFO Pluck - Chord Progression (Vital-Init Sound)
Designing the Core of the Modern LFO Pluck
With the default preset loaded, it's time to shape the sound's foundation. The patch uses two oscillators: We set Oscillator 1 to a saw wave, while Oscillator 2 uses a square-style waveform. We balanced both at roughly 65% level.
To create a wider sound, we configured Oscillator 2 with 8 unison voices and a detune of around 28%. We enabled the sample layer using white noise, with its level reduced to approximately 30% to add a subtle high-frequency texture.
Finally, we activated an Analog 24 low-pass filter and routed both oscillators and the sample layer through it. With these basic settings in place, the patch is ready for envelope shaping and LFO modulation.
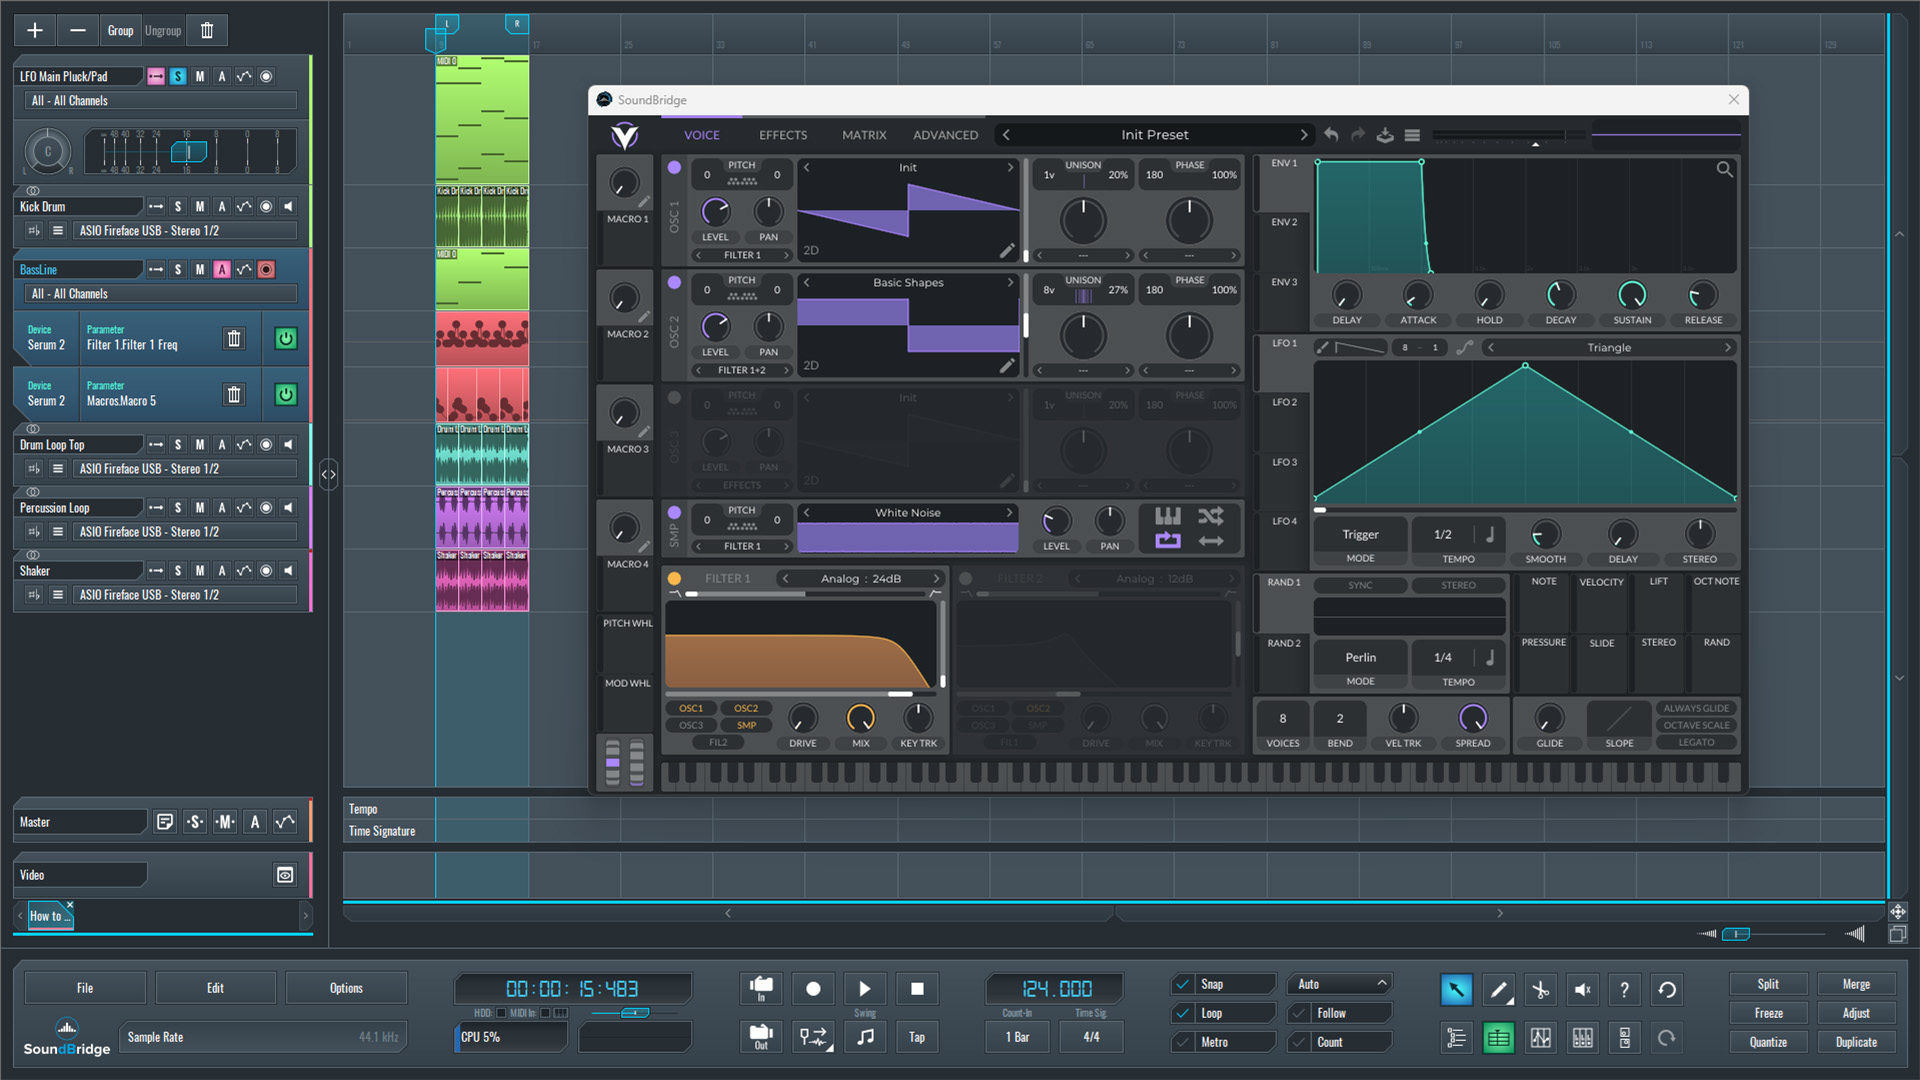
~LFO Pluck - OSC & Filter Settings
Shaping the Sound with LFO Modulation
The next step is adding the modulation that gives this pluck its signature movement.
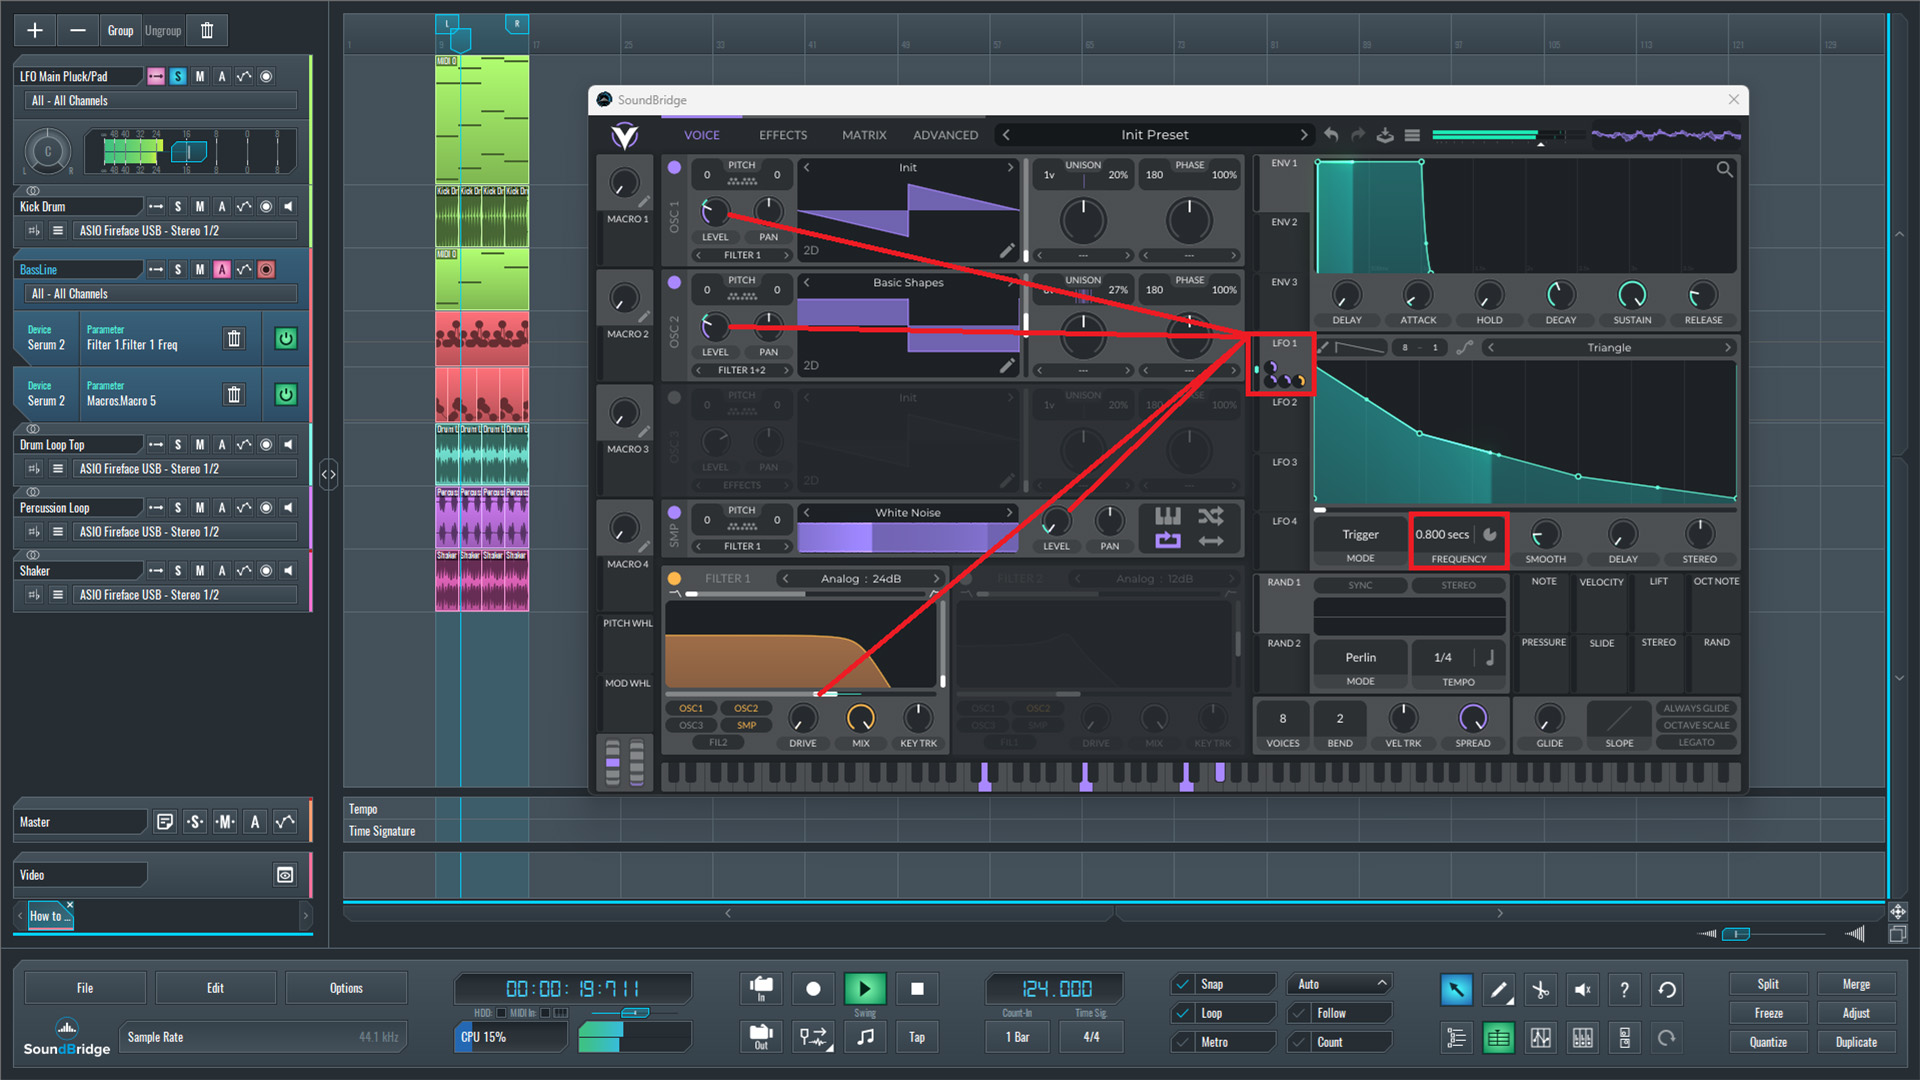
We assigned LFO 1 to the level controls of Oscillator 1, Oscillator 2, and the white noise sample layer. The LFO then creates a rhythmic pulsing effect across the entire sound. We also routed the same LFO to the filter cutoff, with the curve shaped as shown in the example. This produces a smooth pluck envelope.
Instead of using Sync mode, we switched the LFO to Seconds mode and set it to approximately 0.8 seconds, resulting in a more natural response.
With these modulations in place, we played back the chord progression again to hear how the static patch transforms into a modern LFO pluck.
~LFO Pluck - LFO Modulation
Adding Macro Controls
The final step in Vital is assigning the most important parameters to macros, making the sound much easier to control during performance.
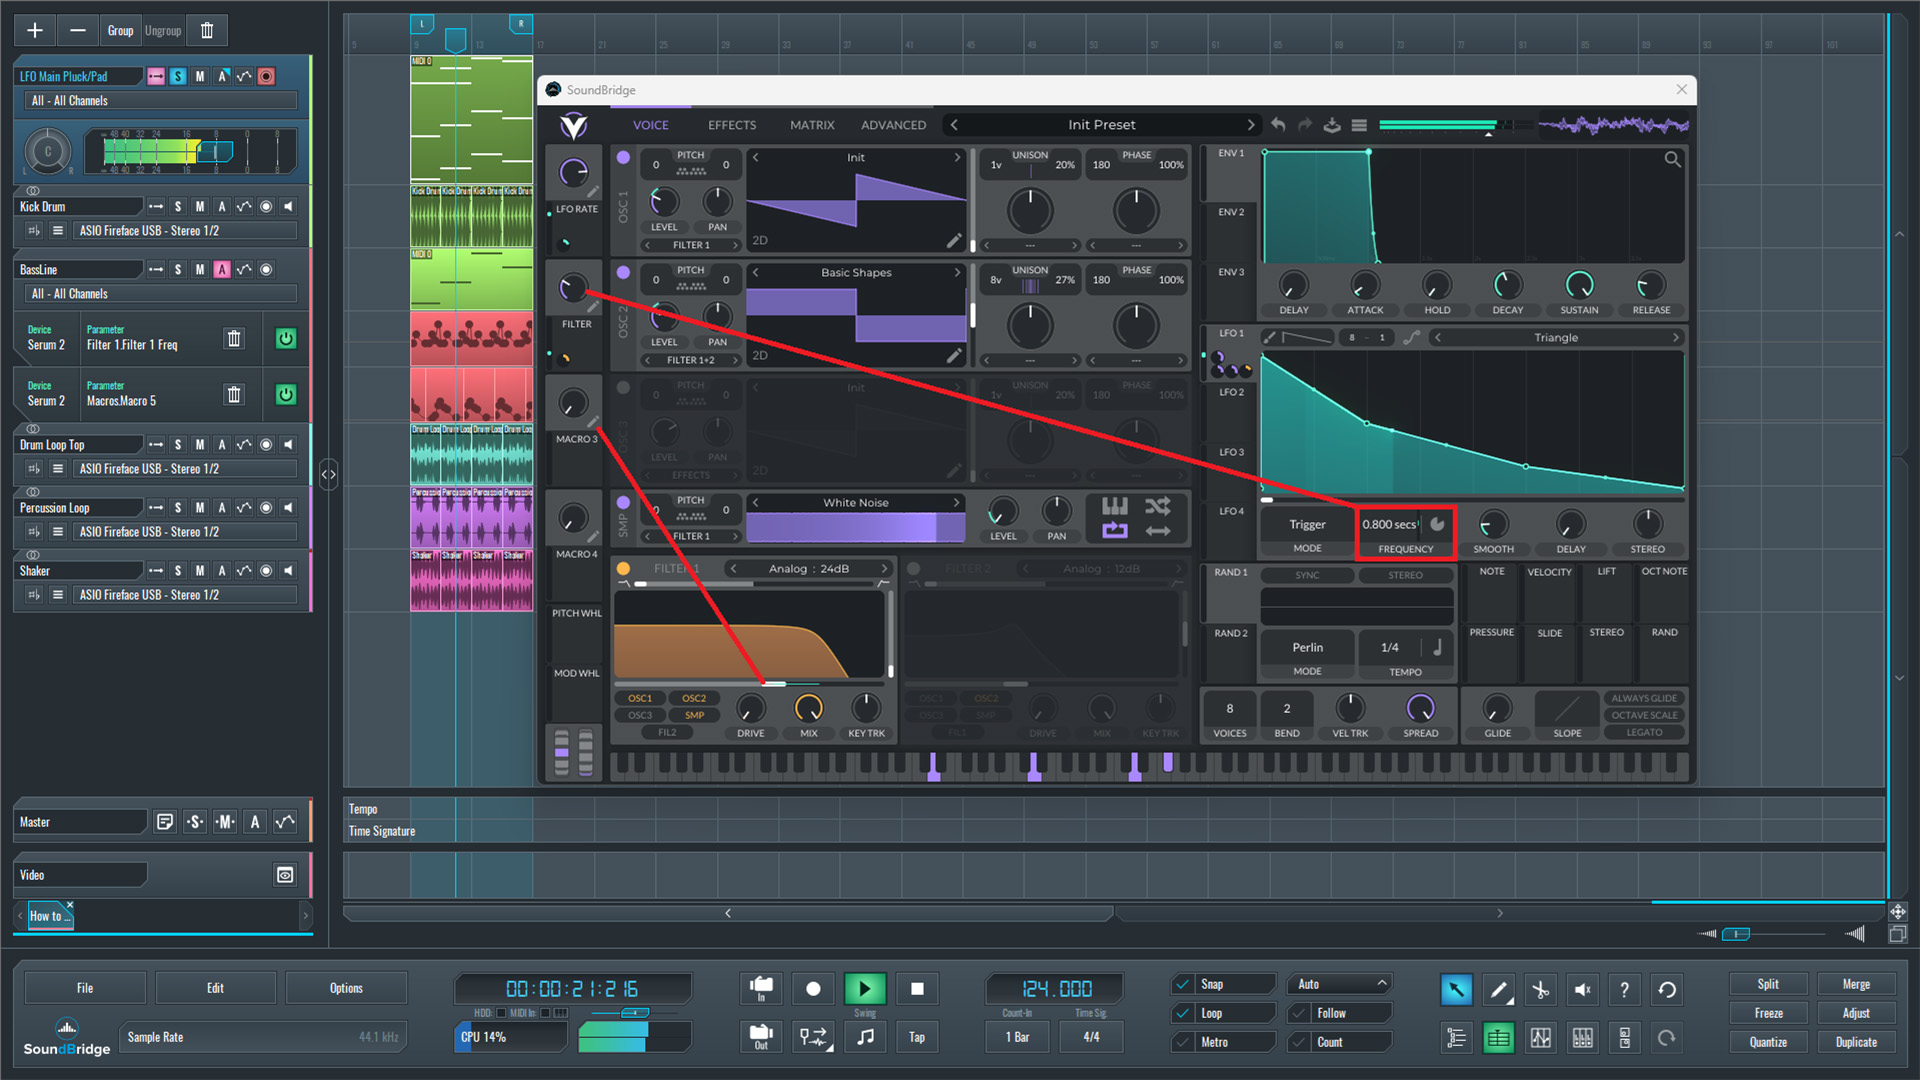
We routed Macro 1 to the Frequency Rate of LFO 1 and renamed it LFO Rate. This allows us to adjust the modulation speed with a single control. With these settings, we can easily create anything from slower rhythmic movement to faster, more energetic pulses.
Next, Macro 2 is assigned to the filter cutoff and renamed Filter. This provides quick access to the sound's brightness. With this macro, we can make the pluck move smoothly between a darker, subtle tone and a brighter, aggressive character.
To demonstrate how these controls affect the patch, we automated both macros independently using random movements. We first played the sound solo. This allowed us to easily hear how changes to the LFO rate and filter cutoff continuously reshape the pluck's character. After that, we placed it back into the full mix.
~LFO Pluck - Macro Controls (LFO & Filter Cutoff Mod.) Automation
Finalizing the Modern LFO Pluck Sound Design
With the core patch complete, the final step is adding the finishing touches using Vital's built-in effects. A combination of reverb, EQ, and an additional filter was applied. We added these FX to give the pluck more depth, clarity, and a smoother overall character.
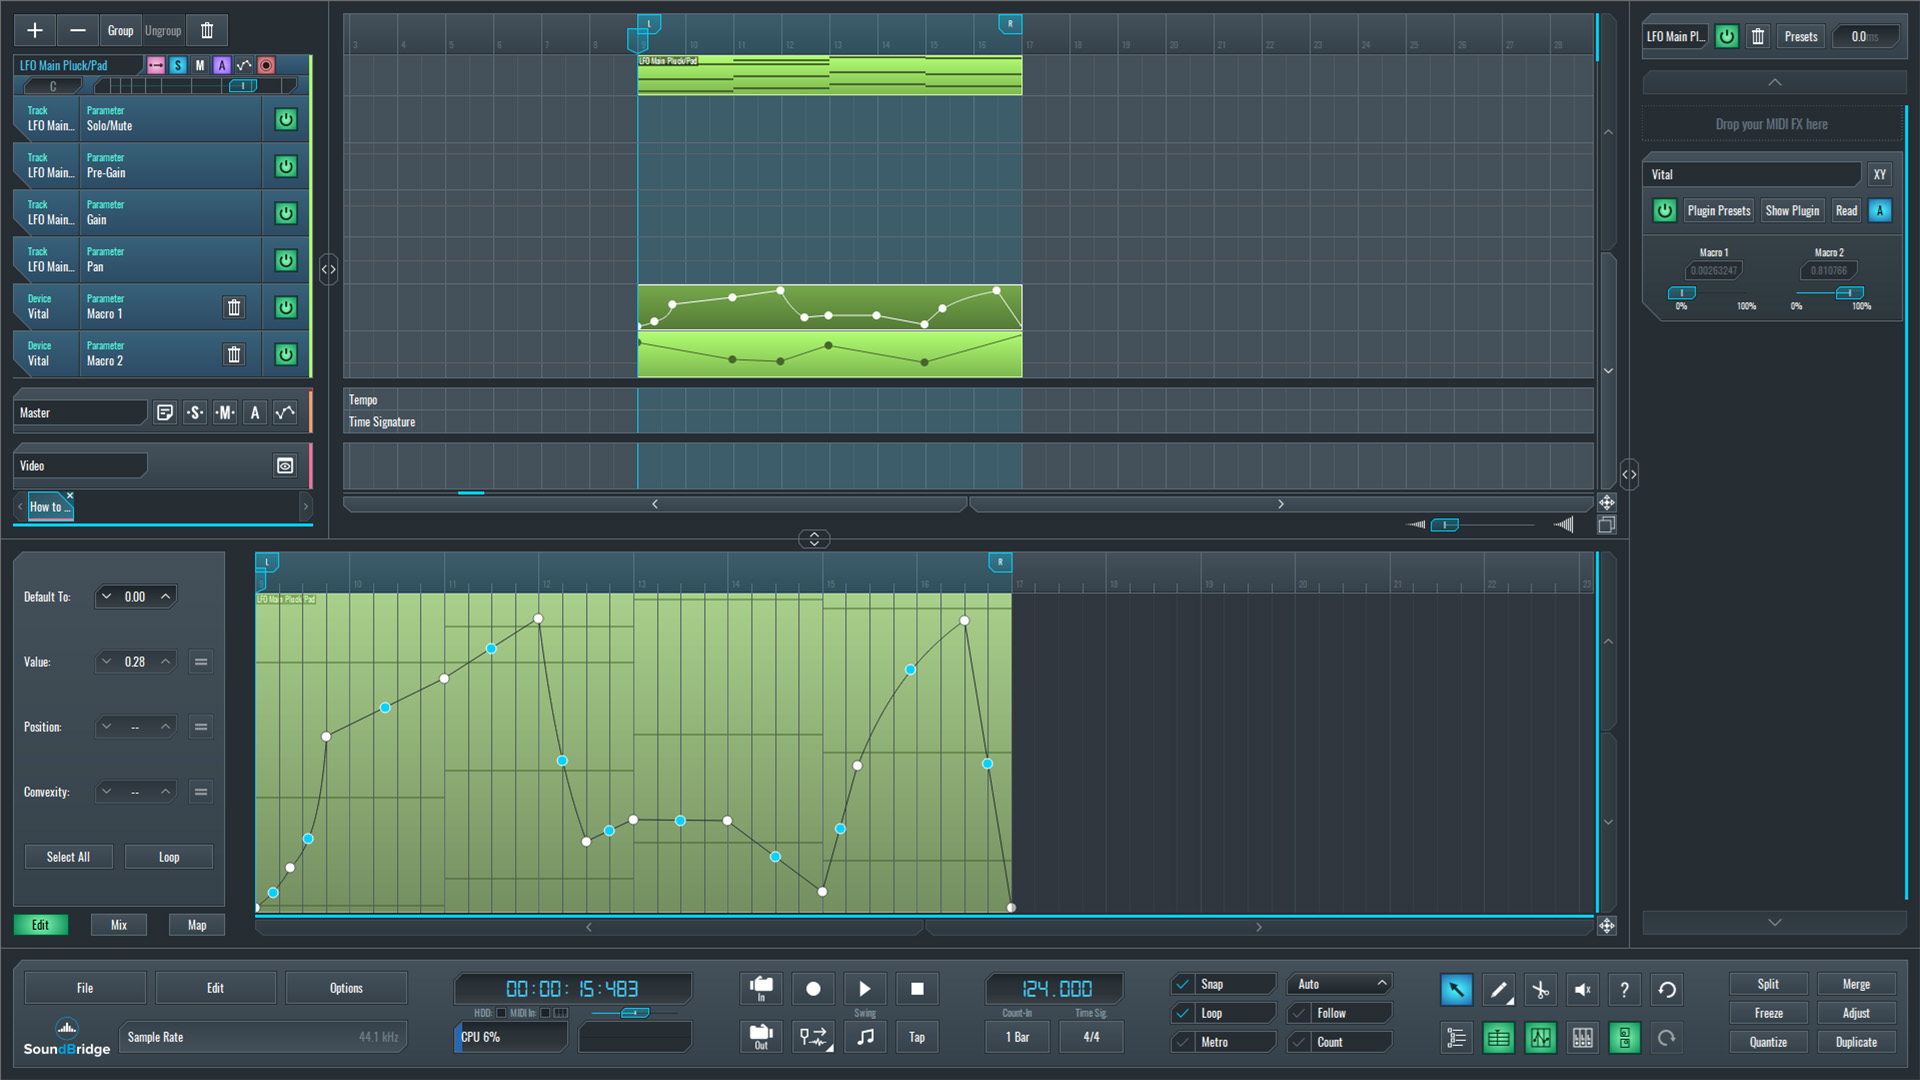
After shaping the sound, the final automation for both macros was written. By automating the LFO Rate and Filter controls throughout the progression, the pluck becomes much more expressive and evolves continuously rather than repeating the exact same movement.
We first played the completed chord progression solo. This makes it easy to hear how the effects and macro automation influence the sound. Finally, we played back the pluck in the context of the full mix. Here we hear how it naturally blends with the groove and becomes the main melodic element of the arrangement.
~LFO Pluck - Fully Processed (Solo)
~Full Mix - With LFO Pluck Sound
Modern LFO Pluck Sound Design in a Nutshell
Designing a modern LFO pluck is not always about using complex synthesis techniques. Most of the time, it's just about combining a few well-chosen elements in the right way. Throughout this tutorial, a simple patch was gradually transformed into a wide, animated lead. We created this by shaping the oscillators, adding filter modulation, introducing LFO movement, and assigning practical macro controls.
One of the biggest advantages of this workflow is its flexibility. The two macro controls make it easy to adapt the pluck to different arrangements. You adjust the filter brightness and the LFO speed.
The final step is listening to the completed patch in the context of the full mix. While the sound is interesting on its own, its real purpose is to complement the groove and provide a melodic focal point without overwhelming the other instruments. Small adjustments to modulation and effects can make a significant difference in how naturally the pluck sits within the arrangement.
The key takeaway is that modern lead sounds often rely on movement rather than complexity. Combining simple synthesis with thoughtful modulation and automation enables the creation of expressive pluck sounds. These sounds can be evolved so they remain interesting throughout the entire track.
If you liked this article, here are some more on the same subject:
MASTER MUSIC PRODUCTION
Expert-led courses designed to take you from fundamentals to finished tracks.

HOUSEFrom bouncy bass and solid kicks, this course teaches you the most modern House music production techniques needed to succeed and stand out.

TRAPQuit sounding like generic Trap and produce something World with hints of the Far East. Create ethnic soundscapes to put your Trap ahead of the curve.

AMBIENTProduce relaxing, sophisticated psy-influenced ambient. Psychedelic and relaxing to listen to, create meditative soundscapes to put your listeners in Zen.