

How to Optimize DAW Performance for Producers
Last Edited: Jul 2, 2026
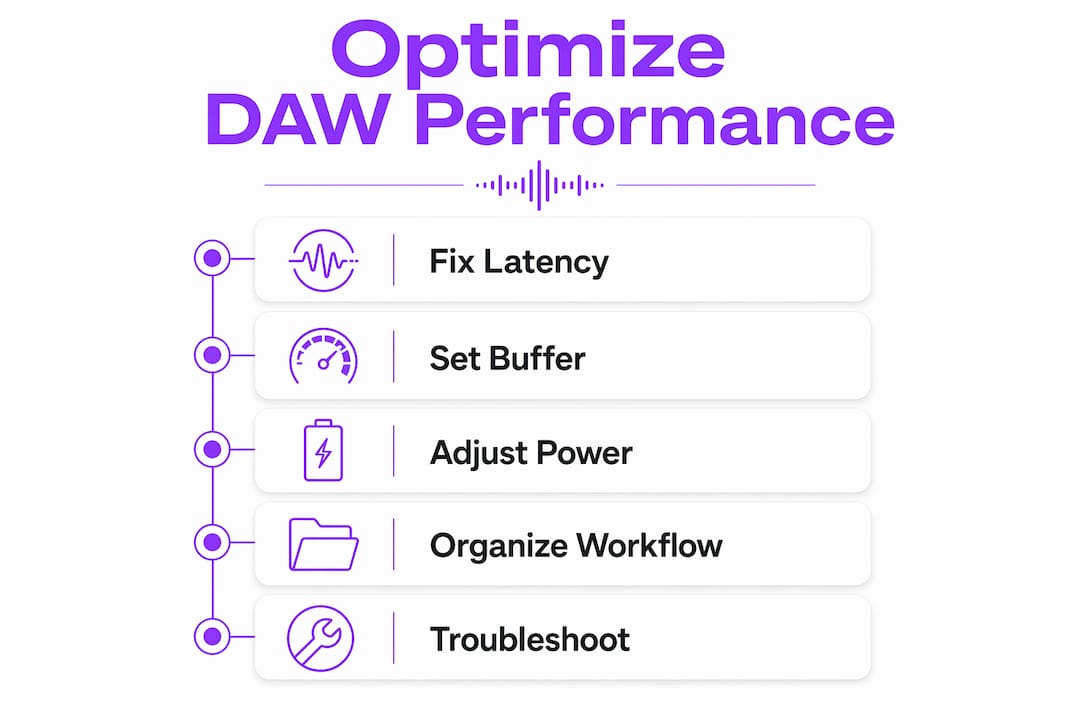
DAW performance optimization is the practice of configuring your system settings, driver behavior, and session habits to keep your digital audio workstation running without glitches, dropouts, or lag. Every click, pop, or freeze you hear during a session is a solvable problem. The techniques in this article cover Windows power settings, buffer size management, session organization, and troubleshooting. Whether you are tracking vocals at 2 a.m. or mixing a 96-track project, these steps will help you get stable, low-latency audio every time you hit record.
What System Settings Most Affect DAW Performance?
The single biggest factor in DAW stability on Windows is not your CPU speed. It is how your operating system manages power and drivers in real time. Two settings fix most audio glitches before you even open your project.
First, set your Power Plan to High Performance. The default Balanced plan throttles your CPU clock speed to save energy. That throttling causes micro-stutters that show up as clicks and pops in your audio. High Performance keeps your processor at full speed, giving your DAW the consistent CPU availability it needs for real-time processing.
Second, disable USB selective suspend. Windows uses this feature to cut power to USB devices during idle periods. Your audio interface connects over USB in most home studio setups. When Windows suspends that connection mid-session, you get dropouts. Turning off USB selective suspend removes that risk entirely.
The third tweak is less obvious but equally powerful. Disable your GPU’s integrated audio driver, such as NVIDIA’s nvhda64v.sys. This driver is a primary cause of high Deferred Procedure Call (DPC) latency. DPC latency is the delay introduced when Windows handles hardware interrupts. A single driver causing spikes of 500 microseconds or more produces audible dropouts even when your CPU meter reads low. Removing the GPU audio driver from the equation often eliminates clicks that no other fix could solve.
Pro Tip: Disable Wi-Fi and Bluetooth during recording sessions. Wireless activity causes random audio clicks and crackles in sensitive recording environments, even when you are not actively browsing.
| Windows tweak | What it fixes | How to apply |
|---|---|---|
| High Performance Power Plan | CPU throttling and micro-stutters | Control Panel > Power Options |
| Disable USB selective suspend | Audio interface dropouts | Power Options > Advanced Settings |
| Disable GPU audio driver | DPC latency spikes and clicks | Device Manager > Sound controllers |
| Disable Wi-Fi and Bluetooth | Random crackles during recording | Device Manager or physical switch |
| Disable background services | CPU contention and latency spikes | Task Manager > Startup or msconfig |
How Does Buffer Size Affect Latency and Stability?
Buffer size is the number of audio samples your interface collects before sending them to your DAW for processing. It is the single most direct control you have over the tradeoff between latency and stability.
Low buffer sizes of 32–128 samples are appropriate for tracking. At 128 samples with a 48kHz sample rate, your round-trip latency sits well under 10 milliseconds. That is below the threshold where most musicians notice a delay between playing and hearing themselves. The tradeoff is that your CPU has less time to process each audio chunk so that any heavy plugin can cause a dropout.
Higher buffer sizes of 256–2,048 samples are the right choice during mixing. Your CPU gets more processing time per chunk, which means you can run more plugins without glitches. Latency increases, but that does not matter when you are not performing live into a microphone.
The mistake most producers make is leaving their buffer at a low tracking setting when they move into mixing. That forces the CPU to work harder than necessary for the entire mix session. Switching buffer size between workflow phases is one of the fastest ways to improve DAW efficiency without touching any hardware.
| Phase | Buffer size range | Key benefit | Key risk |
|---|---|---|---|
| Tracking | 32–128 samples | Minimal monitoring latency | CPU overload with heavy plugins |
| Mixing | 256–2,048 samples | Stable plugin-heavy sessions | Higher latency (not relevant for mixing) |
| Mastering | 512–2,048 samples | Maximum headroom for processing | Same as mixing phase |
What Workflow Habits Speed up Your DAW Sessions?
Technical settings only take you so far. Workflow friction causes more delay than hardware limits in most home studio setups. Organizational practices can save 20–30 minutes per session, and that time compounds across hundreds of projects.
Start with naming conventions and color coding. Every track should have a clear name and a consistent color before you record a single note. When you open a session three weeks later, you will find your kick drum and your lead vocal in under two seconds instead of scanning 40 unnamed audio tracks. This sounds trivial until you are on a deadline.
Templates are your second biggest productivity lever. A well-built template loads your session with your standard routing, your preferred monitoring chain, and your go-to utility plugins already in place. The key is keeping templates lean. Template bloat occurs when you load every plugin you own into the default session. Excessive always-on plugin chains increase load times and raise your baseline CPU usage before you have recorded a single note. Load heavy processors only when a specific track needs them.
Keyboard shortcuts are the third pillar of a fast workflow. Mastering five core shortcuts first is more effective than trying to learn every command at once. Keyboard shortcuts reduce common editing tasks from roughly 47 seconds to roughly 9 seconds. That is not a small gain. Pick the five operations you perform most often, such as splitting clips, muting tracks, zooming in and out, and bouncing regions, and drill those until they are automatic.
Here are the session organization practices that make the biggest difference:
- Name every track before recording, not after
- Assign a consistent color to each instrument group (drums, bass, keys, vocals)
- Keep your template to 20 tracks or fewer with only utility plugins loaded
- Store all project files, samples, and renders in a single named project folder
- Use track folders or groups to collapse sections you are not actively editing
- Archive old versions with date stamps instead of overwriting them
Pro Tip: Build a session organization checklist and run it at the start of every project. Professional session organization is a force multiplier that enables accurate monitoring and reproducible technical decisions across every session.
How Do You Troubleshoot Common DAW Performance Problems?
The most common troubleshooting mistake is watching your CPU meter and assuming a low reading means everything is fine. Real-time audio stability depends on DPC latency, not overall CPU load. A driver causing latency spikes of 500 microseconds or more will produce audible dropouts even when your CPU sits at 20%. Use a dedicated latency measurement tool to identify the offending driver, not just the Windows Task Manager.
Separating your system files, project files, and sample libraries across multiple NVMe SSDs removes a major source of I/O bottlenecks. When your operating system, your active project, and your sample library all compete for the same drive, read speeds slow down and plugin samples stutter. Dedicated drives for each role solve this without any software changes.
AI-based plugins deserve special attention. AI pitch correction and noise reduction plugins can each consume 15–30% of your CPU. Running two or three simultaneously at a low buffer size is a reliable way to crash a session. Freeze tracks that use heavy AI processing, so the CPU renders them to audio and stops recalculating in real time.
Common mistakes that cause DAW instability:
- Leaving Wi-Fi enabled during recording, which causes random latency spikes
- Running multiple AI plugins simultaneously at low buffer sizes
- Ignoring DPC latency and focusing only on CPU percentage
- Storing all files on a single drive, including the OS, projects, and samples
- Never updating audio interface drivers, which accumulates compatibility issues over time
- Skipping the step of isolating new plugins before adding them to a live session
When a new plugin causes glitches, isolate it first. Load it in a blank session with no other plugins running. If it causes issues there, the plugin is the problem. If it runs clean, the issue is plugin interaction or CPU load in your main session. Isolation saves hours of guesswork.
Key Takeaways
Optimizing DAW performance requires fixing DPC latency at the driver level, managing buffer size by workflow phase, and building lean, organized sessions from the start.
| Point | Details |
|---|---|
| Fix DPC latency first | Disable GPU audio drivers and wireless adapters before adjusting any other setting. |
| Match buffer size to task | Use 32–128 samples for tracking and 256–2,048 samples for mixing to balance latency and stability. |
| Keep templates lean | Load only utility plugins in your default template; add heavy processors per track as needed. |
| Master five shortcuts | Drilling five core keyboard shortcuts cuts common editing time from 47 seconds to 9 seconds. |
| Separate your storage | Store OS, project files, and sample libraries on separate NVMe SSDs to eliminate I/O bottlenecks. |
The Part Most Producers Skip Entirely
After years of working with DAW setups across home studios and professional rooms, the pattern I keep seeing is the same. Producers spend hours researching the best plugins and zero hours on their system configuration. They buy more RAM when the real problem is a GPU audio driver they never knew existed.
The DPC latency issue is the clearest example. You can have a fast machine and still get clicks and pops on every take because one driver is misbehaving. The fix takes five minutes in Device Manager. But most producers never find it because they are looking at the CPU meter instead of measuring actual driver latency.
Workflow organization is the other half of this equation, and it gets even less attention. I have seen producers spend 20 minutes hunting for a sample in an unnamed folder when a simple naming convention would have found it in seconds. That friction adds up. It breaks your creative focus at exactly the wrong moment.
My honest recommendation: spend one session doing nothing but system maintenance and template building. Set your Power Plan, disable the GPU audio driver, build a clean template with essential DAW features already configured, and drill your five most-used shortcuts. You will feel the difference on every session after that. The technical side of audio production is not glamorous, but getting it right is what lets the creative side breathe.
— Wake
SoundBridge and Your DAW Workflow
SoundBridge is built for producers who want high-performance audio without fighting their setup. The platform supports sample rates up to 192kHz, zero-latency remote tracking, and bi-directional plugin control, giving you the technical foundation to apply every optimization covered here without hitting a ceiling.

If you are still building your understanding of what a DAW can do, the complete DAW overview on the SoundBridge site covers everything from signal flow to session structure. For producers ready to push further, the audio editing techniques guide shows how a well-configured system translates directly into faster, cleaner edits. SoundBridge gives you the tools. These optimizations make sure your system keeps up.
FAQ
What is DPC latency and why does it matter for audio?
DPC (Deferred Procedure Call) latency is the delay caused when Windows handles hardware driver interrupts. A single driver causing spikes above 500 microseconds produces audible clicks and dropouts even when overall CPU usage is low.
What buffer size should I use for recording vocals?
Use a buffer size of 32–128 samples for tracking to keep monitoring latency below the threshold where singers notice a delay. Switch to 256–2,048 samples when you move into mixing.
How do I stop audio clicks and pops in my DAW?
Disable your GPU’s integrated audio driver in Device Manager, turn off Wi-Fi and Bluetooth during sessions, and set your Windows Power Plan to High Performance. These three steps resolve the majority of click-and-pop issues.
Does adding more RAM improve DAW performance?
More RAM helps when your sample libraries exceed the available memory, but most DAW stability issues stem from DPC latency and driver conflicts, not a RAM shortage. Fix your driver configuration before upgrading hardware.
How do I speed up DAW session load times?
Keep your default template lean, with only utility plugins loaded; store your sample libraries on a dedicated NVMe SSD; and avoid loading resource-heavy plugins until a specific track requires them.
Recommended
MASTER MUSIC PRODUCTION
Expert-led courses designed to take you from fundamentals to finished tracks.

HOUSEFrom bouncy bass and solid kicks, this course teaches you the most modern House music production techniques needed to succeed and stand out.

TRAPQuit sounding like generic Trap and produce something World with hints of the Far East. Create ethnic soundscapes to put your Trap ahead of the curve.

AMBIENTProduce relaxing, sophisticated psy-influenced ambient. Psychedelic and relaxing to listen to, create meditative soundscapes to put your listeners in Zen.