

How to Use Plugins for Music Production: 2026 Guide
Last Edited: Jul 20, 2026

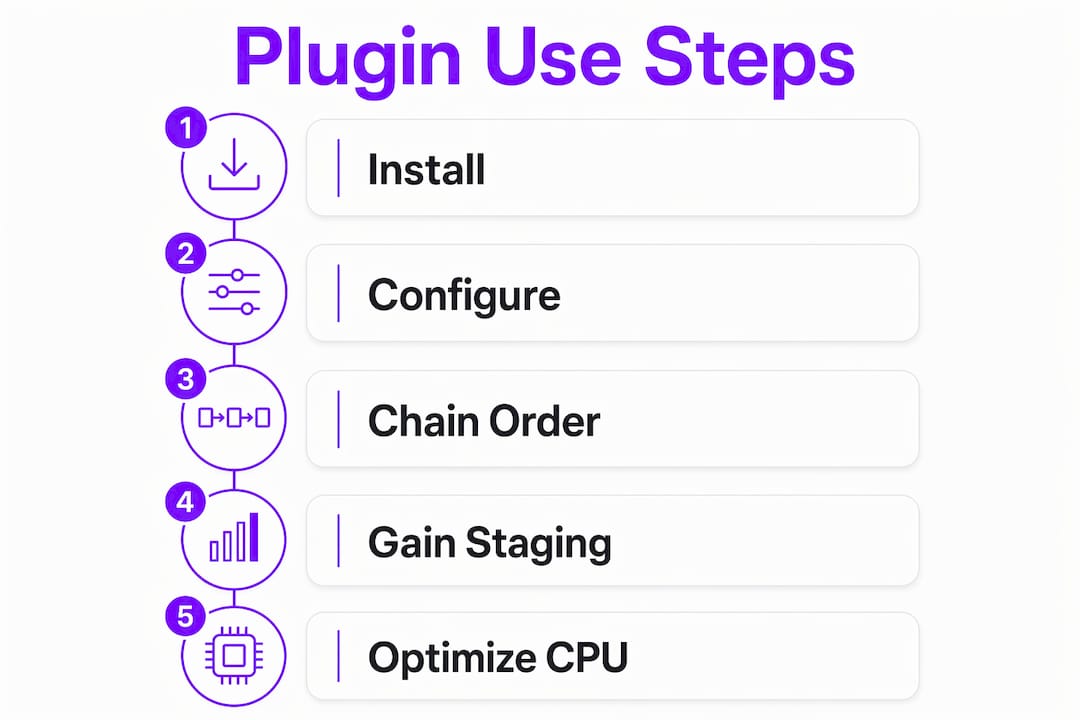
Audio plugins are software tools inserted into a digital audio workstation (DAW) to process or generate audio signals. Knowing how to use plugins effectively is the difference between a muddy, CPU-choked session and a mix that breathes with clarity and character. Plugins fall into three main categories: effects (EQ, compression, reverb), virtual instruments (synthesizers, samplers), and utilities (gain trimmers, metering tools). Mastering them means understanding plugin chain order, gain staging to the -18 dBFS RMS standard, and CPU management strategies to keep your sessions running clean. This guide covers every step, from installation to troubleshooting, so that you can build better sounds faster.
How to Use Plugins: Installation and Configuration
Getting plugins into your DAW correctly is the foundation of every great session. Skip this step, and you spend hours chasing compatibility errors instead of making music.

Choosing the Right Plugin Format
VST3 is the preferred format in 2026 over VST2 because of better CPU efficiency, improved MIDI handling, and automatic suspension when idle. That automatic suspension alone can save meaningful CPU headroom in large sessions. On Mac, AU (Audio Units) is the native format and equally reliable. AAX is required for Pro Tools users. When you have a choice, always install VST3.
Step-By-Step Installation Process
Follow these steps for a clean install every time:
- Download the installer from the plugin developer’s official website.
- Run the installer and select the correct format for your DAW (VST3, AU, or AAX).
- Note the installation folder. VST3 plugins typically install to
C:\Program Files\Common Files\VST3on Windows or/Library/Audio/Plug-Ins/VST3on Mac. - Open your DAW and navigate to the plugin manager or preferences panel.
- Run a plugin scan to detect newly installed plugins.
- Activate the plugin if a license or serial number is required.
Initial Configuration Basics
Once your plugin appears in the DAW, open it on a track and explore the preset library. Presets are starting points, not finished sounds. Always adjust parameters to fit your specific track rather than relying on factory settings. For virtual instruments, assign MIDI input so your keyboard or controller triggers the plugin correctly. Check the plugin’s output level before committing it to a chain.
Pro Tip: Always keep your DAW and plugins updated. Version mismatches between a DAW and a plugin are the most common cause of crashes and scanning failures.
What Is the Optimal Plugin Chain Order for Mixing?
The most effective plugin chain order is noise gate, corrective EQ, compression, creative EQ or saturation, then time-based effects like reverb and delay placed on auxiliary sends. This sequence preserves signal clarity at every stage and prevents each processor from fighting the one before it. Changing this order fundamentally changes the sound, and not always for the better.
Why Each Position Matters
A noise gate sits first because it removes unwanted room noise and bleed before any processor amplifies it. Corrective EQ follows to remove problem frequencies, giving the compressor a cleaner signal to work with. Compression then controls dynamics without reacting to harsh peaks that EQ has already removed. Creative EQ and saturation come after compression because they shape the tonal character of an already controlled signal. Time-based effects go last, or better yet, on a send channel, so reverb and delay tail off naturally without getting compressed or distorted.
| Plugin Category | Chain Position | Primary Function |
|---|---|---|
| Noise gate | 1st | Remove bleed and background noise |
| Corrective EQ | 2nd | Fix problem frequencies |
| Compressor | 3rd | Control dynamics |
| Creative EQ/saturation | 4th | Shape tone and add harmonic color |
| Reverb/delay | 5th (send) | Add space and depth |
Using Gain Utilities Between Stages
Professionals use gain utility plugins between major processors to maintain consistent loudness and objectively evaluate each plugin’s effect. Without volume matching, your ears will always prefer the louder signal, which fools you into thinking a plugin sounds better than it does. A simple trim plugin set to compensate for any gain added or removed by the previous processor solves this. This is one of the most underused and most valuable techniques in mixing.
Pro Tip: Place reverb and delay on send channels rather than directly on instrument tracks. This keeps the dry signal clean and gives you independent control over the wet effect level.
How to Manage CPU Performance With Plugins in Large Sessions
CPU load does not scale evenly across plugins. Complex synthesizers can disproportionately spike CPU usage compared to simpler effect plugins, and oversampling multiplies that load fast. A 4x oversampling setting on a single plugin quadruples the CPU demand for that instance. Understanding this helps you make smarter choices before your session starts dropping out.
Buffer Size and Oversampling Strategy
Buffer size directly controls the tradeoff between latency and stability:
- Tracking sessions: Use a buffer size of 32–128 samples to minimize latency while recording live instruments or vocals.
- Mixing sessions: Raise the buffer to 1,024–2,048 samples for stability when running many plugins simultaneously.
- Oversampling: Enable it only on plugins where aliasing distortion is audible. Applying it globally is one of the fastest ways to crash a session.
Freezing vs. Rendering Tracks
Track freezing temporarily frees the CPU while allowing you to unfreeze and edit later. Rendering permanently prints audio to a file, which is best for final archiving. During production, freeze heavily loaded instrument tracks first. Render only when you are certain no further edits are needed. This two-step approach keeps your workflow flexible without sacrificing performance.
Windows producers should also check power settings. Setting the power plan to “High Performance” and turning off CPU C-States prevents the latency spikes that cause audio dropouts under heavy plugin load. This is a system-level fix that costs nothing and makes a real difference. For a deeper look at platform-specific performance, the Mac vs. Windows comparison from SoundBridge covers workflow and stability in detail.
Pro Tip: Use shared reverb sends instead of placing individual reverb instances on every track. One send reverb serving multiple tracks is more CPU-efficient and creates a more cohesive sense of space in the mix.
How to Do Gain Staging and Level Matching With Plugins
Gain staging is the practice of controlling signal levels at every point in the signal chain to keep audio clean and prevent distortion. The professional standard targets an average RMS of -18 dBFS per track, with peaks near -6 dBFS. This headroom gives every plugin in your chain room to work without clipping.
Clip Gain vs. Fader Gain
These two tools serve different purposes:
- Clip gain: Adjusts the level of audio before it hits any plugin. Use it to normalize inconsistent recordings before the chain begins.
- Fader gain: Controls the level after all plugins have processed the signal. Use it to balance tracks in the mix without affecting plugin behavior.
- Output gain matching: After each plugin, check that the output level matches the input level. If a compressor reduces gain by 4dB, add 4dB of makeup gain to compensate before the next plugin.
Loudness bias is real. When one signal is louder than another, your brain perceives it as better sounding. Volume-match every plugin in your chain, and you will make more accurate decisions about whether a plugin is actually improving your sound.
Distortion and unwanted saturation appear when levels hit plugins too hot. Many analog-modeled plugins are calibrated to behave correctly at an input of -18 dBFS. Feed them a signal peaking at -3dBFS, and you get unintended harmonic distortion that compounds through every stage. Proper gain staging is not just about avoiding clipping. It is about making every plugin perform as its designer intended. For a full breakdown of mixing fundamentals, SoundBridge’s audio mixing step-by-step guide is worth your time.
Common Plugin Mistakes and How to Fix Them
Applying plugins only when a problem is identified yields better results than stacking processors by habit. The most common plugin mistakes are predictable, and fixing them is straightforward once you know what to look for.
- Overloading the chain: Every plugin adds CPU load and potential phase issues. Remove or bypass any plugin that is not solving a specific problem. If you cannot hear it, it should not be there.
- Ignoring gain staging: Skipping level matching between plugins causes loudness bias and distortion. Set clip gain before the chain, then match output levels after each processor.
- Using presets unthinkingly: Presets are starting points that need customization. Always A/B test your adjusted settings against the preset to confirm your changes are improvements.
- Global oversampling: Enabling oversampling on every plugin simultaneously overloads the CPU. Apply it selectively, only where aliasing is audible.
- Skipping bypass checks: Regularly bypass your entire plugin chain and compare it to the processed signal. This keeps you honest about whether your processing is actually adding value.
The music production world in 2026 rewards producers who treat plugins as surgical tools rather than decorations. Quality over quantity is the rule that holds across every genre and format. If you want to see how producers are using their mixes to build audiences, short-form video promotion is now a major part of that picture.
Key Takeaways
Effective plugin use comes down to three fundamentals: correct chain order, consistent gain staging at -18dBFS RMS, and disciplined CPU management through freezing, buffer control, and selective oversampling.
| Point | Details |
|---|---|
| Install VST3 format first | VST3 suspends automatically when idle, saving CPU and improving MIDI handling. |
| Follow the correct chain order. | Gate, corrective EQ, compression, creative EQ, then time-based effects on sends. |
| Gain stage to -18dBFS RMS | Keep track averages at -18 dBFS, with peaks near -6 dBFS, to prevent distortion. |
| Freeze before rendering | Freeze heavy tracks during production; render only when edits are finalized. |
| Remove unused plugins | Every idle plugin costs CPU. Bypass or delete anything not solving a clear problem. |
What I Have Learned From Years of Building Plugin Chains
The biggest shift in my approach came when I stopped asking “what plugin should I add?” and started asking “what problem am I solving?” That one question cut my average plugin count per track by more than half, and my mixes got cleaner immediately.
One quality plugin used well beats stacking five mediocre ones every time. I spent years collecting plugins before I realized the ones I reached for in every session were the same six or seven. The rest were noise, both literally and creatively. Now I build chains from the signal’s actual needs: is there a frequency problem? Is the dynamic range too wide? Does it need space? Each question maps to a single plugin, placed in the correct position.
CPU management used to feel like a technical chore. Now I treat it as part of the creative process. Freezing a track the moment I am happy with its sound keeps the session moving. It forces a kind of commitment that actually improves decision-making. The SoundBridge philosophy of keeping workflows clean and performance high aligns with how I think about this. A session that runs well lets you focus on music, not troubleshooting.
— Wake
SoundBridge and Your Plugin Workflow
SoundBridge is built for producers who want their plugin workflow to work without friction. The platform supports VST3 plugins natively, with a plugin manager that scans and organizes your library fast.

SoundBridge’s DAW environment gives you bi-directional plugin control, CPU monitoring built into the session view, and a signal chain interface that makes gain staging visible at every stage. Whether you are tracking at 32 samples of latency or mixing a 200-track session at 2,048, the platform adapts. SoundBridge also offers tutorials and community resources that take you from plugin basics to advanced chain design. If you are ready to build mixes that hold up at any volume, SoundBridge gives you the tools to get there.
FAQ
What plugin format should I use in my DAW?
VST3 is the best choice for most DAWs in 2026 because it suspends automatically when idle and handles MIDI more efficiently than VST2. Mac users can also rely on AU, while Pro Tools requires AAX.
What is the correct order for plugins in a signal chain?
The standard order is noise gate, corrective EQ, compressor, creative EQ or saturation, then reverb and delay on auxiliary sends. This sequence keeps the signal clean and prevents processors from interfering with each other.
What is gain staging and why does it matter?
Gain staging is the practice of controlling audio levels throughout the signal chain. The professional target is -18 dBFS RMS per track, with peaks near -6 dBFS, which prevents distortion and keeps every plugin performing as designed.
How do I reduce CPU load from plugins?
Use track freezing during production to free CPU without losing editability. Set the buffer size to 1,024–2,048 samples during mixing, enable oversampling only where needed, and route reverb to shared send channels rather than individual inserts.
Why does my mix sound worse after adding more plugins?
More plugins do not equal a better mix. Each plugin adds phase shift, potential distortion, and CPU load. Apply plugins only when you identify a specific problem, and bypass any processor you cannot clearly hear improving the signal.
Recommended
MASTER MUSIC PRODUCTION
Expert-led courses designed to take you from fundamentals to finished tracks.

HOUSEFrom bouncy bass and solid kicks, this course teaches you the most modern House music production techniques needed to succeed and stand out.

TRAPQuit sounding like generic Trap and produce something World with hints of the Far East. Create ethnic soundscapes to put your Trap ahead of the curve.

AMBIENTProduce relaxing, sophisticated psy-influenced ambient. Psychedelic and relaxing to listen to, create meditative soundscapes to put your listeners in Zen.