Mixing Drums: Pro Techniques for a Punchy Kit Sound
Last Edited: Jun 23, 2026

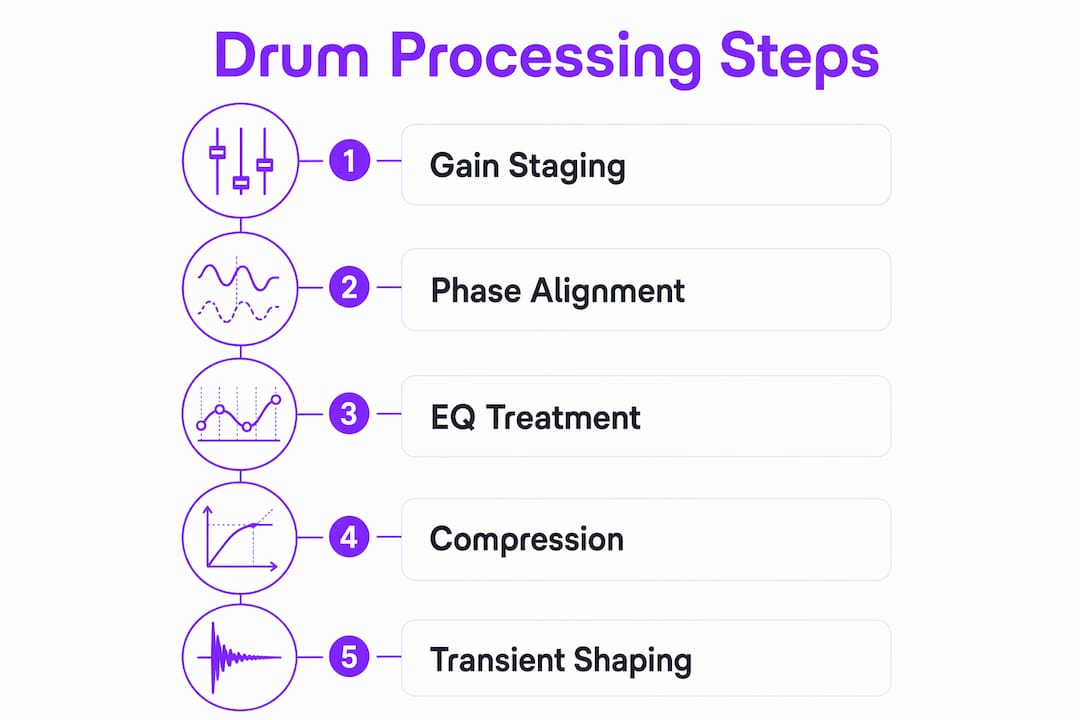
Mixing drums is the art of balancing, processing, and blending individual drum tracks into a cohesive, impactful rhythm foundation. Done right, your drum mix drives the energy of an entire track and locks the groove in place. Done wrong, even the best performances sound flat and disconnected. The process covers gain staging, phase alignment, EQ, compression, parallel compression, and bus processing. Each step builds on the last. Master the sequence, and you will get drum mixes that hit hard, breathe naturally, and sit perfectly in any genre.
What Makes for Better Drum Mixing: The Essential Prep Steps
The biggest mistake producers make is reaching for plugins before the foundation is solid. Start with all levels at zero and build a dry, balanced kit first. Processing a poorly balanced kit only amplifies the problems.
Gain staging is your first real task. Target around -18 dBFS RMS on every individual drum channel before any bus processing begins. That headroom gives your compressors and EQs room to work without clipping or distorting the signal chain.
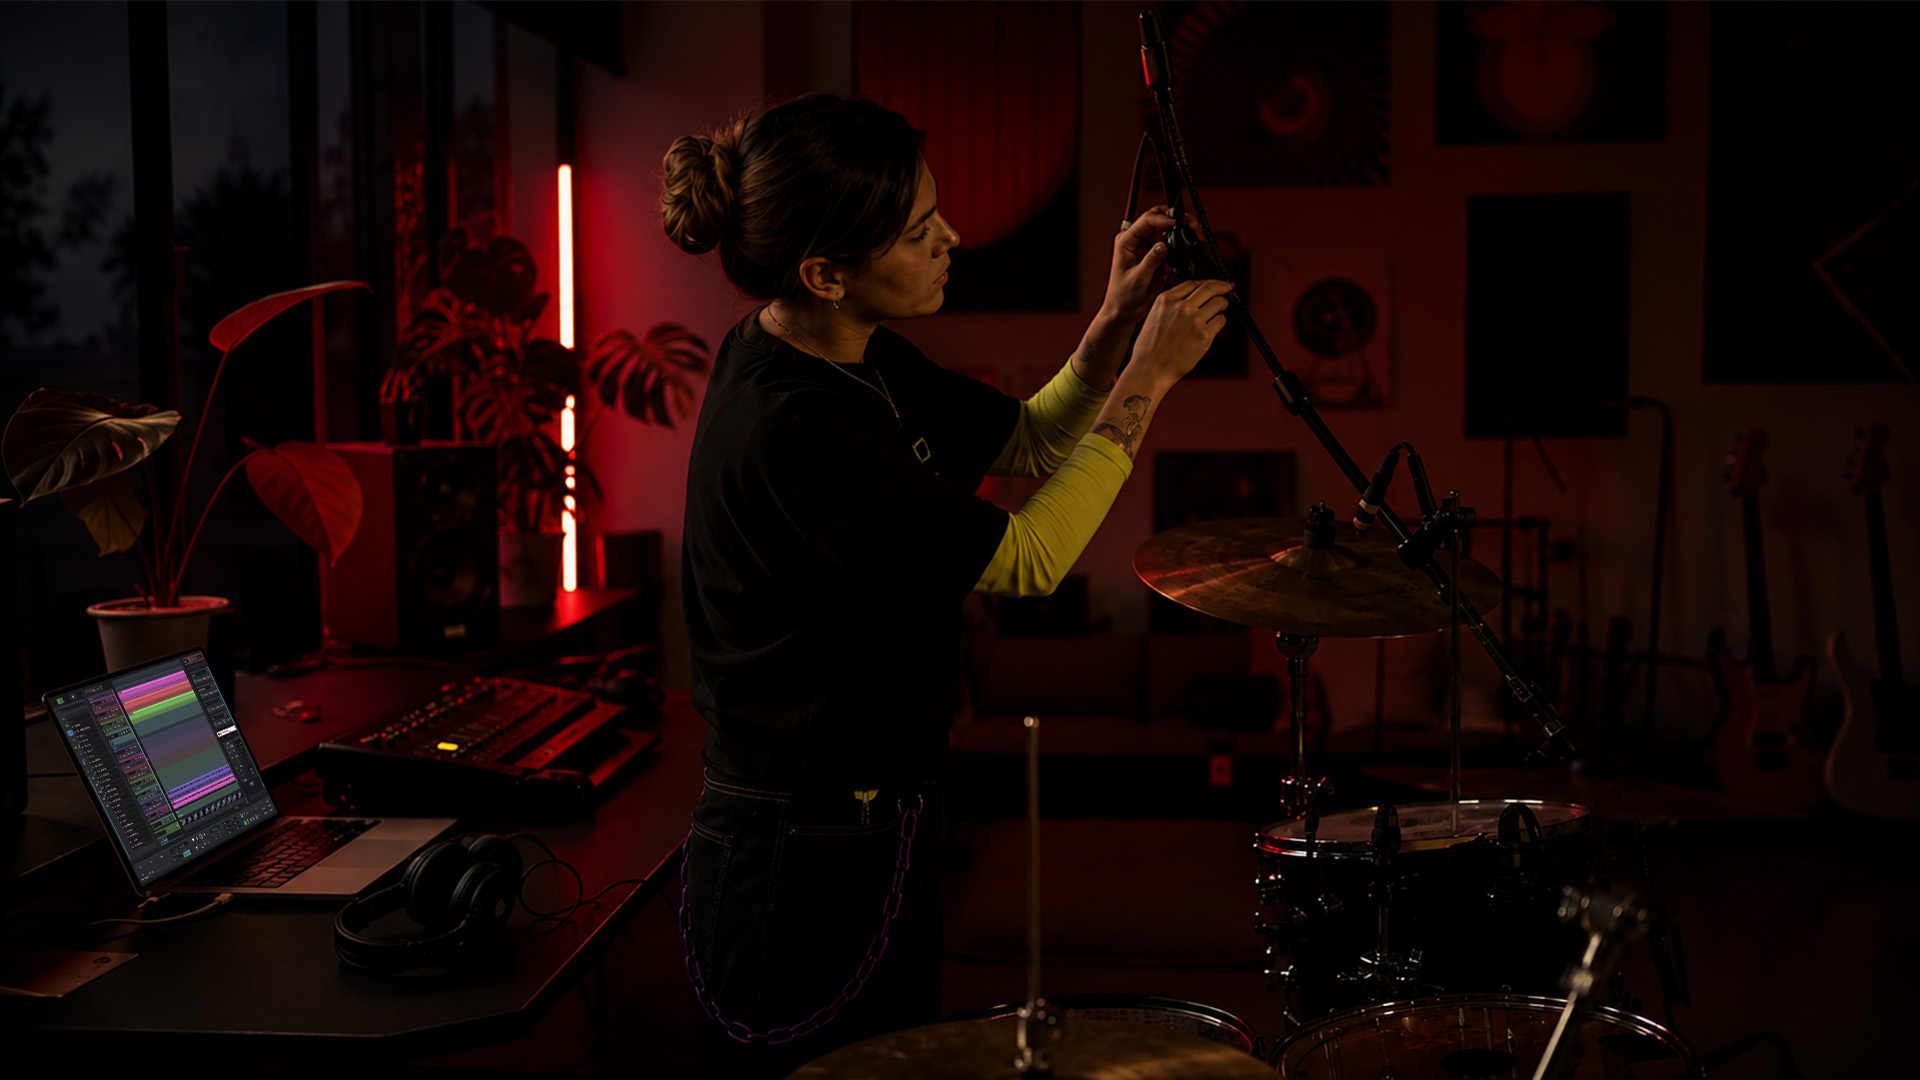
Phase alignment comes next, and it matters more than most producers expect. Use polarity flips and sample-accurate nudging between critical mic pairs, especially kick and overhead, and snare top and bottom. Misaligned phases cancel frequencies and make your kit sound thin and hollow.
Organize your session before touching a single plugin:
- Name every drum track clearly (Kick In, Kick Out, Snare Top, Snare Bottom, OH L, OH R, Room L, Room R)
- Color code by drum element for fast visual navigation
- Route all drum tracks to a dedicated drum bus
- Group related mics (kick group, snare group) into subgroups for easier processing
One more decision shapes your entire workflow. Decide early whether you are treating the kit as a single instrument (emphasizing overheads) or as a collection of individual elements (emphasizing close mics). The first approach gives you a natural, room-driven sound. The second gives you surgical control over each element.
Pro Tip: Build your initial balance starting from the overheads. Overheads form the stereo foundation; then add kick, snare, and close mics one at a time while checking phase and balance changes.
How Do You Process Individual Drum Elements for Clarity and Punch?
Each drum element needs its own targeted treatment. Generic settings will not cut it. Here is how to approach the key components.
Kick Drum
The kick carries the low-end weight of your entire mix. Boost the body between 60–80 Hz for chest-thumping impact. Roll off rumble with a high-pass filter around 40 Hz. Add a presence boost between 3–5 kHz to give the beater attack that cuts through dense arrangements. Avoid boosting both the low end and the attack without checking how the kick sits against your bass.
Snare Drum
A snare needs punch, crack, and air. Apply a gentle high-pass filter around 80–100 Hz to clean up mud. Cut around 400 Hz to remove that boxy, cardboard tone. Boost the top end between 8–12 kHz for snap and air. Compression with a fast attack and medium release tightens the transient and adds sustain. Keep your ratio moderate, around 4:1, to preserve the natural crack.
Hi-Hats and Cymbals
Hi-hats and cymbals live in the high-frequency range and can easily become harsh. Control sibilance by cutting narrow bands around 6–8 kHz if the hats feel piercing. High-pass overheads up to 300–400 Hz to prevent conflict with kick and snare frequencies while keeping cymbal brightness intact.
Toms
Toms tend to ring out longer than you want. Use a noise gate or transient shaper to tighten the decay. A transient shaper with a slower attack and faster release adds punch without killing the natural tone. Cut the low-mid buildup around 200–300 Hz to keep toms from muddying the mix.
Saturation adds harmonic richness to programmed drums and gives acoustic samples more weight and sustain. A subtle tape-saturation plugin on individual channels can make a programmed kit feel alive without introducing obvious distortion.
Pro Tip: On snare and kick, try a transient shaper before compression. Shaping the attack and sustain first means your compressor has a cleaner signal to work with, and you will use far less gain reduction.
What Are the Best Drum Bus Processing Techniques to Glue the Kit Together?
The drum bus is where individual elements become one instrument. The goal is cohesion, not control. Here is the sequence that works.
-
High-pass filter at 20–30 Hz. Apply a high-pass filter at 20–30 Hz with a 12 dB/octave slope to strip out infrasonic rumble. You cannot hear it, but it wastes headroom and causes issues on playback systems with subwoofers.
-
Glue compression. Use an SSL-style bus compressor set to a 2:1 or 4:1 ratio. Aim for 2–4 dB of gain reduction to add cohesion without flattening your transients. A slow attack (30–50 ms) lets the initial hit through. A medium release (auto or 200–400 ms) keeps the groove pumping naturally.
-
Parallel compression (New York compression). Blend a heavily compressed version of the drum bus underneath the dry signal. The recommended blend is 30–60% compressed to 40–70% dry. This technique preserves the natural attack and dynamics while adding density, sustain, and perceived loudness. You can read more about parallel processing tips to confidently dial in this technique.
-
Saturation on the bus. A light layer of harmonic saturation on the drum bus adds weight and perceived loudness without pushing the limiter. Tape or tube saturation works best here.
| Technique | Setting | Result |
|---|---|---|
| Glue compression | 2–4 dB gain reduction, 2:1–4:1 ratio | Cohesion without killing punch |
| Parallel compression | 30–60% compressed blend | Density and sustain with preserved attack |
| High-pass filter | 20–30 Hz, 12 dB/octave | Clean low end, reclaimed headroom |
| Bus saturation | Subtle tape or tube | Weight and warmth without distortion |
The most common pitfall is over-compression. When the drum bus compressor works too hard, the kit loses its dynamic feel and sounds like it is being squeezed through a straw. Aim for movement, not stillness.
Pro Tip: Bypass your drum bus processing and compare it to the unprocessed mix. If the processed version sounds noticeably louder but not better, you are over-processing. Loudness is not the same as quality.
How Do Spatial Effects and Panning Shape Your Drum Mix?
Reverb and panning give your drum mix a sense of space and dimension. Without them, even a perfectly processed kit sounds like it was recorded in a shoebox.
Panning follows the drummer’s perspective as the standard approach:
- Kick and snare: center
- Hi-hat: slightly left (10–15%)
- Ride cymbal: slightly right (10–15%)
- Rack toms: left to center
- Floor tom: center to right
- Overheads: hard left and right for full stereo width
Reverb routing matters as much as the reverb settings. Route mono sources like kick, snare, and toms to mono reverbs, and stereo sources like overheads and room mics to stereo reverbs. This preserves the stereo image and prevents phase smearing that makes mixes sound blurry.
For reverb settings, short room reverbs work best on drums. Use a pre-delay of 10–20 ms to separate the dry hit from the reverb tail. Keep decay time under one second for most genres. Longer tails work in ambient or cinematic contexts but can quickly cloud a dense mix.
Keep your overheads relatively dry. They already capture the natural room ambiance of the recording space. Adding heavy reverb on top creates a washy, unfocused sound.
Pro Tip: Use parallel compression on room mics with heavy settings, then blend them under your close mics. This adds size and sustain to the kit without overpowering the tight, punchy sound of the close mics.
Key Takeaways
Professional drum mixing follows a strict sequence: gain staging, phase alignment, individual processing, bus processing, and spatial treatment, with each step protecting the work done before it.
| Point | Details |
|---|---|
| Gain stage first | Target -18dBFS RMS on every drum channel before applying any processing. |
| Align the phase carefully. | Use polarity flips and sample nudging between kick, snare, and overhead mics to prevent frequency cancellation. |
| Process elements individually | Apply targeted EQ and compression to kick, snare, hi-hats, and toms before touching the bus. |
| Use parallel compression | Blend 30–60% compressed signal with 40–70% dry to add density while preserving attack. |
| Pan from the drummer’s view | Place the hi-hat left, ride right, and kick and snare center for natural stereo width. |
What I Have Learned From Years of Mixing Drum Tracks
The single biggest trap I see producers fall into is processing too early. They hear a kick that lacks punch and immediately reach for a compressor or EQ. But the real problem is almost always a gain staging or phase issue underneath. Fix the foundation first, and the processing becomes almost effortless.
Listening on multiple playback systems is non-negotiable. A drum mix that sounds massive on studio monitors can sound thin on laptop speakers or earbuds. Check your mix on headphones, a phone speaker, and a car stereo before you call it done. Each system reveals something different.
Genre context changes everything. A jazz drum mix should breathe and feel live, with minimal compression and natural room sound. A modern hip-hop or trap mix wants tight, punchy close mics with heavy parallel compression and almost no reverb. An audio mixing guide can help you understand how these genre differences affect your overall approach. Trust your ears over any preset or formula. The settings in this article are starting points, not rules.
— Wake
SoundBridge Makes Drum Mixing Faster and More Focused
SoundBridge is built for producers who want to move quickly without sacrificing quality. Its flexible routing lets you set up drum subgroups, parallel compression chains, and bus processing in minutes.

The plugin ecosystem inside SoundBridge covers every stage of drum audio mixing, from transient shaping and EQ to glue compression and reverb. You can make instruments punch through with the compression and saturation tools built directly into the workflow. Whether you are working on a full live kit recording or a programmed beat, SoundBridge gives you the environment to apply every technique in this guide without fighting your tools. Start with the 2026 DAW guide to see how SoundBridge fits into your production setup.
FAQ
What is the correct gain staging target for drum tracks?
Target an average RMS level of -18 dBFS on individual drum channels before applying bus processing. This headroom keeps your compressors and EQs working in their optimal range.
Why does phase alignment matter in drum mixing?
Phase misalignment between mic pairs, such as kick and overhead or snare top and bottom, causes frequency cancellation. The result is a thin, hollow kit sound that no amount of EQ can fully fix.
How much compression should I use on the drum bus?
Apply glue compression with 2–4 dB of gain reduction at a 2:1-4:1 ratio. More than that flattens the dynamics and removes the natural punch of the kit.
What is parallel compression, and why use it on drums?
Parallel compression blends a heavily compressed signal with the dry drum signal, typically at a 30–60% compressed to 40–70% dry ratio. It adds density and sustain while keeping the original attack and dynamics intact.
How should I pan a drum kit in a mix?
Pan from the drummer’s perspective: kick and snare center, hi-hat slightly left, ride slightly right, and toms spread across the stereo field. This creates natural width and keeps the low-frequency elements anchored in the center.
Recommended
MASTER MUSIC PRODUCTION
Expert-led courses designed to take you from fundamentals to finished tracks.

HOUSEFrom bouncy bass and solid kicks, this course teaches you the most modern House music production techniques needed to succeed and stand out.

TRAPQuit sounding like generic Trap and produce something World with hints of the Far East. Create ethnic soundscapes to put your Trap ahead of the curve.

AMBIENTProduce relaxing, sophisticated psy-influenced ambient. Psychedelic and relaxing to listen to, create meditative soundscapes to put your listeners in Zen.