

Stop Rewiring: Save Multi Output VST Routing Templates for Producers
Last Edited: Sep 20, 2026
Multi-output VST routing sends each instrument, kit piece, or articulation to its own DAW channel rather than a single stereo mix, giving you independent control over every sound. To set it up: enable multi-output mode in the plugin, add the outputs you need, create matching audio tracks in your DAW, then map each track’s input to the plugin’s corresponding output.
TL;DR:
- Setting up multi-output routing requires enabling multi-output mode in the plugin and creating matching DAW tracks, which can save significant time in future projects.
- Most plugins need to be instantiated as their multi-output version and configured with the correct number of mono or stereo outputs before routing tracks in the DAW.
- Proper input mapping involves testing signal flow and confirming each track’s input points to the correct plugin output, with solo and mute checks to identify routing collisions.
- Routing individual parts may bypass the plugin’s master processing, so rebuilding effects like reverb or compression on a group bus is essential for maintaining a cohesive sound.
- Saving configurations as templates and naming outputs by instrument role helps streamline workflow and reduces setup redundancy across multiple sessions
What Is Multi-Output VST Routing, Exactly?
That one-sentence answer covers the mechanics, but it’s worth pinning down why producers bother. Multi-output routing lets you send individual instrument sounds, like a kick drum, snare, and hats, from a drum sampler to separate DAW tracks, so each one gets its own EQ, compression, and fader instead of fighting for space in a single stereo mix.
This matters most with drum samplers, orchestral libraries, and multi-timbral synths. A plugin like Kontakt, loaded with a full drum kit, can technically run in stereo while printing everything to one channel. But that means you can’t push the kick louder without also pushing the hats, or slap a transient shaper on just the snare. Multi-output VST routing splits those signals before they ever hit your mixer, so kick, snare, and overheads land on separate tracks, where you can treat them as the individual instruments they are.
Run through this before you touch a fader:
- Load the multi-output version of the plugin, or switch its instantiation mode from stereo to multi-output inside your DAW’s instrument menu.
- Add the outputs you actually need inside the plugin’s own mixer or output panel, choosing mono or stereo per channel.
- Create matching audio or aux tracks in your DAW and give them clear names before you forget which is which.
- Route each track’s input to the correct plugin output, then play back and confirm signal on the meters.
- Save the whole setup as a template, both the plugin’s output preset and your DAW session, so you never have to rebuild it from scratch again.
Skip step five, and you’ll be redoing this same wiring job every time you open a new project with the same drum kit or orchestral patch.
How Do You Set Up Multi-Output Routing Step by Step?
The checklist above is the skeleton. Here’s the muscle behind each step, since the exact menus shift depending on the plugin and host.
Enabling multi-output mode starts inside the plugin itself. Most multi-timbral instruments and drum samplers have a button, tab, or dropdown labeled something like “Outputs,” “Multi,” or “Mixer.” A stereo-only instance of the same plugin won’t show that panel because the plugin is built to hand off a single summed pair of channels. If you don’t see an outputs tab at all, you’re probably running the wrong instantiation type. The canonical fix is to first instantiate the plugin as its multi-output version, configure the number and types of outputs, and then build DAW tracks to match.
Configuring outputs means deciding how many channels you need and whether each is mono or stereo. A kick and snare usually only need mono outputs. Overheads and room mics almost always need stereo. Once you’ve dialed in the count, save that configuration as the plugin’s default output preset so the next instance loads pre-wired.
Creating DAW channels comes next. Match audio track count to output count, and name tracks the instant you create them, not after you’ve lost track of which channel feeds what. Color coding by instrument group (all drums in one hue, all synth layers in another) saves real time once a session hits 40 or 50 tracks.
Mapping inputs is where most confusion happens. Each DAW track’s input needs to point at the specific plugin output, not just “the instrument.” Play a test note or loop and watch the meter on each track. Silence on a channel usually means a mapping mismatch, not a broken plugin.
- Check meters on every new track before moving forward, not just the master.
- Confirm that mono outputs are mapped to mono tracks and not accidentally split across a stereo pair.
- Re-check mapping any time you swap or reload the plugin instance.
Pro Tip: Solo one output at a time and hit a single note. If two tracks light up at once, you’ve got a mapping collision, not a plugin bug.
One caveat that catches people off guard: routing individual parts to separate outputs often bypasses the plugin’s built-in master processing, things like a master bus compressor, saturation, or reverb baked into the instrument’s main stereo output. Once you split the signal, that processing may never touch the individual channels. If the plugin’s master glue was doing real work, rebuild it in the DAW with a group bus or duplicate send, or you’ll notice your mix losing cohesion the moment you switch to multi-output.
DAW-Specific Recipes for Multi-Output Routing
Every host handles this slightly differently. Here’s the fast version for the five DAWs producers ask about most.
Logic Pro: Load the instrument as a Multi-Output Instrument from the instrument list rather than the standard stereo version. Logic auto-creates Aux tracks for each output. Watch for channel offsets: the main stereo output is usually labeled “st. 1,” but the kick or a secondary output often lands on “Out 2” instead of where you’d expect.
Cubase: Load the plugin through the VST Rack or as an instrument track, then use the Activate Outputs option inside the plugin panel. Save the configuration as Cubase’s default so that future loads automatically name outputs correctly, rather than showing generic numbered channels.
Ableton Live: Multi-output behavior depends on the plugin wrapper’s settings. Create audio tracks set to receive from the specific plugin output, or route through Returns if you’d rather sidechain a group of outputs together. Behavior genuinely varies by instrument here more than in other hosts, so check each plugin’s own output naming.
FL Studio: Open the plugin wrapper’s Processing or Connections tab and enable the outputs you need. Map each plugin output to its own Mixer channel inside FL’s mixer view, since outputs won’t appear as separate tracks automatically the way they do in some other hosts.
Reaper: Reaper frequently auto-detects multi-output plugins, but the extra channels can stay hidden until you go looking. Use the “Add sends to all tracks” routing option and manually select the correct channel mapping in the routing matrix, since Reaper won’t always surface every available output by default.
Some newer hosts blur these lines further. Certain DAWs now build multi-output mixers directly into the host interface so the plugin’s outputs feel like native mixer channels. The convenience is real, but output numbering still shifts from host to host, so don’t assume a template built in one DAW will map cleanly in another.
Why Won’t My Plugin Show Multiple Outputs?
Start here when outputs go missing or the mapping breaks. Nine times out of ten, it’s one of five things.
- No outputs tab visible at all: you’re likely running the plugin’s stereo-only instantiation. Reload it as the multi-output version.
- Outputs appeared before but vanished now: reset the plugin’s output configuration by recreating it in standalone mode, save it as the new default, then reload inside your DAW.
- Numbering doesn’t match what you expected: different hosts offset channels differently. A plugin’s “Ext 1” might show as Out 2 in one DAW and Out 3 in another. Map once per host and save a template so you never repeat the guesswork.
- Master effects sound thin or missing after splitting outputs: that’s the master-processing bypass mentioned earlier. Rebuild the missing reverb or compression on a group bus.
- CPU spikes after adding several outputs: more tracks mean more plugin instances and more meters running. Subgroup similar outputs (all drum mics into one bus, for instance) once track count climbs past what you can process individually without strain.
Run a quick verification pass before moving on: solo each new track, confirm the meter moves, mute it and confirm silence, and play a short test tone through the full chain. That thirty-second check catches almost every routing mistake before it costs you a mix session.
Smart Habits That Make Multi-Output Routing Actually Scale
The setup steps get you working. These habits keep the workflow from falling apart on your twentieth project.
- Save the plugin’s output configuration as a template the moment you finish mapping it, not after you’ve closed the session.
- Build a matching DAW template with tracks already named and color-coded, so loading a new project doesn’t mean rebuilding wiring from zero.
- Skip multi-output entirely on simple sessions. A single vocal take or a one-shot synth patch doesn’t need eight channels of routing overhead.
- Write a one-line routing note in the session (a text track or comment) so a collaborator, or you in six months, can see exactly which output feeds which track. Sharing session context matters even more once you’re collaborating remotely with someone who didn’t build the original template.
Pro Tip: Name outputs by instrument role, not plugin default labels. “Kick_Out2” tells you more six months from now than “Kontakt Out 3” ever will.
A Practitioner’s Note on This Workflow
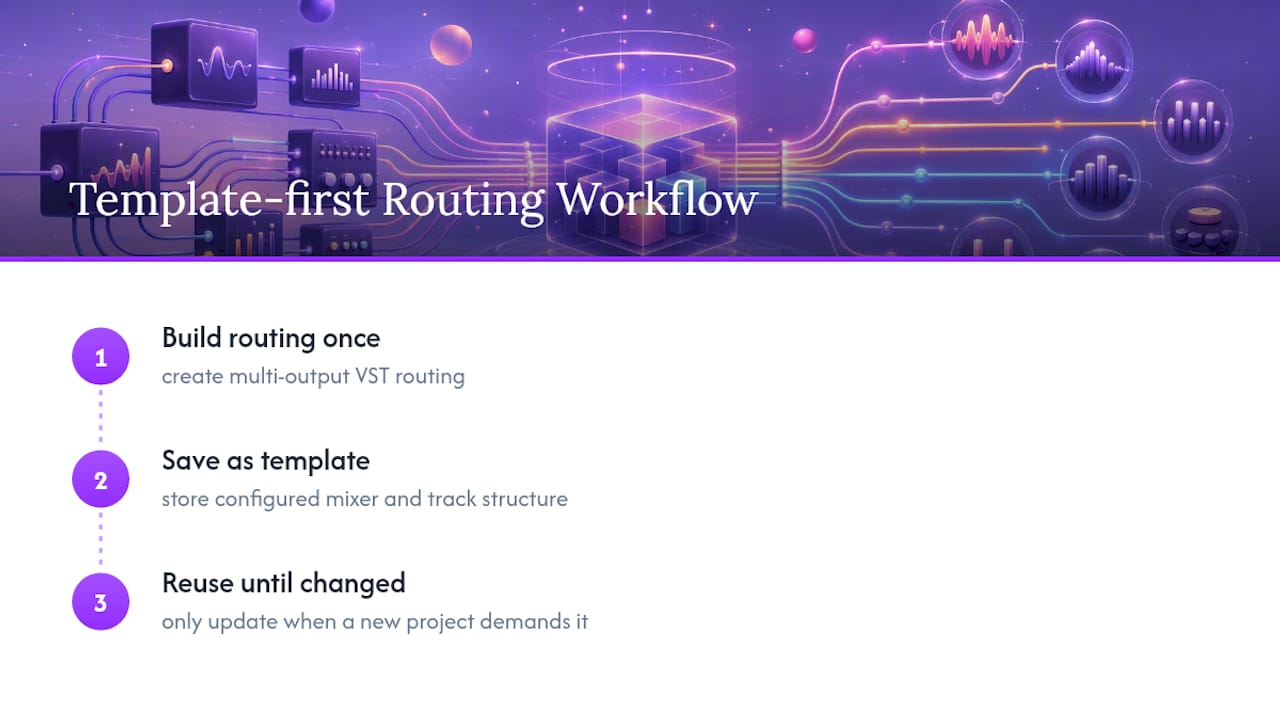
This guide comes out of a straightforward production workflow: build the routing once, save it as a template, then never think about it again until the next project needs something different. Producers who want to go deeper into how DAW mixers and track structures actually work should check Soundbridge’s guide to essential DAW features, and anyone routing drum kits specifically will get more mileage from the layering guide once outputs are mapped and ready for processing.
What Most Guides Get Wrong About Multi-Output Routing
Most tutorials treat multi-output routing as a one-time technical chore, something you slog through once and forget. That framing misses the actual payoff. The setup cost is real, but it’s fixed. Once you’ve built the template, every future project with that same drum kit or orchestral patch loads pre-wired.
The bigger blind spot is the master-processing bypass. Plenty of producers split their outputs, notice the mix suddenly sounds thinner or duller, and blame the plugin, not realizing they just lost the built-in glue compression or saturation that made the stereo version sound finished. That’s not a bug. It’s a structural tradeoff of routing individual channels, and rebuilding that processing on a group bus should be treated as a required step, not an optional polish pass.
If there’s one thing worth prioritizing first, it’s this: don’t build routing you won’t reuse. Multi-output setups earn their complexity on drum kits, orchestral libraries, and multi-timbral synths you load repeatedly. For a one-off stereo pad, skip it entirely and save the template-building energy for instruments that actually justify it.
— Wake
Where SoundBridge Fits Into Your Routing Workflow
If you’re rebuilding the same multi-output routing every time you open a new session, that’s exactly the kind of repetitive setup a modular workflow is built to eliminate. SoundBridge’s customizable interface and template-friendly session structure let you save your output mapping, track names, and color coding once, then recall the entire setup instantly for your next project, instead of rewiring channels from scratch.

That matters even more once collaboration comes into play. Zero-latency remote tracking and bi-directional plugin control mean that a collaborator can open your routed session and see the same track structure you built, without having to renegotiate which output feeds which channel. Pair that with support for high-fidelity audio processing, and your multi-output drum or orchestral setups stay pristine from tracking through final mix.
If you want a fuller picture of how a modern DAW handles routing, tracks, and templates before you commit, start with Soundbridge’s guide to what a DAW actually does, then head to Soundbridge to try building your own multi-output template.
Sources
- How to create multiple outputs in Kontakt and route them to a DAW — Native Instruments Support
- How to use UJAM’s drum plug-ins in Multi-Output mode — UJAM Support
Recommended
MASTER MUSIC PRODUCTION
Expert-led courses designed to take you from fundamentals to finished tracks.

HOUSEFrom bouncy bass and solid kicks, this course teaches you the most modern House music production techniques needed to succeed and stand out.

TRAPQuit sounding like generic Trap and produce something World with hints of the Far East. Create ethnic soundscapes to put your Trap ahead of the curve.

AMBIENTProduce relaxing, sophisticated psy-influenced ambient. Psychedelic and relaxing to listen to, create meditative soundscapes to put your listeners in Zen.