

Get a Working Talkback Mic Setup in Minutes
Last Edited: Sep 26, 2026
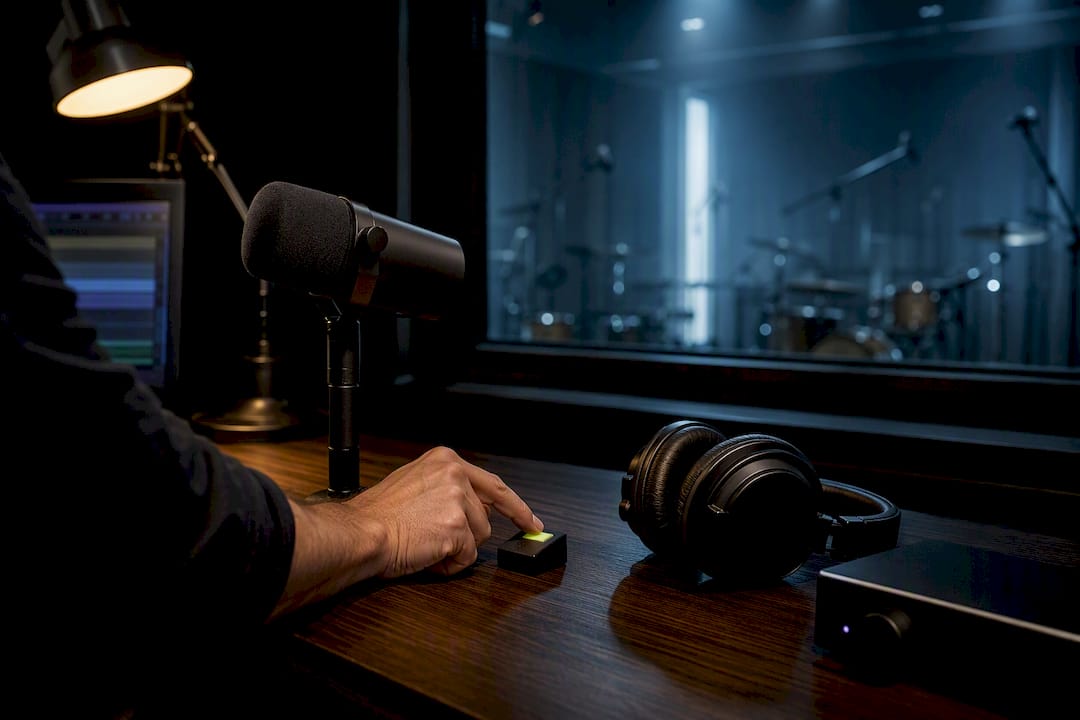
Connect a dynamic mic to a spare input, route it pre-fader to your headphone or monitor bus, and set the talk button to push-to-talk before you touch anything else. That single chain gets you a working talkback path in minutes. Everything past this point is about tightening that signal, matching your mic to your room, and building in the dim, routing, and DAW controls that make talkback disappear into the background of a great session.
TL;DR:
- Using a dynamic microphone connected to a preamp and routed pre-fader to a dedicated monitor bus prevents talkback from leaking into the main mix.
- Proper routing involves assigning the mic input to a pre-fader send, verifying silence on main speakers, and confirming signal only reaches headphones or monitor speakers.
- Dynamic mics are generally preferable for talkback due to their durability, noise rejection, and avoidance of phantom power issues.
- An external talkback controller or footswitch improves usability, especially in small studios, while mounting the mic on a gooseneck reduces plosives and breath noise.
- Modern DAWs and networked setups allow built-in, software-based talkback routing and remote communication without extra hardware, simplifying the workflow.
How Do You Set Up a Talkback Mic Quickly?
You don’t need a rack of gear to get talking into headphones. You need the right order of operations.
- Plug a dynamic mic into a spare preamp or input on your console or interface.
- Assign that input to a pre-fader aux or bus, or to a dedicated talkback input if your desk has one.
- Route that bus to your headphone distro or the performers’ monitor mixes.
- Set the talk button to push-to-talk by default; switch to latch only if you expect a long conversation.
- Set a comfortable dim level for program audio, then confirm talkback is not leaking into the main L/R.
That last step gets skipped more than any other, and it’s the one that turns a smooth session into an awkward one when the room suddenly hears the engineer complaining about lunch.
Which Microphone and Controller Hardware Should You Use?
Dynamic mics win for talkback almost every time. They handle loud rooms without distorting, reject off-axis noise from computer fans and chair squeaks, and skip phantom power entirely. Condensers pick up more ambient noise, so they only make sense in a very quiet, treated control room where you want a more natural, open tone for broadcast-style announcing.
- A desk-mounted dynamic mic, something in the SM57 family, replaces the noisy built-in mic on most monitor controllers, since chassis clicks and mechanical rattle from their internal capsules are common complaints among engineers who rely on them daily.
- Dedicated cue and talkback controllers give you a cleaner path than jury-rigging a console channel, especially in smaller rooms.
- Footswitches turn any push-to-talk mic into a hands-free tool, which matters when your hands are on faders or an instrument.
Pro Tip: Mount the talkback mic on a short gooseneck or a desk stand angled slightly off-axis from your mouth. It kills plosives and keeps your breath noise out of the performers’ headphones.
Small studios that don’t want to touch console patching at all can add a purpose-built box like the Radial Studio-Q, which includes a built-in mic, an external mic input, footswitch compatibility, and dim control in one unit.
How Do You Route and Patch a Talkback Mic?
Routing is where most talkback setups actually go wrong, not in mic choice. The process changes slightly by platform, but the logic stays the same everywhere.
- Assign or “burn” an input. If your console lacks a dedicated talkback input, assign a standard channel, like channel 32 or Aux 8, as the talkback source through the desk’s internal patching or talkback menu, then set the talk button to push or latch mode.
- Send it pre-fader. Route that channel’s send to the monitor bus pre-fader, and pull it out of the L/R assignment completely. This is the step that prevents talkback from ever reaching the house mix.
- Verify before the session. Raise the talkback fader and confirm the main speakers stay silent while the headphones or monitors get the signal. Skipping this check is how engineers end up broadcasting a private conversation to a full room.
- For networked rigs, send talkback across Dante or a similar network protocol using a direct out, so front-of-house can talk to monitor world without running a separate analog line across the venue.
- In a DAW, route the mic input to a dedicated talkback bus, then out to a headphone-only output. Confirm that bus isn’t printed to any recording track or summed into your main output.
Push-to-Talk vs. Latch: Which Mode and Dim Setting Should You Use?
Push-to-talk should be your default for tracking sessions, since it only opens the mic while you’re pressing the button and prevents accidental chatter from reaching the performer. Latch mode makes more sense during setup, sound check, or long production discussions where holding a button the whole time is impractical.
- Wire a footswitch for momentary (push) behavior when your hands need to stay free for fader moves or an instrument.
- Start your dim level to reduce program audio to a comfortable background level, then adjust by ear once musicians are actually performing.
- Confirm the talkback trigger is gated to the aux bus only, never the master bus, so a stuck button can’t dump your voice into a live recording.
Can You Automate Ambient Talkback Without a Push Button?
Some engineers skip individual push-to-talk mics entirely for a band tracking together in one room. Instead, they place an omni condenser in the play area and run it through a compressor with a fast attack and long release, which lets conversation stay intelligible in headphones while automatically taming loud instrument peaks, according to a talkback mic technique documented by Tape Op. The compressor essentially does the ducking job a human would otherwise handle manually on a fader.
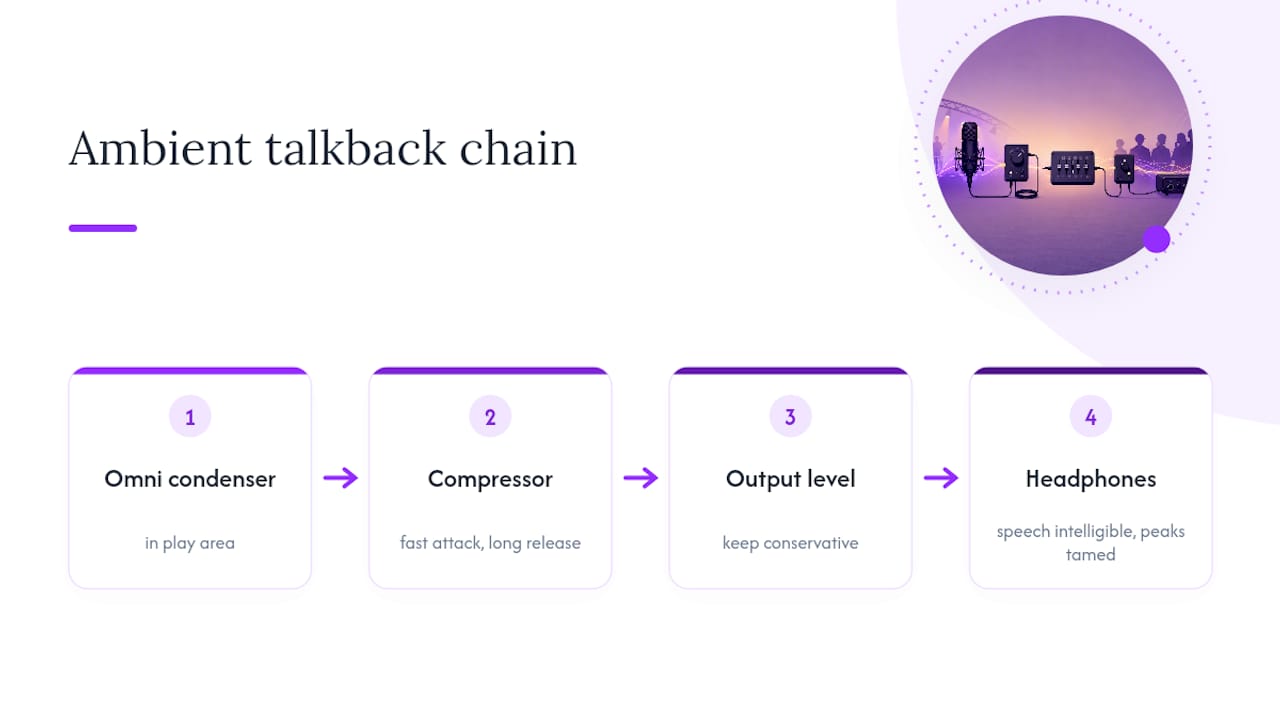
This trades some fidelity for zero-friction communication, which is often the right call in a large room with four or five musicians who need to talk between takes without hunting for a button. Keep the output level conservative, though. If musicians hear their own room too prominently in the cans, it changes how they play and sing.
Pro Tip: Test the ambient talkback trick at full performance volume before the real take. What sounds balanced during a quiet rehearsal often gets buried the moment the band hits full energy.
How Do You Build Talkback Into a DAW Workflow?
Inside a DAW, the routing pattern mirrors a physical console: mic input feeds a talkback bus, which feeds your interface’s headphone outputs, separate from anything printed to a track.
- Use hardware outputs when you’re tracking locally and want zero added latency between you and the performer.
- Use USB or virtual routing when a remote collaborator needs to hear you, and you’re working across a session without a shared physical rig, a workflow that audio interfaces handle cleanly once configured.
- Confirm your talkback bus is excluded from any bus feeding a recorded track or a remote monitor mix meant for playback only.
Integrated talkback inside your DAW, paired with low-latency remote tracking, cuts out a chunk of hardware most home studios never needed in the first place, since the routing lives entirely in software rather than in a rack of physical patch points.
What Are the Most Common Talkback Mic Problems?
Most talkback complaints trace back to a handful of repeat offenders, and each one is fixable in under a minute once you know where to look.
- No talkback in the phones: confirm the aux send is actually turned up and routed to the correct headphone bus, not just enabled at the channel.
- Talkback leaking into the mains: check that the channel is unassigned from L/R and that the send is pre-fader, not post-fader, on the master bus.
- Noisy or clicky talkback: swap the built-in monitor controller mic for an external desk-mounted dynamic, since mechanical chassis noise is a known weak point on many controllers.
- Mute logic backward: verify whether your console mutes the mix or opens the talkback channel when you press the button, since consoles handle pre- and post-mute behavior differently.
Pro Tip: Label your talkback source clearly on the console scribble strip or DAW track name. It sounds trivial until a substitute engineer spends five minutes hunting for a channel labeled “Input 32.”
Etiquette matters here, too. Keep talkback brief, set the volume so it doesn’t startle anyone wearing closed-back cans, and default to push-to-talk unless everyone in the room has agreed otherwise.
What Actually Matters Once the Gear Is Working
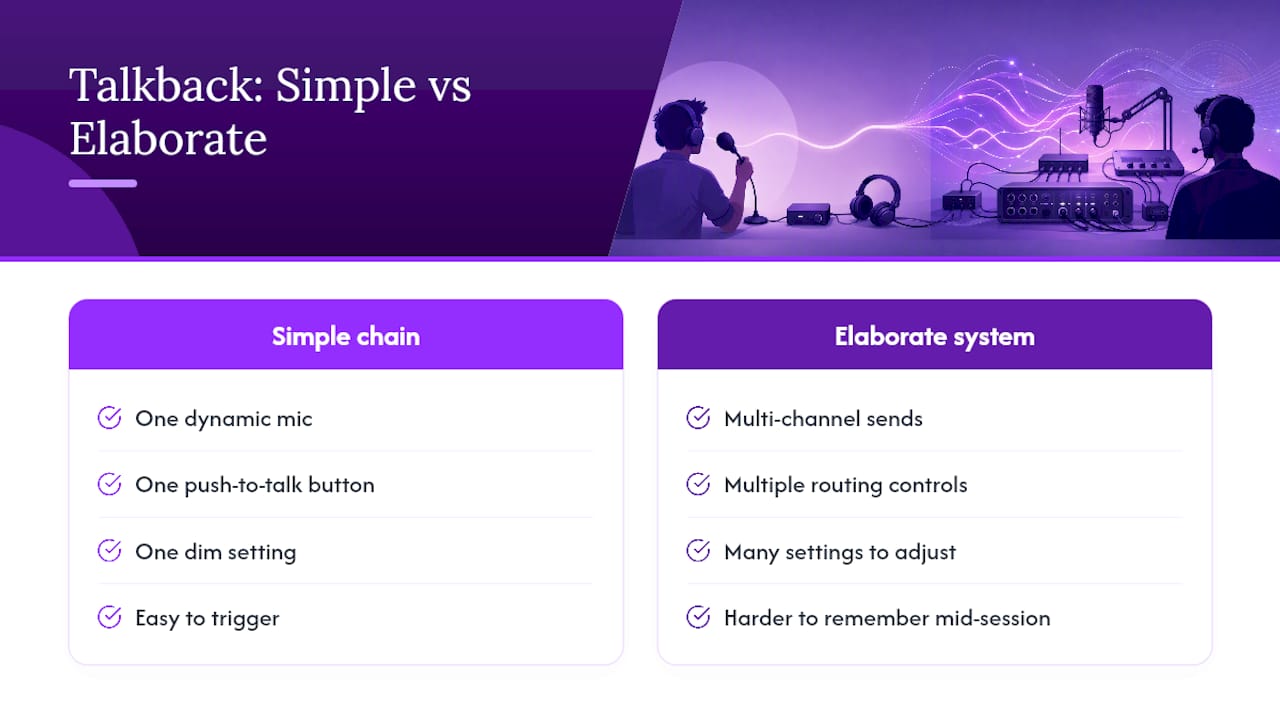
Every talkback setup I’ve seen fail wasn’t a hardware problem; it was a friction problem. Engineers build elaborate multi-channel talkback systems with individual sends and forget that a single reliable path, easy to trigger, beats a complicated one nobody remembers how to use mid-session.
Favor the simple chain: one dynamic mic, one push-to-talk button, one dim setting you don’t have to think about. Perfect fidelity on a talkback mic has never saved a session; a button that works every single time has saved plenty. Test it at full performance level before you commit to it, because a setup that sounds fine in a quiet room can vanish the instant the band starts playing for real.
— Wake
Skip the Patch Bay: Talkback Built Into Your DAW
Every routing step covered above — burning an input, sending pre-fader, keeping talkback off the mains — exists because most consoles were never designed with talkback in mind. SoundBridge builds it in from the start, with an integrated talkback bus, zero-latency remote tracking, and bi-directional plugin control that removes extra complexity. Instead of assigning and configuring a channel and a pre-fader send correctly, you route the mic to the headphone output within the same session window you’re already tracking in.

For remote sessions, this matters even more. A collaborator across the country hears your talkback and your program audio in sync, without a separate hardware path or a second interface. If you’re building a home studio workflow around this kind of routing, start with SoundBridge’s guide to what a modern DAW actually does and try the platform on your next session.
Where to Go for Device-Specific Talkback Steps
For exact menu paths, check your console’s manual directly: the Radial Studio-Q manual covers cue-system controllers, FOH’s talkback routing piece covers networked monitor-world routing, and PreSonus’s knowledge base walks through channel-based talkback assignment on StudioLive consoles. For a broader primer on signal flow and headphone monitoring, AmmarAI’s sound studio resource is worth a look too.
Sources
FAQ
How does a talkback mic work?
A talkback mic feeds a dedicated bus that routes only to headphones or monitor mixes, triggered by a push-to-talk or latch button, and stays isolated from the main recording or house mix.
What is a talkback mic for church?
In houses of worship, a talkback mic lets the sound booth communicate with stage performers or camera operators through in-ear monitors or IFB systems without the congregation hearing the conversation.
What is the best microphone for talkback?
A rugged dynamic mic, like something from the SM57 family, is the standard choice because it rejects room noise and handles loud environments without needing phantom power.
How do I set up my Behringer X32 talkback mic?
Assign a spare input channel to talkback through the X32’s routing menu, set it to send pre-fader to your monitor or headphone bus, and configure the talk button as push or latch depending on the session.
Can I use talkback for remote recording sessions?
Yes. DAWs with integrated talkback and zero-latency remote tracking route the talkback signal through software rather than extra hardware, enabling remote collaboration without additional hardware.
Recommended
MASTER MUSIC PRODUCTION
Expert-led courses designed to take you from fundamentals to finished tracks.

HOUSEFrom bouncy bass and solid kicks, this course teaches you the most modern House music production techniques needed to succeed and stand out.

TRAPQuit sounding like generic Trap and produce something World with hints of the Far East. Create ethnic soundscapes to put your Trap ahead of the curve.

AMBIENTProduce relaxing, sophisticated psy-influenced ambient. Psychedelic and relaxing to listen to, create meditative soundscapes to put your listeners in Zen.