Using Upward and Downward Compression for Maximum Impact
Last Edited: Jun 18, 2026
Unprocessed sound elements often feel flat, inconsistent, or buried in the mix. This flatness is not due to poor design, but because we haven't shaped their dynamic structure. What initially sounds punchy in isolation often becomes dull or masked when competing with other elements. This fact is why upward-downward compression is critical. Unlike traditional compression that mainly reduces peaks, this approach works in two directions at once. It controls loud transients while simultaneously lifting quieter details. Instead of simply narrowing the dynamic range, it redistributes energy across the signal.
We do this type of processing commonly with OTT-style compression, known for its aggressive, highly audible effect. However, relying on a fixed preset often leads to overprocessing or loss of clarity. A more controlled approach is to recreate this behavior using a flexible multiband tool manually. In this guide, the focus is on using Dynastia by Outobugi inside SoundBridge: DAW to build an OTT-style workflow from the ground up. Rather than applying a one-size-fits-all setting, we will treat each section of the mix differently based on its role and frequency content.
The process will move through four key stages. First, shaping the relationship between kick and bass, where low-end control is essential. Then, apply the same principles to the rhythm section to enhance groove and cohesion. After that, processing synth elements to bring out texture and width. Finally, a controlled application on the master channel will demonstrate how to glue everything together without destroying dynamics.
The objective is not maximum loudness or exaggerated processing. The objective is controlled density, achieving a sound that feels full, stable, and detailed while still retaining clarity and movement.
Listening to the Full Mix Before Introducing Upward-Downward Compression
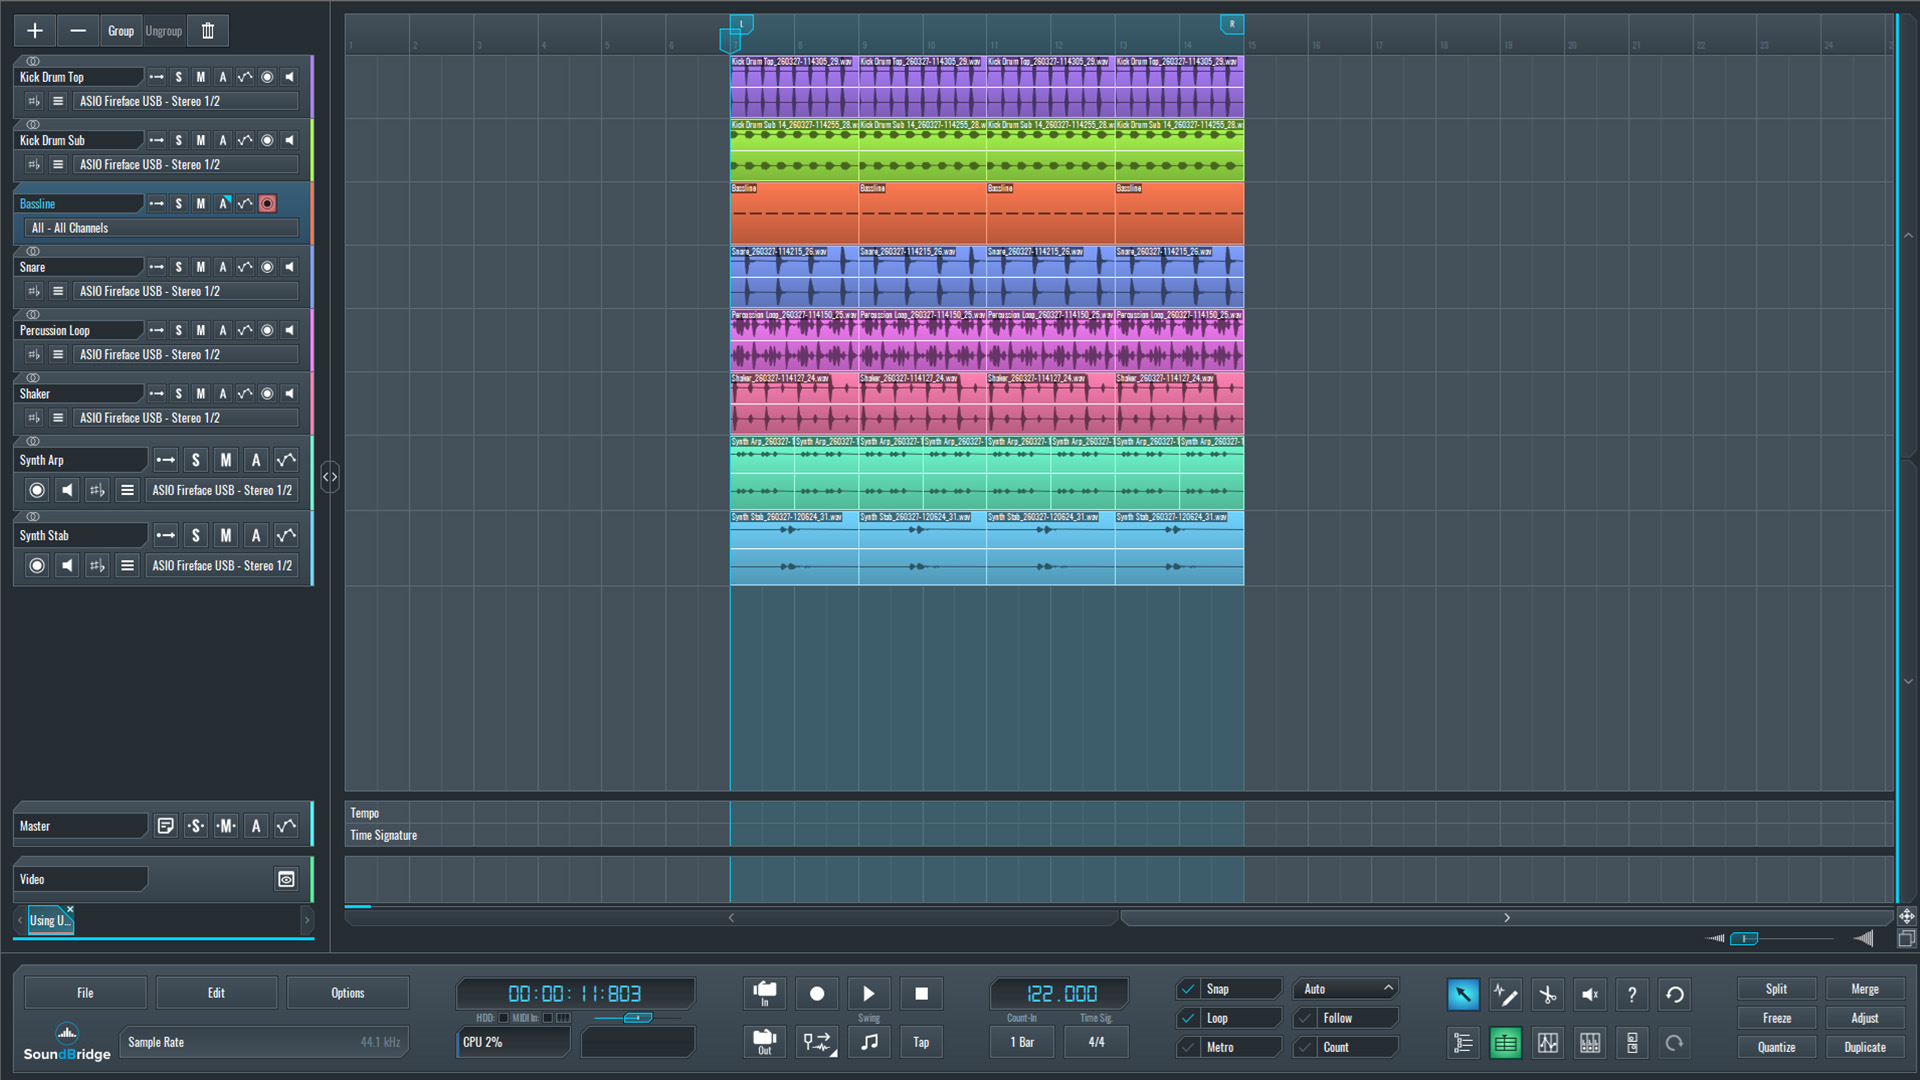
At this stage, we have already created a short pattern inside SoundBridge: DAW. It consists of the core elements of the mix: low-end instruments such as kick and bass, a drum section, and a few melodic synth layers.
Play this loop and listen to it in context as a whole. The goal here is not to make adjustments yet, but to observe how these elements interact before we apply any processing.
This first step provides a reference for the subsequent steps, in which we will introduce upward and downward compression.
~Full Mix - Unprocessed
Shaping the Bass With Ott-Style Upward-Downward Compression
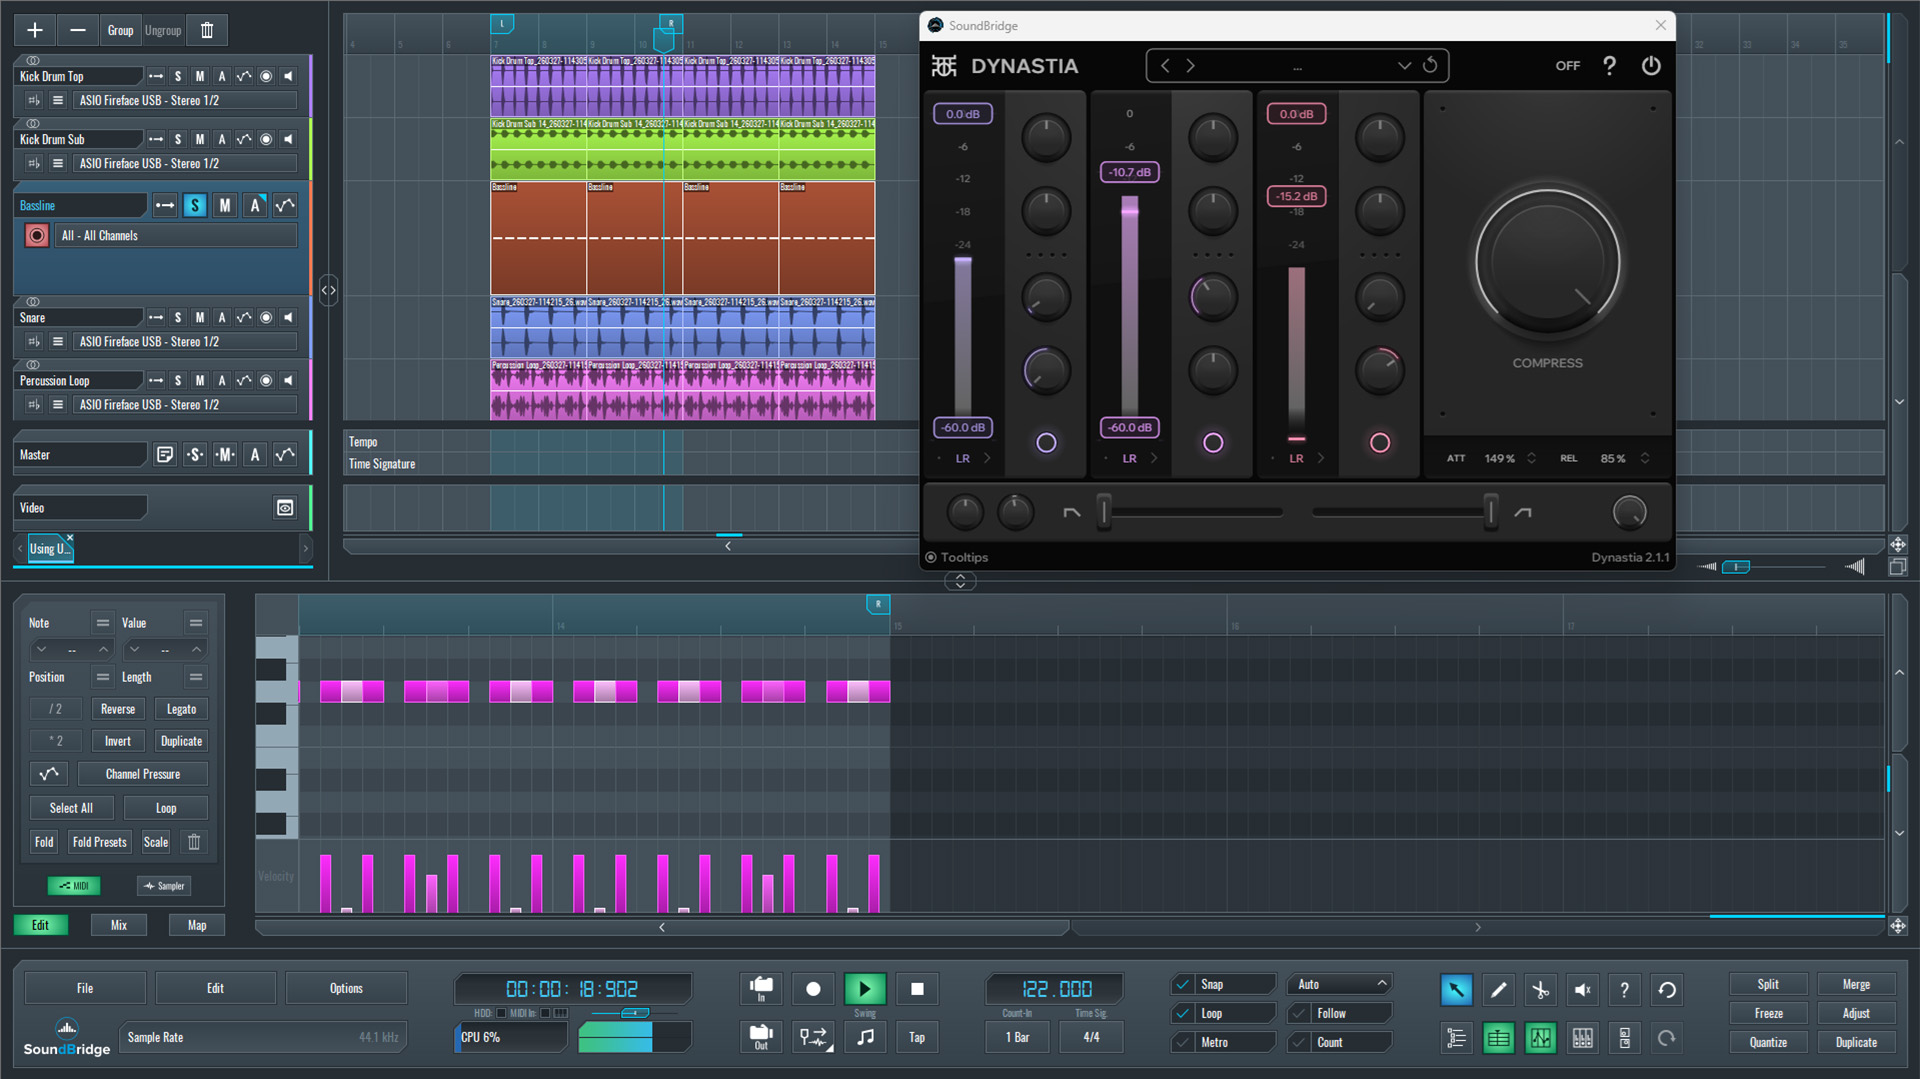
In this step, we inserted Dynastia by Outobugi on the bass channel and monitored the signal in solo to hear the changes clearly.
We split the processing across the three bands. In the mid band, we applied a moderate amount of downward compression to stabilize the bass body and keep its energy consistent. This split processing resulted in a tighter and more controlled low-mid range.
On the high band, instead of reducing dynamics, we used upward-compression to bring out subtle harmonics and transient detail. This upward compression made the bass more defined and present without increasing its overall level.
We introduced an additional character using Dynastia's per-band saturation. Also, we raised the mid-band saturation to approximately 40%, adding harmonic richness and improving translation on smaller playback systems.
We then adjusted the global attack and release controls by ear to balance between tightness and natural movement across all three bands.
Finally, we compared the processed bass against the unprocessed version in the context of the kick. With Dynastia engaged, the low end became more stable, detailed, and clearly positioned in the mix.
~Kick Drum & Bassline - Solo (Bassline Without Processing)
~Kick Drum & Bassline - Solo (Bassline Processed With Dynastia)
Processing the Snare and Percussion Loop
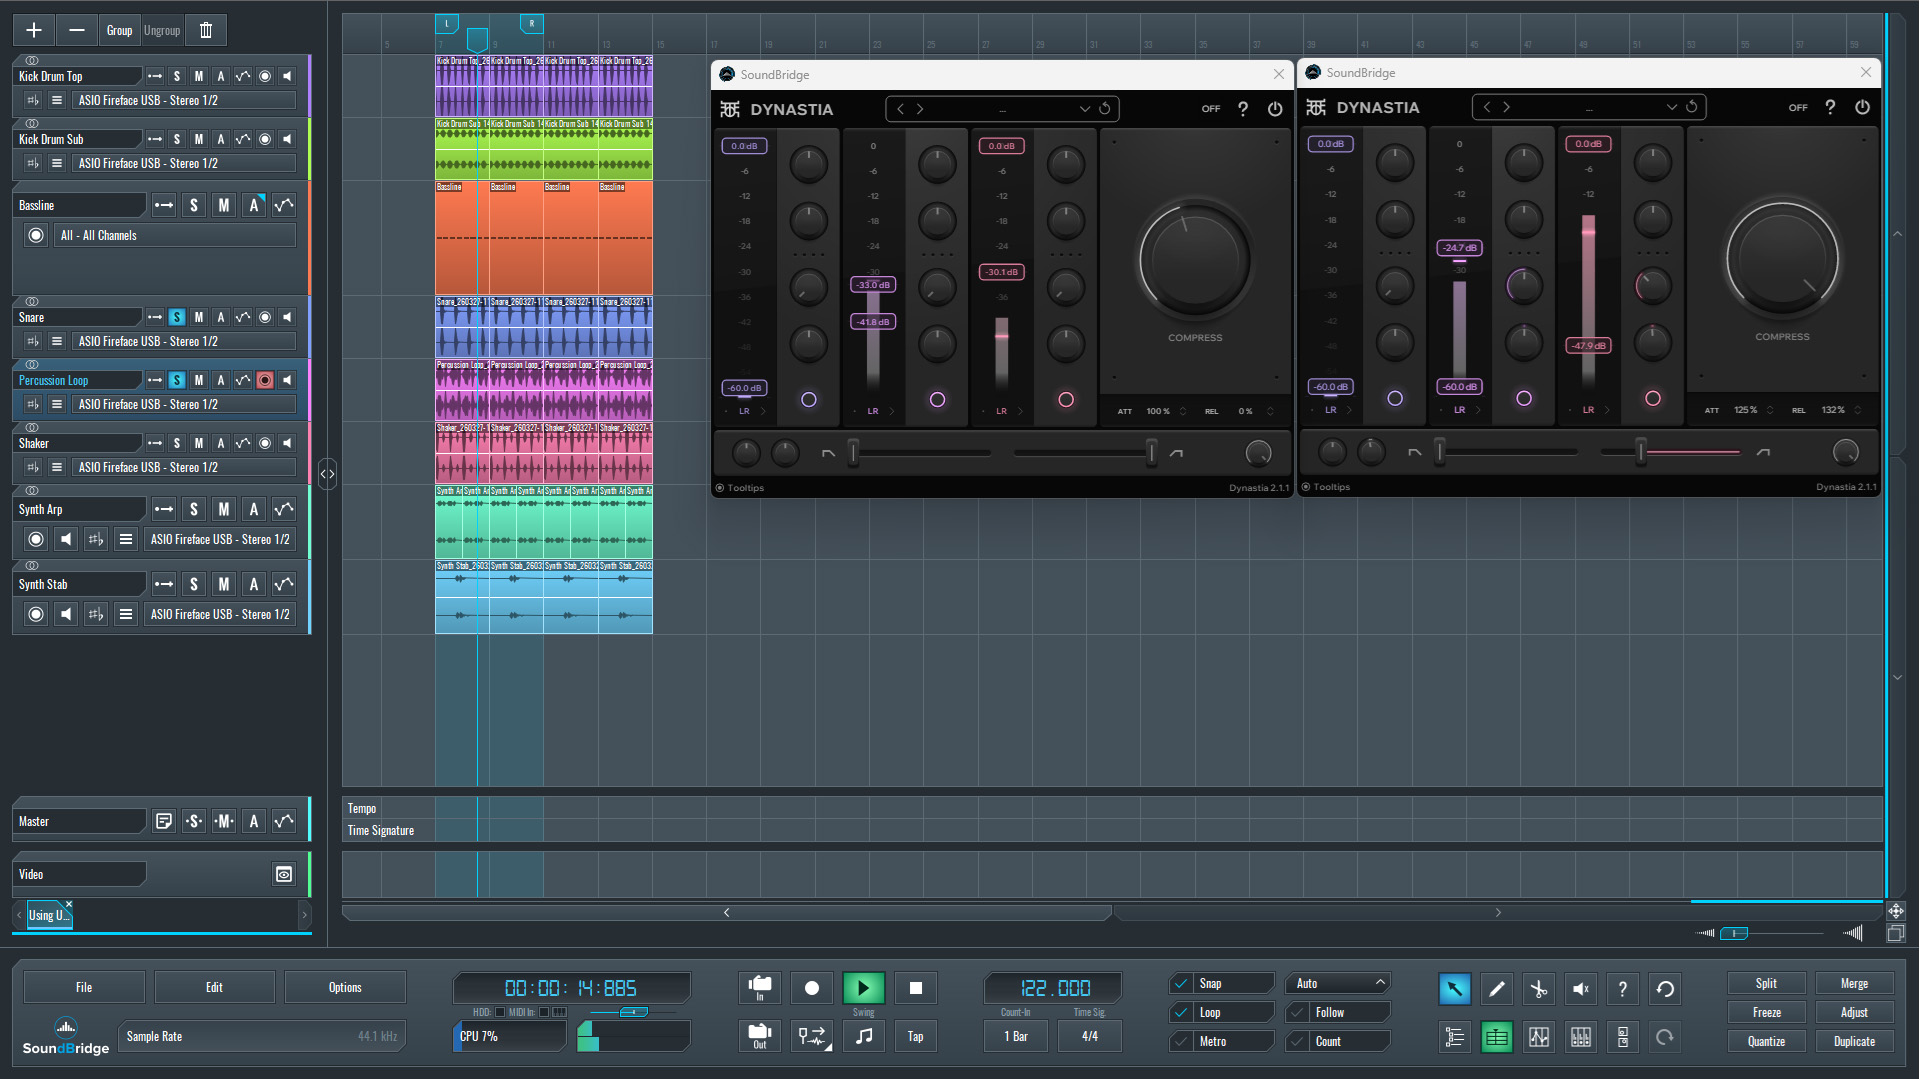
In this step, we applied Dynastia to both the snare and the percussion loop, using a slightly more aggressive approach compared to the bass.
On the snare, we focused on the mid band, pushing both downward and upward compression further than usual. This processing emphasized the body and, more importantly, brought out the snare's tail, making it longer and more present in the mix.
On the high band, we applied additional upward compression to enhance the snap and top-end detail. At the same time, we slightly reduced the overall compression amount from the maximum to keep the result under control and avoid overprocessing.
For the percussion loop, the approach shifted more toward control and harmonic enhancement. We also processed the mid band with downward compression, tightening the dynamics and making the groove more consistent. Alongside this, we significantly increased saturation to introduce additional harmonics and bring more character to the loop.
On the high band, we added a smaller amount of upward compression, combined with lighter saturation, to lift subtle textures and high-frequency details without making the sound harsh.
Listening back in solo, first without processing and then with Dynastia engaged, the difference became clear. The snare gained a longer, more controlled presence, while the percussion loop revealed greater texture and depth, resulting in a tighter, more cohesive rhythmic layer.
~Snare Drum & Percussion Loop - Solo (Unprocessed)
~Snare Drum & Percussion Loop - Solo (Processed With Dynastia)
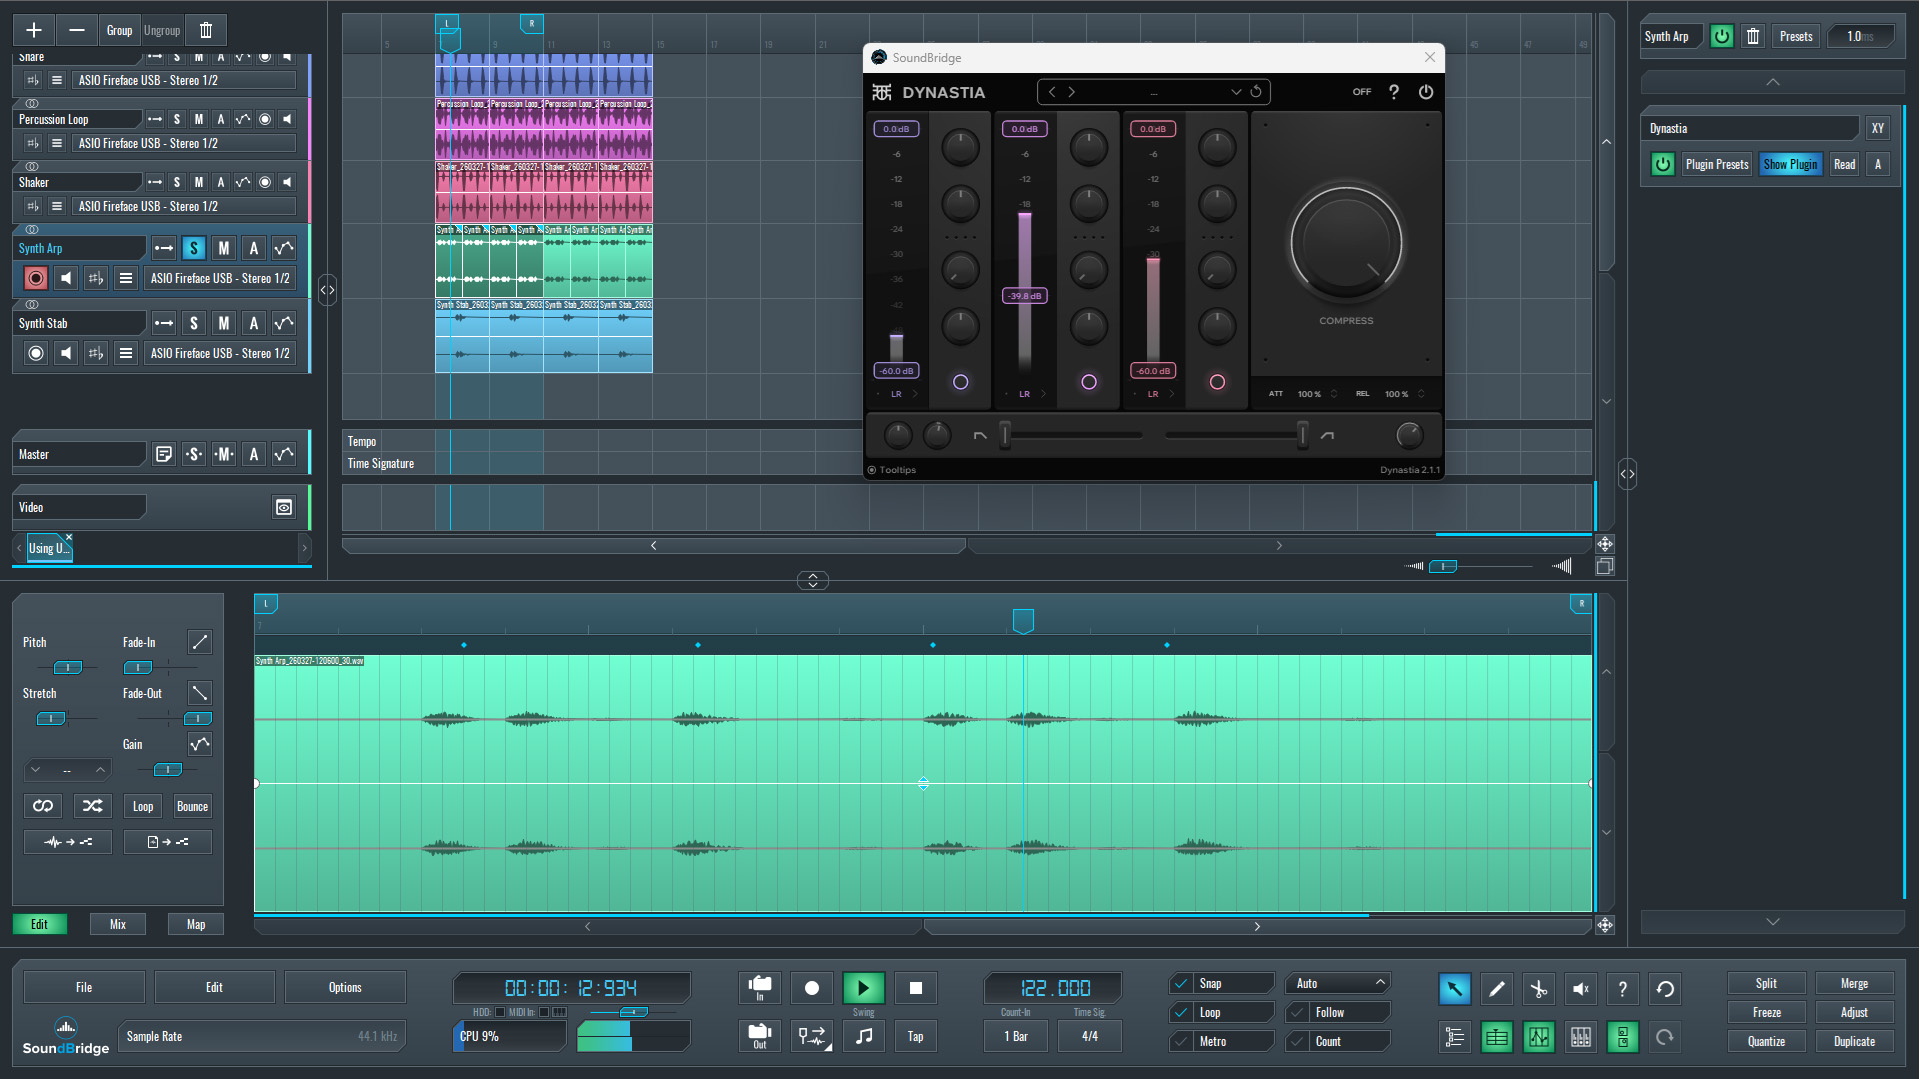
Processing the Synth Arp
The final element processed with Dynastia upward-downward compression was the synth arp.
In this case, we still focused on the mid band, and we applied a moderate amount of upward compression. This processing extended the tail of the sound and helped it sit more naturally within the mix, improving the overall glue between melodic and rhythmic elements.
Unlike the previous stages, no extreme adjustments were made here. Most parameters were kept close to their default values, with only subtle compression applied. This compression style was enough to enhance sustain and bring out additional detail without pushing the sound too far forward or making it overly dense.
To evaluate the result clearly, the synth arp was first played unprocessed, then with Dynastia engaged. The difference reveals a smoother, more connected sound that integrates better with the rest of the mix while maintaining clarity.
~Synth Arp - Solo (Unprocessed)
~Synth Arp - Solo (Processed with Dynastia)
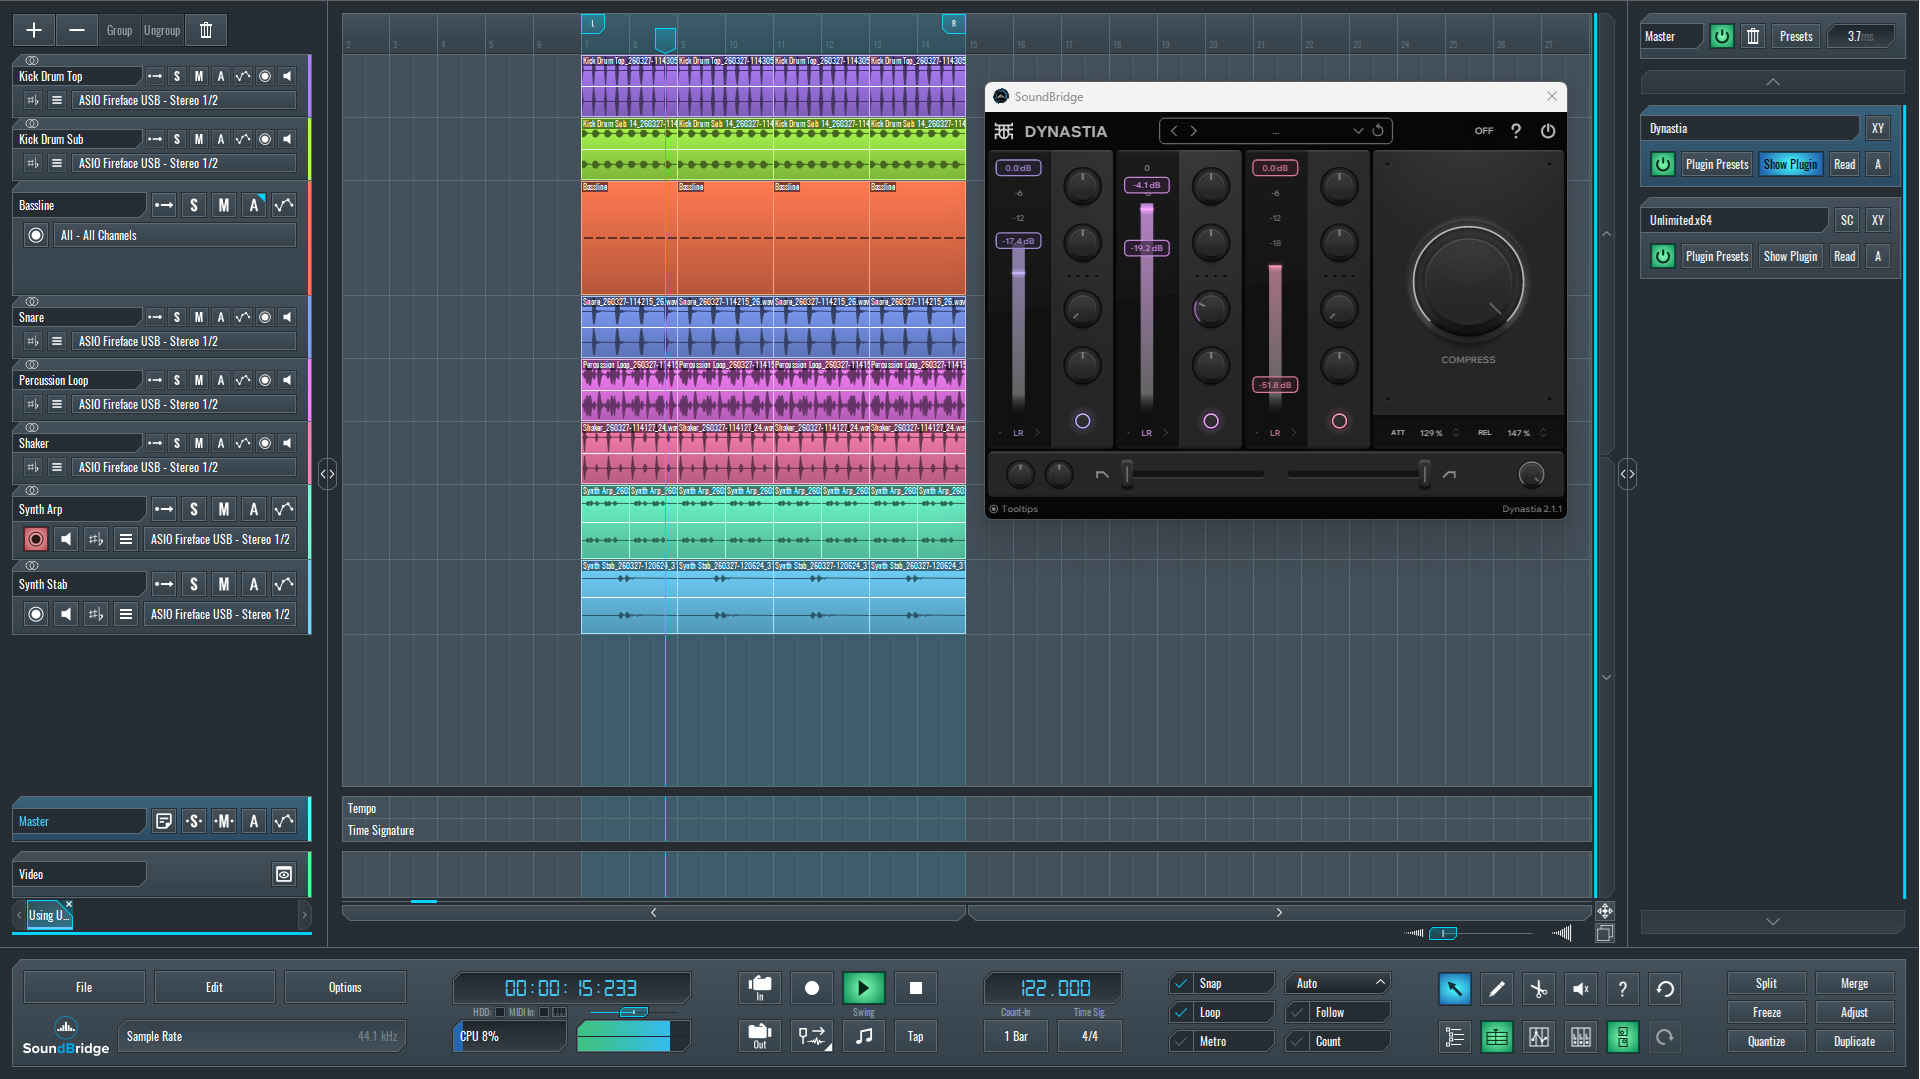
Applying Dynastia on the Master Channel
In the final step, Dynastia was placed on the master channel, positioned before the limiter, with the limiter remaining as the last processor in the chain.
At this stage, there was enough headroom to apply more noticeable processing. The low and mid bands were treated with stronger upward compression, which helped bring up low-level detail and increase the overall density of the mix.
On the high band, only a small amount of upward compression was applied to avoid harshness and maintain a smooth top end. Additionally, a touch of downward compression was used on the mid band to control occasional peaks and keep the mix stable.
As a result, the entire mix became more cohesive and glued together. The low end, in particular, felt warmer and more consistent, while the overall balance improved without relying on excessive limiting.
To confirm the effect, the full mix was first played without Dynastia on the master, then with it engaged. The processed version reveals a tighter, fuller, and more unified sound.
~Full Mix - Unprocessed
~Full Mix - Processed with Dynastia
Final Thoughts
Applying upward and downward compression in an OTT-style workflow proved to be less about intensity and more about control. Across all elements—bass, drums, synths, and the master channel—the same principle was applied, with varying levels of aggression depending on each sound's role.
On the bass and drums, the processing was more pronounced to stabilize dynamics and bring important details to the fore. On melodic elements like the synth arp, a lighter touch was enough to improve sustain and cohesion without overloading the mix. Finally, on the master channel, careful use of multiband compression helped glue everything together while maintaining clarity and headroom for the limiter.
The key takeaway is that this type of compression should not be treated as a fixed preset or a one-click solution. Small adjustments across individual bands often produce more controlled and musical results than pushing the processor to extremes.
When used correctly, upward and downward compression can reshape the internal balance of a sound, making it feel fuller, more stable, and more detailed. The result is not just a louder mix, but a more controlled and better-translating one.
If you like this article, here are some more on the same subject:
MASTER MUSIC PRODUCTION
Expert-led courses designed to take you from fundamentals to finished tracks.

HOUSEFrom bouncy bass and solid kicks, this course teaches you the most modern House music production techniques needed to succeed and stand out.

TRAPQuit sounding like generic Trap and produce something World with hints of the Far East. Create ethnic soundscapes to put your Trap ahead of the curve.

AMBIENTProduce relaxing, sophisticated psy-influenced ambient. Psychedelic and relaxing to listen to, create meditative soundscapes to put your listeners in Zen.