
How to Control Transients with Multiband Processing
Last Edited: Apr 3, 2026
In this article, we'll explore how you can use a multiband transient shaper on individual instruments and the master channel. The focus is not on extreme sound design but on how to control transients with multiband processing. In modern mixing and mastering, transient control has evolved far beyond simple attack and release adjustments.
As arrangements become denser and frequency ranges more tightly packed, broadband transient shaping often proves too blunt to address specific problems without introducing new ones. Enhancing attack across the entire signal may add punch in one area while causing harshness or instability in another. Transient shaping focuses on the temporal structure of sound, how quickly energy rises and decays. This approach offers a high degree of control over perceived punch, definition, and forward motion.
Transient shaping does not rely on threshold-based dynamic processing. This is unlike compression, which responds to signal level. Dividing the signal into frequency-dependent bands allows you to shape transient behavior independently across the spectrum. You can stabilize low frequencies without dulling high-end detail. You can also enhance mid- and high-band clarity and articulation without exaggerating low-end movement.
Before We Control The Transients with A Multiband Processor, We Listen First
Let's listen to a short loop we made in SoundBridge: DAW in its unprocessed state. We take this initial step to hear how transients behave naturally across the frequency spectrum, without any enhancement or control.
It then becomes easier to identify where we need transient shaping, and just as importantly, where we do not. Without listening, there's no context for making intentional, frequency-specific decisions. We would rather react mindlessly once we engage the processor.
~Full Mix - Unprocessed.
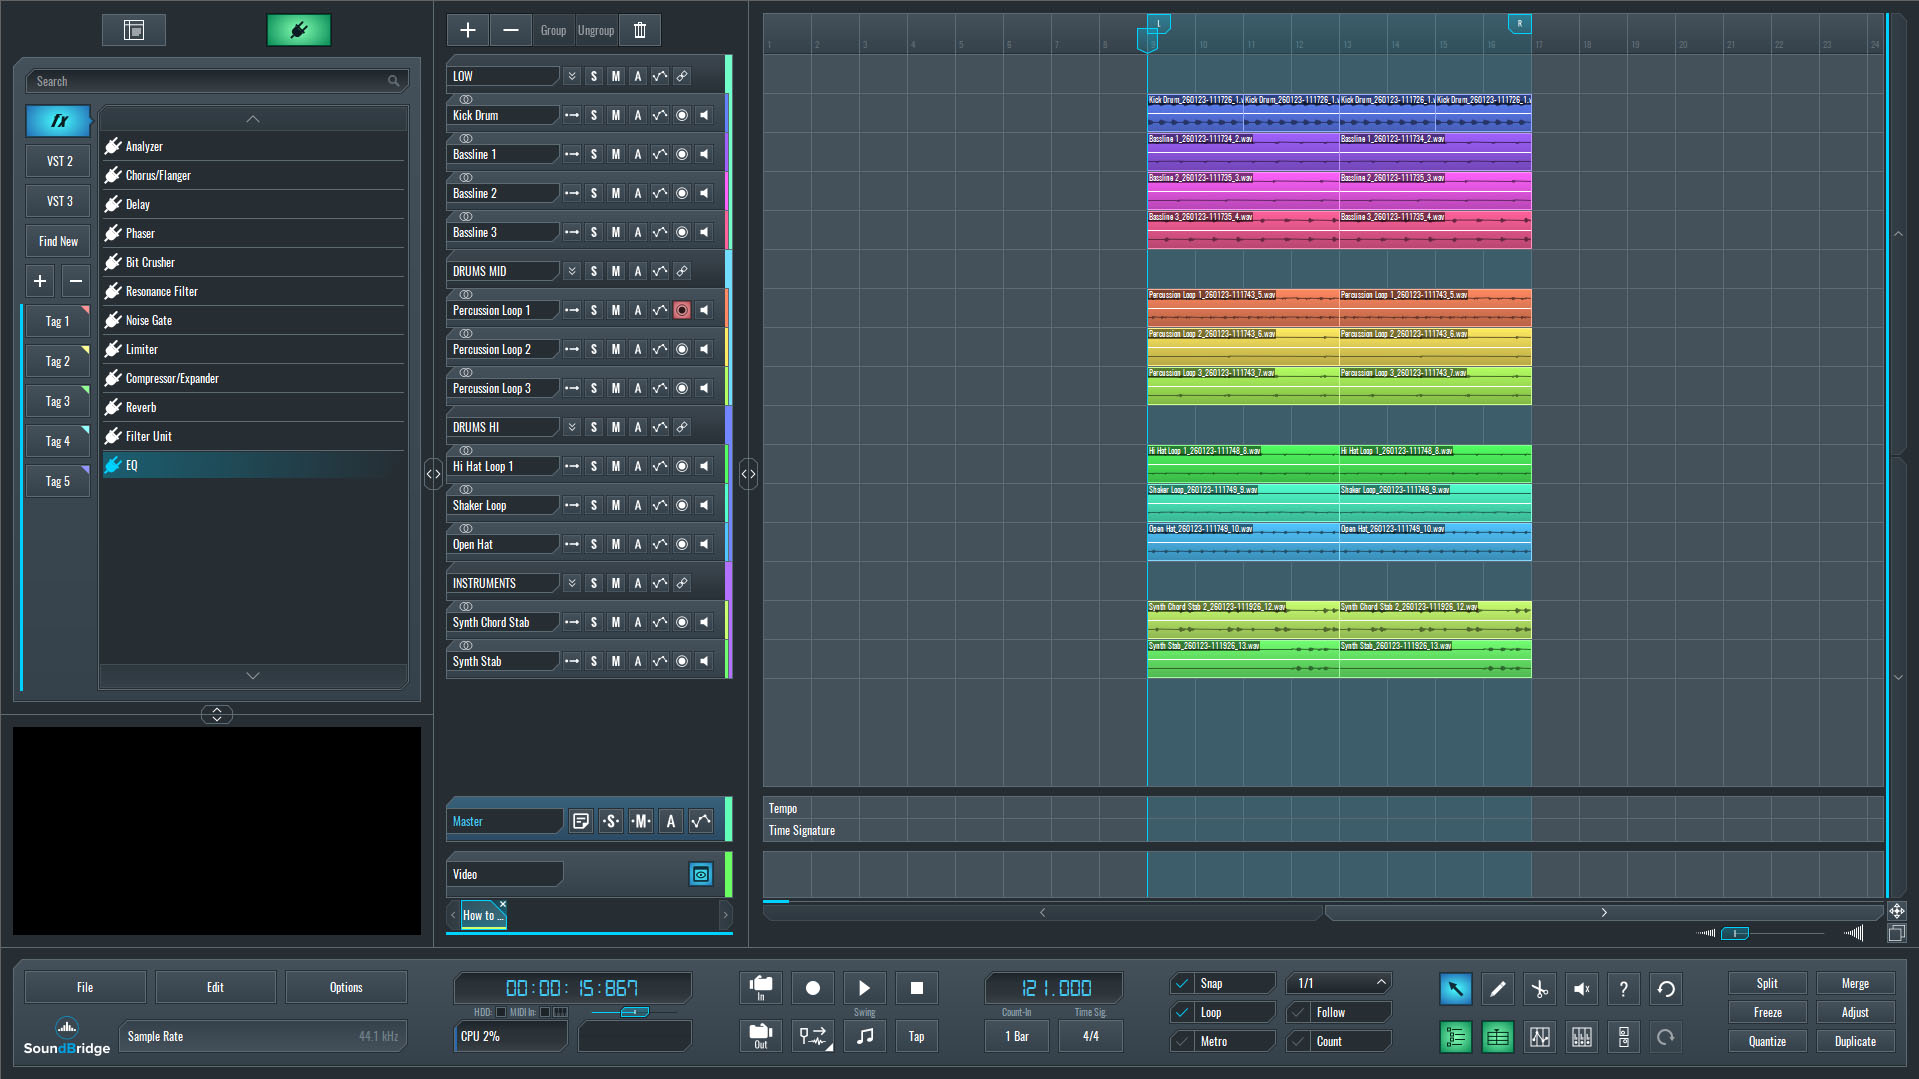
Isolating the Percussion Loop
At this stage, we'll isolate a single percussion loop routed within the Drums Mid group and listen to it. This channel stands out as less prominent than intended, lacking definition and impact in specific parts of the frequency spectrum.
Listening in isolation makes it easier to assess how energy moves and why it struggles to cut through the mix. Certain frequency ranges may feel soft or underrepresented, resulting in a groove that lacks presence and forward motion. Such a focused listening step helps clarify what the sound is missing before any processing decisions are made.

~Percussion Loop - Solo (Unprocessed).
Introducing the Transient Processor
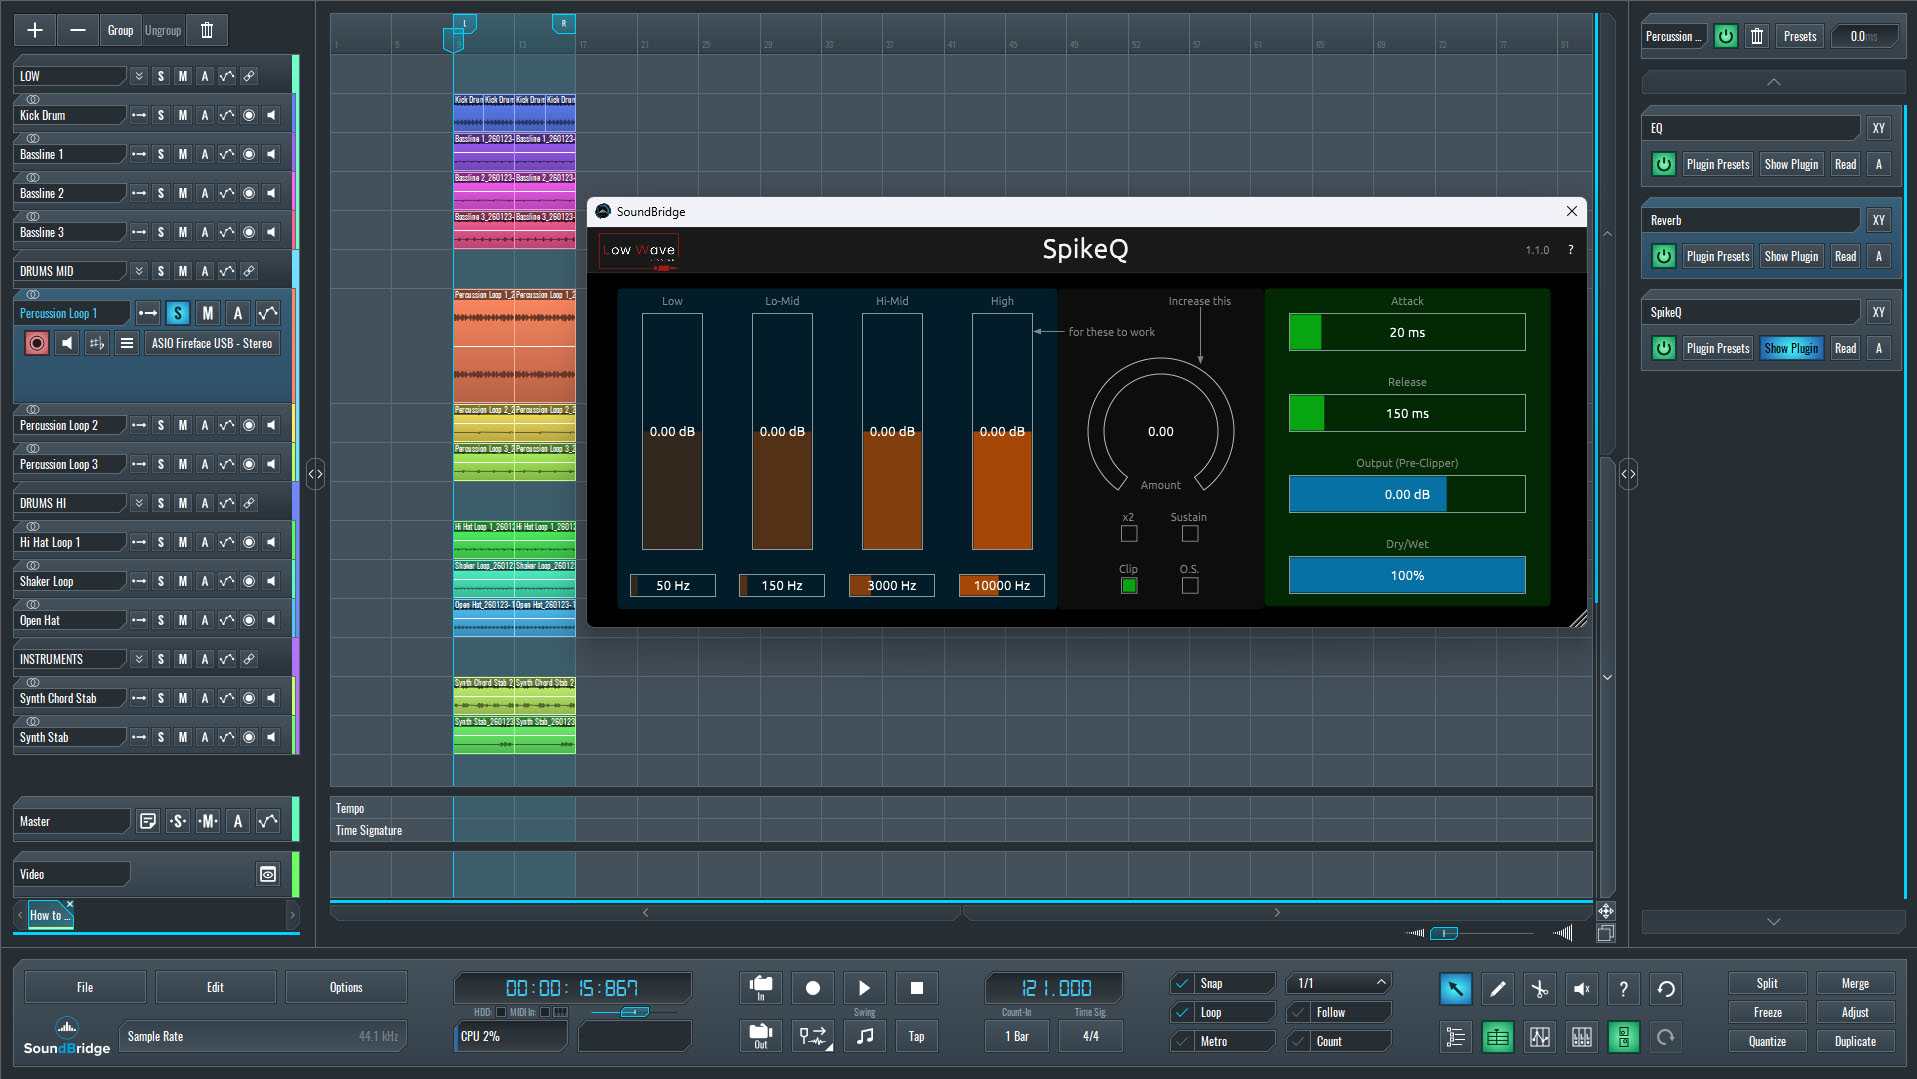
With the percussion loop isolated, we'll insert a multiband transient shaper on the channel. In this case, we'll be using Spike, developed by Low Wave Studios. This processor allows transient behavior to be shaped independently across different frequency ranges, making it well-suited for addressing issues of definition and impact without affecting the entire signal uniformly.
Before making any adjustments, we'll take a moment to walk through Spike's main parameters and explain how each section influences the sound. Understanding how the processor behaves across frequency bands is essential, as it provides a foundation for making controlled, intentional changes rather than relying on trial-and-error.
Understanding how to Control Transients Using Spike for Multiband Processing
With the multiband transient shaper inserted on the percussion loop channel, the next step is to understand how its controls influence the sound before making any adjustments. The interface is intentionally divided into three functional sections, each serving a specific role in shaping the loop's impact and definition.
On the left side of the interface, the signal is split into four frequency bands. Each band represents a different spectral region and can be adjusted independently. By increasing the level of a specific band, we emphasize the transient impact within that frequency range rather than uniformly affecting the entire signal. This process allows us to add presence and punch where the loop needs it most, while leaving other areas untouched. For percussion material, this frequency-selective approach is far more controlled than broadband transient shaping.
In the center section, we find the overall Amount control. This parameter determines how strongly the transient shaping effect is applied across all bands combined. Think of it as a global intensity control: the individual band levels define where the effect is focused, while the Amount knob defines how much of the effect is applied in total. Keeping this balance in mind helps avoid overprocessing while still achieving a noticeable improvement in definition.
Configuring Spike
On the right side of the interface, we defined the processor's timing behavior. The Attack parameter controls how quickly the transient enhancement reacts to the incoming signal, directly influencing how sharp or pronounced the initial hit feels. The Release parameter determines how quickly the effect decays after the transient, shaping whether the loop feels tight and controlled or more extended and energetic. Adjusting these times allows the percussion to sit more confidently in the groove without becoming aggressive or unstable.
Below these controls, the Drive (Output / Pre-Clip) section is set to its maximum magnitude in this example. At this stage, it serves purely as a level and character anchor, ensuring consistent output while we focus on transient shaping rather than tonal coloration or saturation.
At this point, we don't need any extreme adjustments. The goal is to understand how each section contributes to the processor's overall behavior before making targeted shaping decisions.
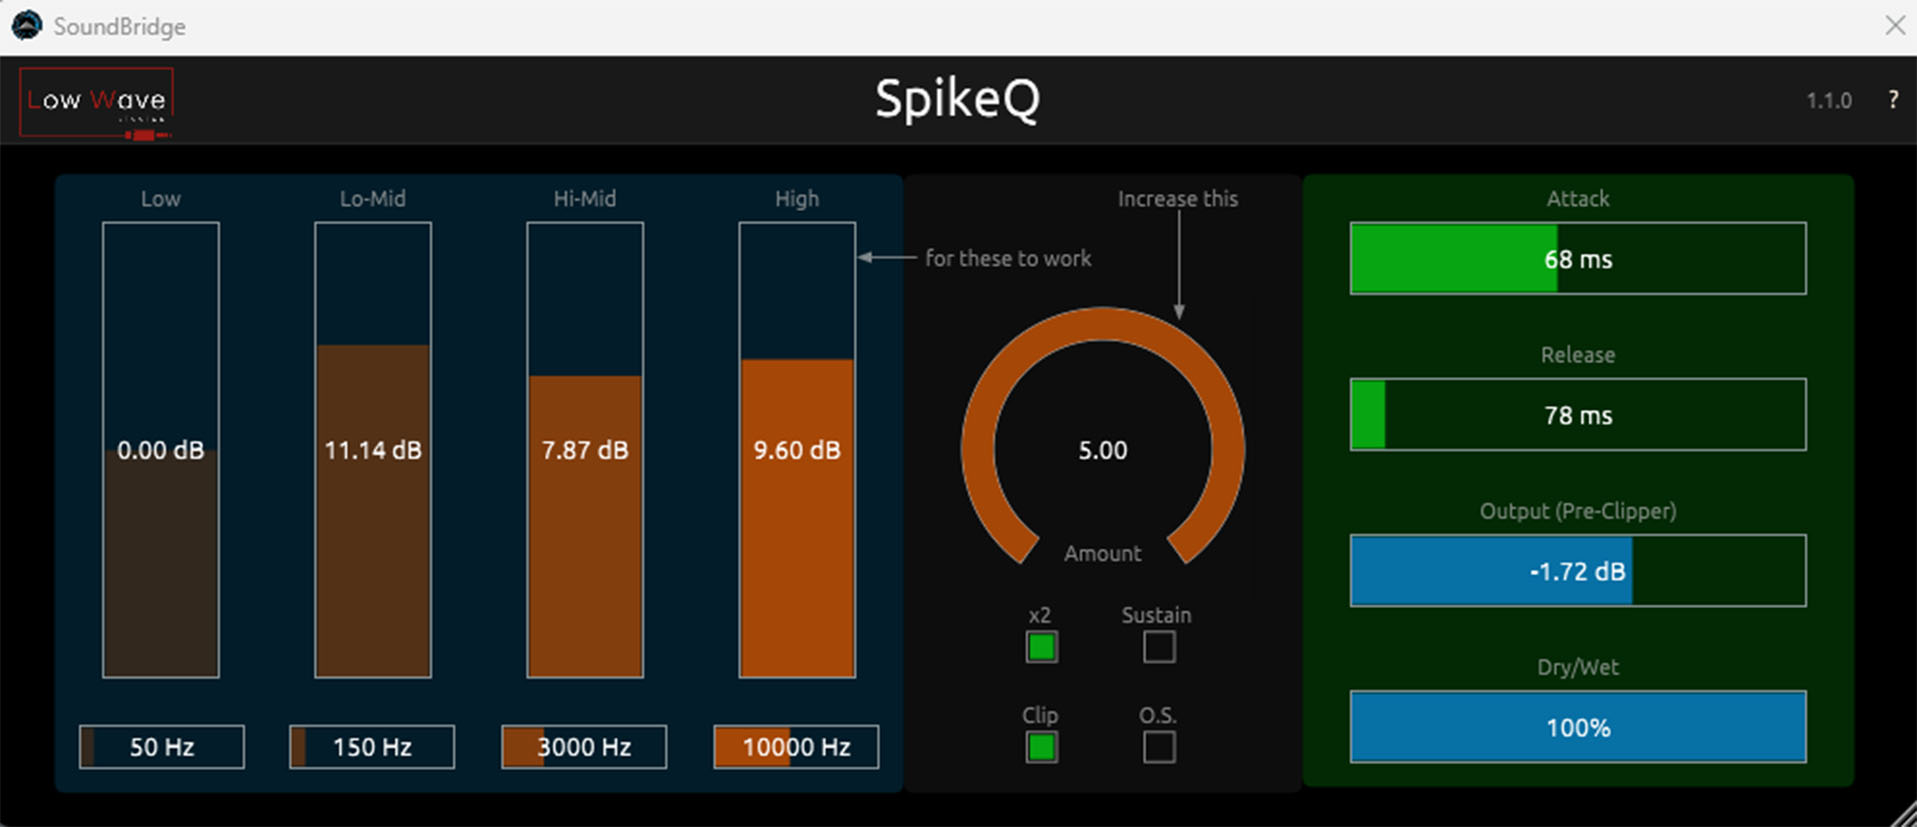
~Percussion Loop - Solo (Processed with SnapQ).
You can also Control Transients on the Master Track with Multiband Processing.
While this type of processing can be applied to a wide range of individual instruments and groups, you can also control transients with multiband processing effectively on the master channel when handled with restraint. In this context, the goal is not to reshape the mix or add obvious punch, but to make small adjustments that enhance clarity and perceived impact across the frequency spectrum.
On the master, settings should remain significantly more conservative than on individual tracks. Minor adjustments across selected bands are often sufficient to subtly tighten low-end movement or improve articulation in the mid and high ranges, without altering the mix's balance. A listener should feel the changes rather than hear them immediately.
You should place this type of transient processing before the limiter in the signal chain. Doing so allows the transient shaping to influence how the limiter responds, rather than having the limiter flatten the very details we are trying to enhance. When placed correctly, the limiter reacts more naturally, resulting in improved control and better overall translation.
As with any master processing, frequent level-matched A/B comparisons are essential. Small, controlled moves can add polish and cohesion, while excessive settings can quickly compromise stability and dynamics. Used carefully, multiband transient shaping becomes a refinement tool rather than a corrective one.
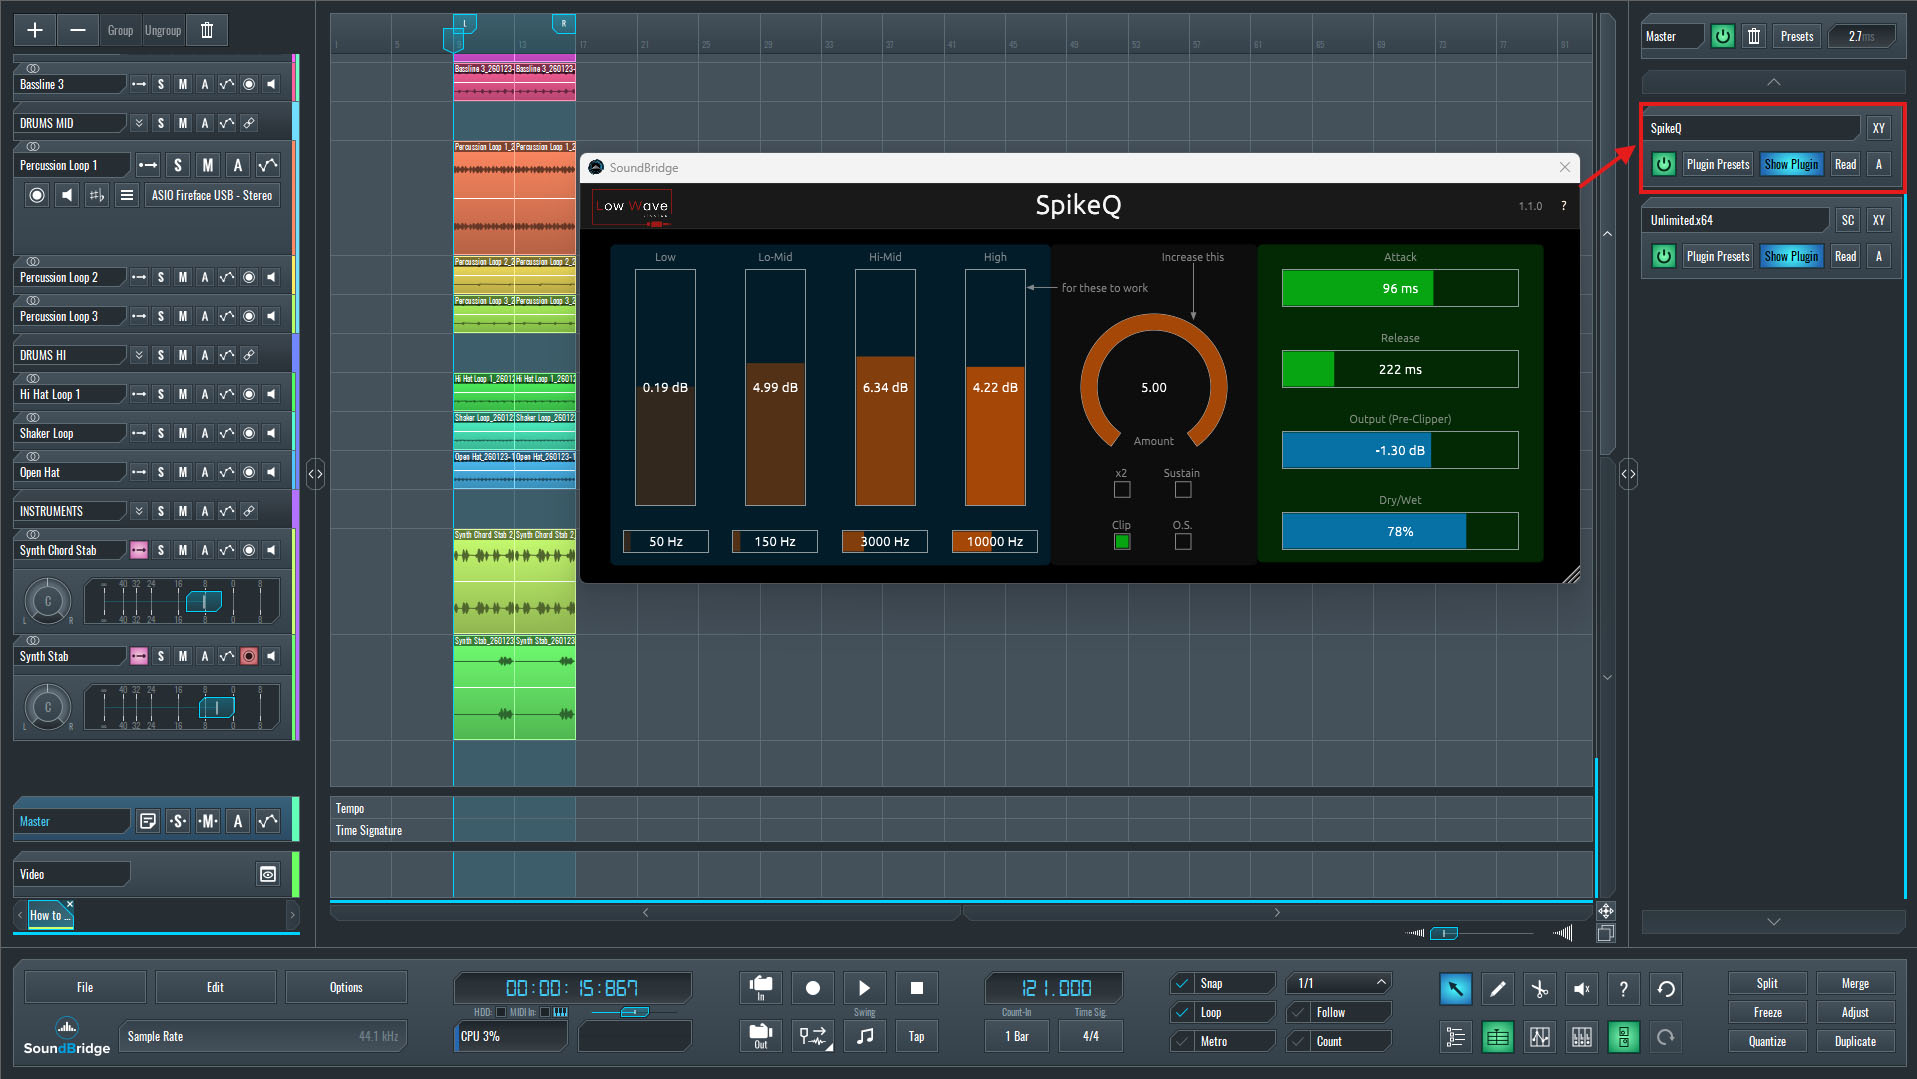
~Full Mix - Processed With SnapQ.
Final Thoughts
Multiband transient shaping is a powerful tool, but its effectiveness depends entirely on how deliberately you use it. Rather than serving as a quick fix for weak or unbalanced sounds, it works best as a method of refinement—allowing specific frequency areas to respond more clearly without disrupting the overall character of the signal.
When you apply this type of processing to individual instruments or groups, it can restore presence, definition, and energy that might otherwise be missing in dense arrangements. The ability to shape transient behavior independently across the spectrum makes it especially useful for percussion and rhythm-focused elements, where impact and clarity must coexist with control.
On the master channel, restraint becomes even more critical. Small adjustments are often enough to subtly enhance perceived punch and cohesion, while excessive processing can quickly undermine balance and translation. Placing the processor before the limiter ensures that transient shaping works with the dynamics of the chain, rather than against them.
Ultimately, the goal is not to exaggerate transients, but to guide the listener's perception in a controlled and musical way. Frequent level-matched comparisons and careful listening in context help keep decisions grounded. Used thoughtfully, multiband transient shaping becomes a precise and flexible technique that supports the mix, rather than drawing attention to the process itself.
If you liked this article on sound design, here are some more on the same subject:
MASTER MUSIC PRODUCTION
Expert-led courses designed to take you from fundamentals to finished tracks.

HOUSEFrom bouncy bass and solid kicks, this course teaches you the most modern House music production techniques needed to succeed and stand out.

TRAPQuit sounding like generic Trap and produce something World with hints of the Far East. Create ethnic soundscapes to put your Trap ahead of the curve.

AMBIENTProduce relaxing, sophisticated psy-influenced ambient. Psychedelic and relaxing to listen to, create meditative soundscapes to put your listeners in Zen.