How to Layer Your Buildup Elements
Last Edited: Feb 6, 2026
In this article, we'll focus on how to layer buildup elements, shaping them into a single, coherent system. Rather than relying on generic risers or constant automation, the goal is to create controlled pressure that feels musical, dynamic, and directly connected to the drop that follows.
Understanding Tension Before the Drop
A buildup doesn't exist only to fill time before the drop. Its real job is to reshape the listener's expectation. When it works, the drop feels inevitable. When it doesn't, no amount of loudness or FX will save it.
Many producers approach buildups from the top down, starting with risers, sweeps, and impacts. They then stack more elements as the section progresses, resulting in a busy, but strangely underwhelming buildup. The energy rises, yet the tension feels artificial, disconnected from the groove and harmony that follow.
The problem isn't the sounds themselves. It's the lack of structure. When multiple uplift elements are layered without clear roles, they blur into a single mass. The elements cancel each other out, competing for the same frequency range, rhythmic space, and emotional function.
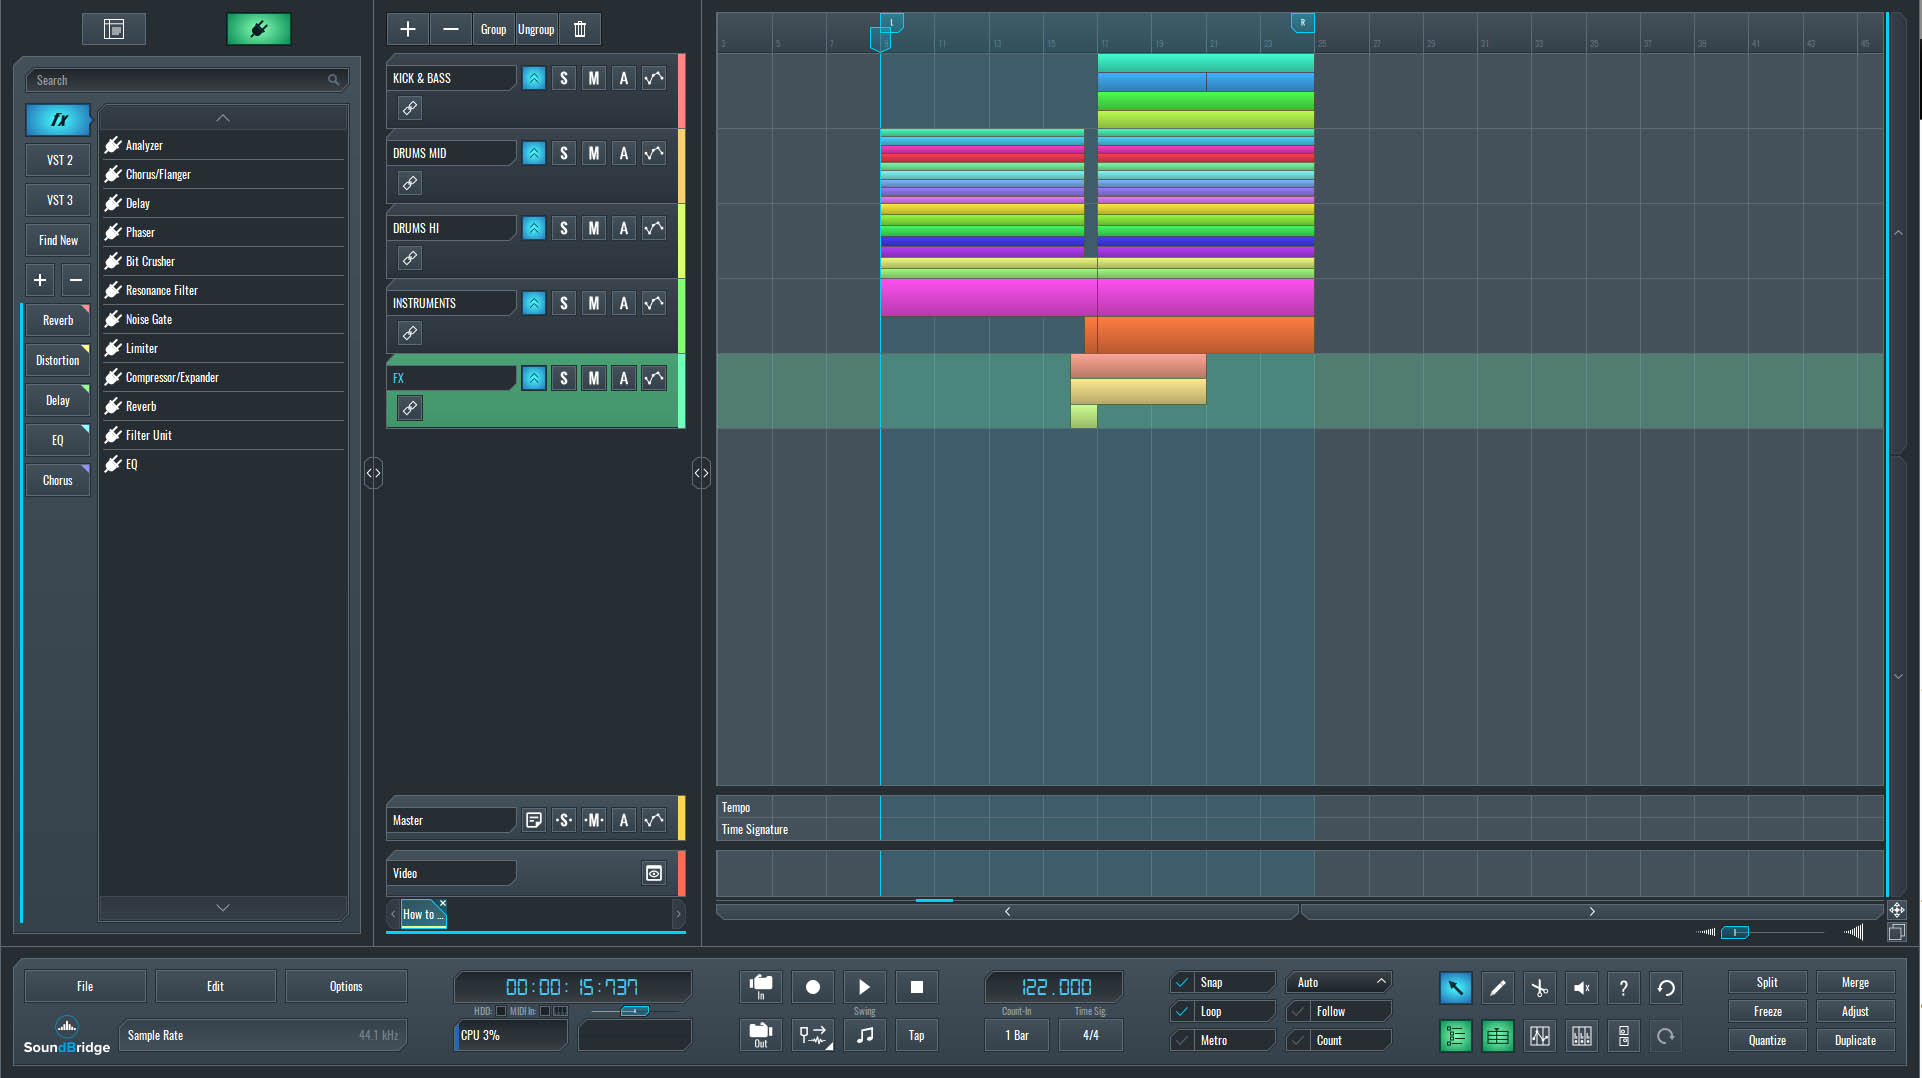
Effective buildups are built horizontally, not vertically. Tension grows as different elements enter with intent, evolve, and interact. Each layer occupies its own spectral space and contributes a specific type of motion: rhythmic drive, tonal lift, or textural urgency.
Setting the Reference Point Before You Layer Your Buildup Elements
Before touching any uplift sounds, automation, or layering, we'll start by listening. Specifically, we'll be listening to a short section of the track we're working on, the intro leading into the drop, without any dedicated buildup elements in place yet.
Our first listen establishes the reference point. It tells us how much tension is already present, where the energy naturally wants to rise, and what kind of impact the drop needs to have. Without this context, it's impossible to make good decisions later. You can't design tension in isolation, it only makes sense relative to what comes before and after.
~Full Mix - Without Buildup Elements.
Starting With a Simple Noise Layer
We'll begin with the most familiar element of all: white noise. This element is one of the most common sounds in electronic music buildups, and almost everyone has used it in some form: a rising sweep, a filtered noise burst, or a subtle background lift.
On its own, white noise isn't interesting. It has no pitch, no rhythm, and minimal character. But that's precisely why it works so well as a starting point. It provides a neutral foundation on which you can layer your buildup elements without diverting attention from the track's musical elements.
Shaping the Noise Into a Buildup Element
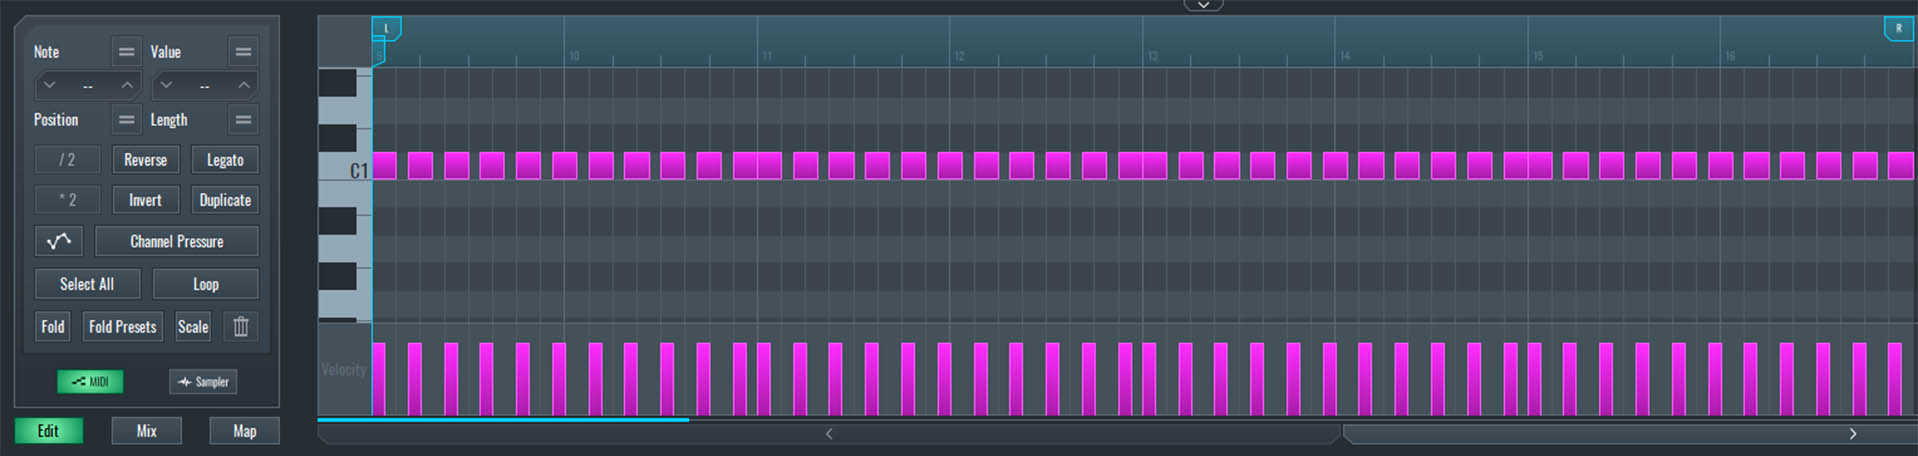
Here, we'll treat white noise as a rhythmic element rather than a static sweep. Instead of holding a single sustained note, the noise will follow the same rhythmic pattern as the rhythm guitar sequence. This approach immediately ties the buildup to the track's groove, preventing the noise from feeling detached or generic. Let us begin by listening to the rhythm guitar groove.
~Rhythm Guitar - Solo.
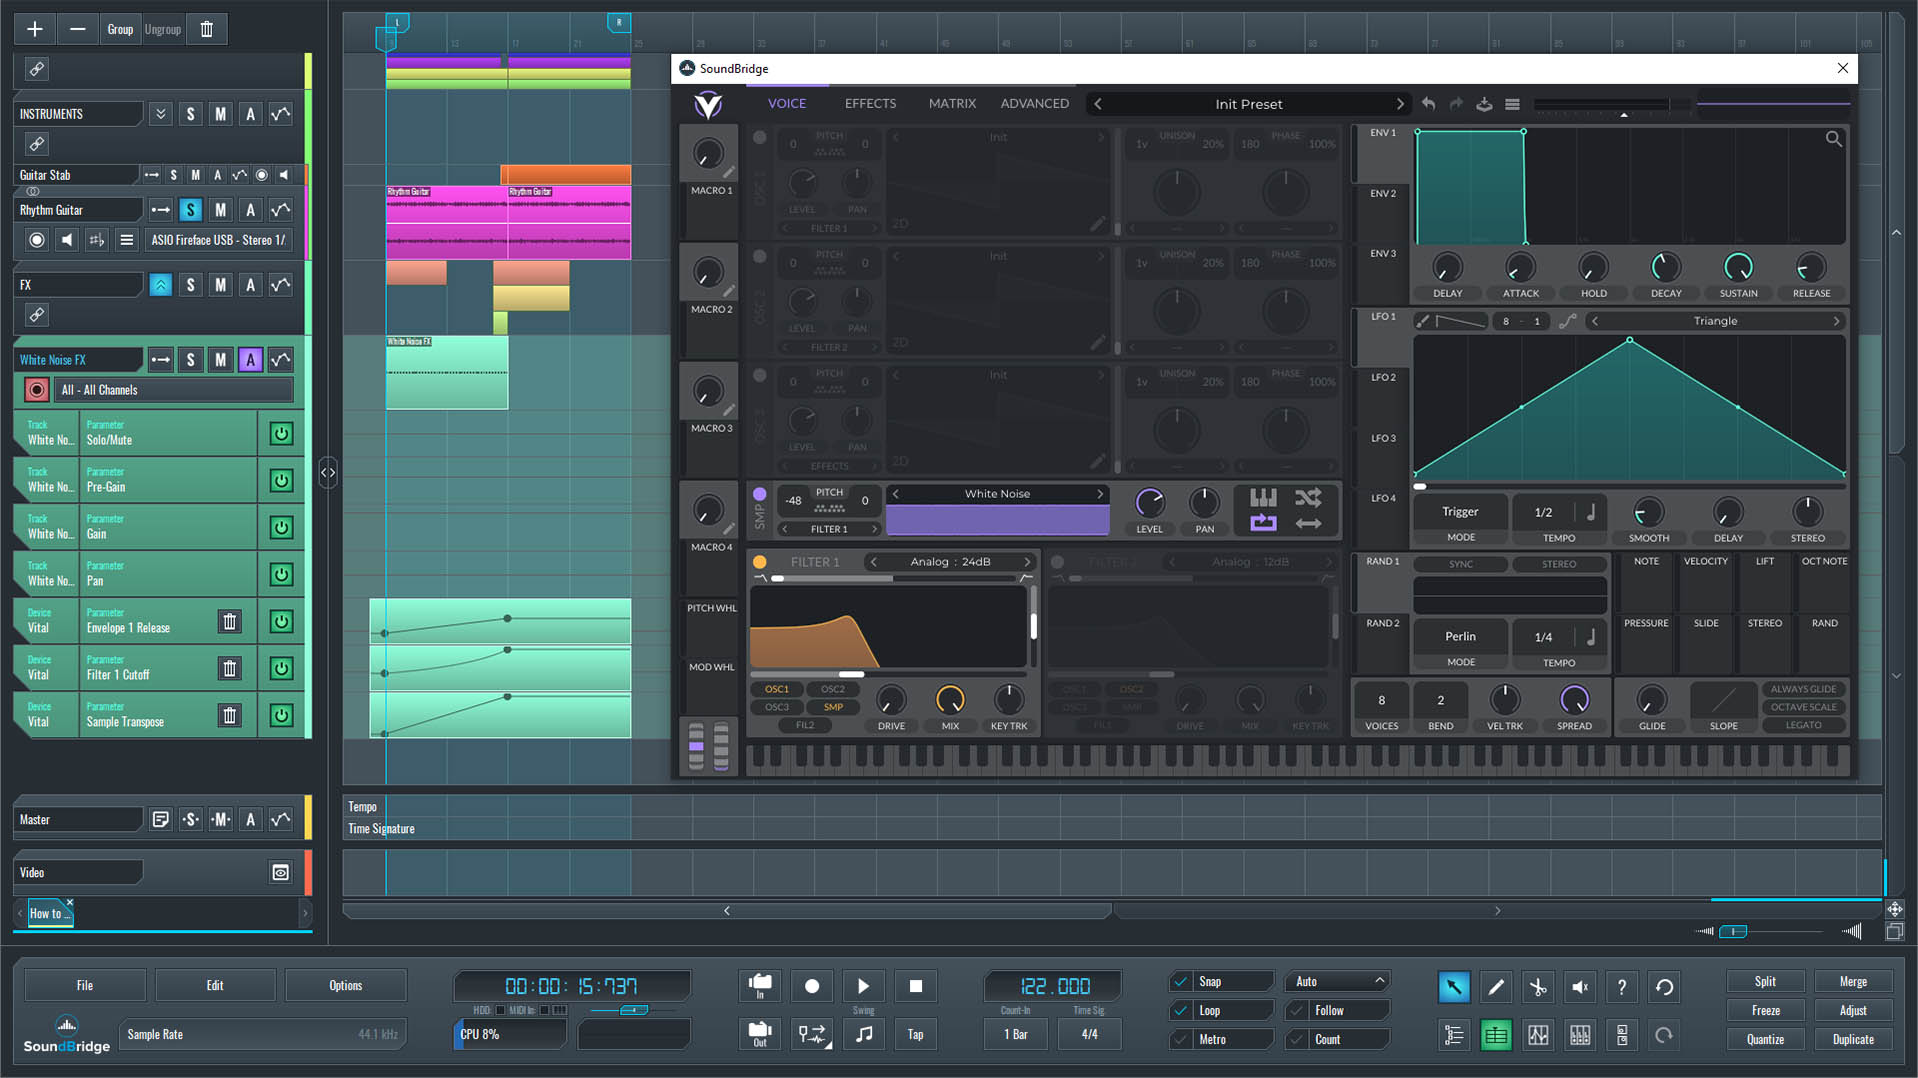
The white noise will be created in Vital, using its sampler as the sound source. All movement will occur within Vital's main interface via a small set of automated parameters, rather than through external effects.
To give the sound a sense of growth, we'll automate the Volume Envelope Release, starting with a short, tight release and gradually extending it. Early in the buildup, the noise feels sharp and percussive; as the release opens up, the sound becomes smoother and more continuous.
Next, we'll automate the Sampler pitch, sweeping from –48 semitones up to +48 semitones over the course of the buildup. This sweep introduces subtle internal motion and perceived lift, even though the source itself remains noise-based.
Finally, we'll automate the filter cutoff, gently opening it while slightly emphasizing the filter's resonance. This automation focuses the noise's higher energy and makes its progression more audible without pushing it to the front of the mix.
At this point, the noise layer is no longer just a background effect, it becomes a moving, rhythm-aware foundation that sets the pace for everything that follows.
Let us hear it solo and then with the rhythm guitar to check how they complement each other.
~White Noise Layer - Processed.
~Rhythm Guitar & White Noise Layer - Processed.
Introducing the Second Buildup Layer: A Clap-Based Uplift
With the noise layer establishing movement and direction, we can move on to the second element. This time, the focus shifts from texture to impact. Instead of another abstract or tonal sound, we'll layer the buildup with an uplifting element, a clap.
Claps are usually associated with groove and transient energy, not buildups. That's precisely why they work well in this role. Their sharp attack gives the buildup a sense of urgency and forward push, especially when reshaped and repurposed beyond their usual rhythmic function.
In this step, the clap won't behave like a standard drum hit. We'll stretch, process, and layer it in a way that transforms it into a rising, tension-building element—something that adds definition and bite without competing with the noise layer or the track's musical content.
This clap-based uplift will introduce more precise articulation, making the buildup feel more deliberate as it approaches the drop.
How We Embedded a Clap in Our Buildup System
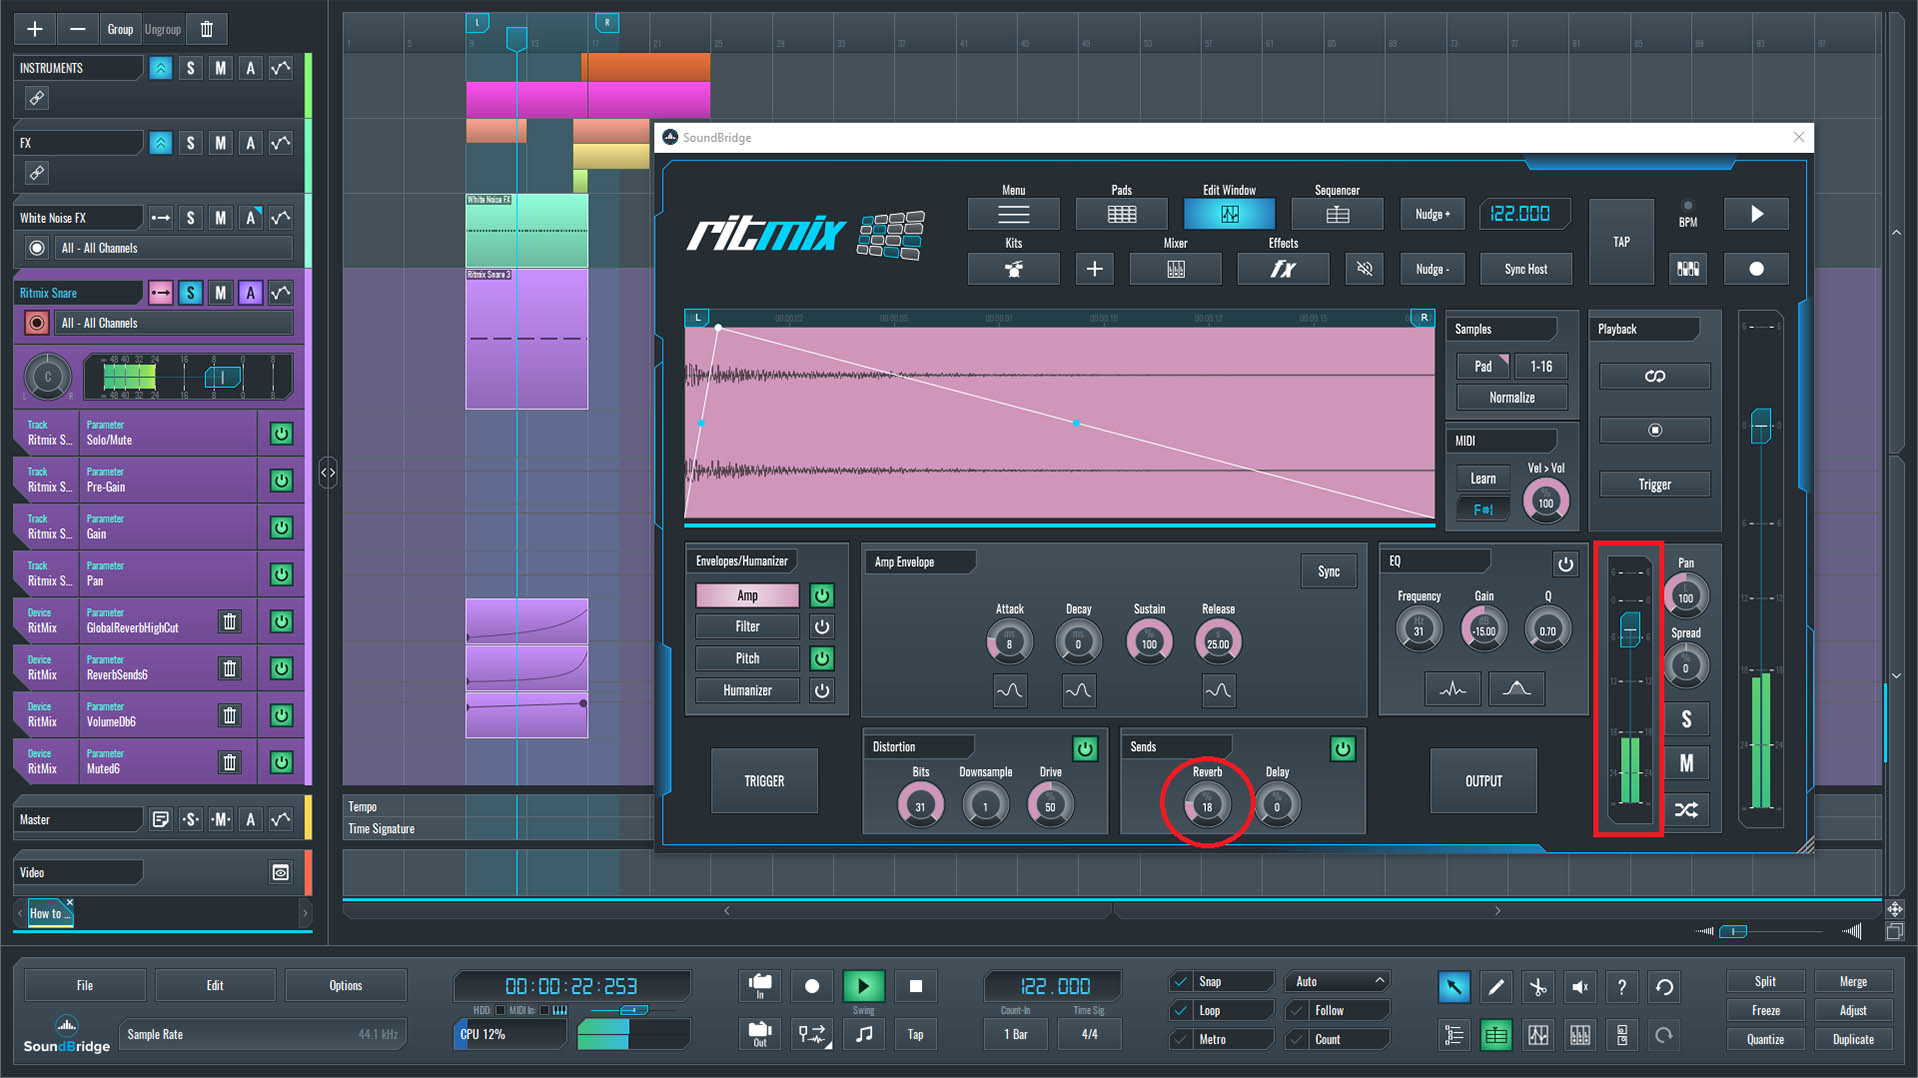
We'll start by loading a new instance of RitMix into the project. Within its interface, we'll drop a clap sound onto one of the drum pads — nothing exotic, just a clean, solid transient to shape.
Once the sound is loaded, we'll program a clap drum roll sequence. The idea here is closely related to what we did with white noise, but applied in a more rhythmic, percussive way. The main accents of the pattern will follow the rhythm guitar, reinforcing the groove that's already present in the track.
Between those accented steps, we'll add additional hits to maintain continuity. These in-between steps will start with a low velocity, barely noticeable at first, and gradually increase in strength as the buildup progresses. As we approach the drop, the clap roll naturally becomes more intense—not because it gets louder all at once, but because its internal energy builds gradually.
This approach turns the clap into more than just a roll. It becomes a dynamic uplift layer that adds urgency, rhythmic pressure, and a clear sense of acceleration leading up to the drop.
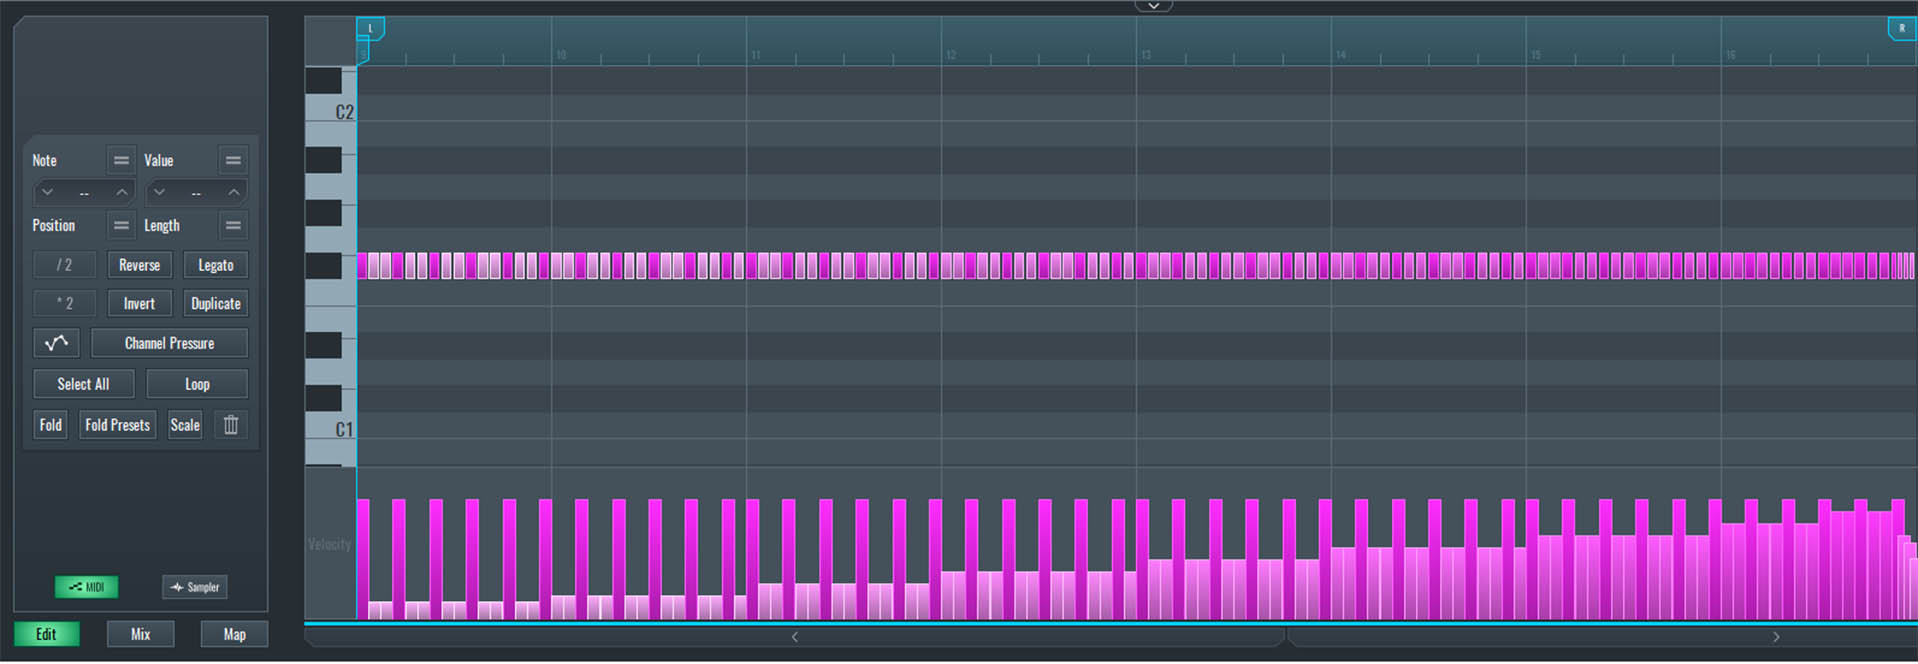
~Clap Drum Roll - Unprocessed.
Adding Movement to Our Clap Sound
At this point, the clap layer still sounds quite dry and exposed, which is expected. To push it further into buildup territory, we'll add reverb directly inside RitMix and use it as a dynamic element rather than a static effect. We'll enable the built-in reverb and automate the send level for the clap, starting very subtly and gradually increasing it as we approach the drop. Early in the sequence, the claps remain tight and defined; later, they smear and expand, creating a sense of rising space and momentum.
In parallel, we'll automate the Hi-Cut frequency of the reverb. By keeping the high frequencies slightly filtered at the start and slowly opening them up, the reverb becomes brighter and more present over time. This process reinforces the perception of lift without increasing the dry signal level. As a final touch, we'll automate one more parameter: the Input Gain, available in RitMix's Edit window. Toward the very end of the clap roll sequence, we'll gradually bring this gain down to zero. This automation ensures that, despite increasing density and reverb, the clap layer's overall level doesn't overpower the drop in the main volume.
Together, these 3 automations add another layer of buildup effect to this element. The clap doesn't just get busier — it grows in size and intensity, helping the transition feel more expansive as the drop approaches.
~Clap Drum Roll - Processed.
Hearing the Buildup in Context
At this stage, all buildup layers are in place, and each one has a clearly defined role. The white noise establishes movement and direction, while the clap-based uplift adds rhythmic urgency and articulation. Together, they form a controlled system that builds tension without overwhelming the arrangement.
The final step is to step back and listen. We'll play the buildup in the context of the whole mix, focusing on how it leads into the drop and how the energy translates once everything comes together. This part is where small-level adjustments and automation refinements matter most, not to make the buildup louder, but to make the transition feel intentional, balanced, and satisfying.
Hearing the buildup in context confirms whether the tension we've created actually serves the track. If the drop hits with clarity and impact, the buildup has done its job.
~Full Mix - With Buildup Elements.
If you liked this article on sound design, here are some more on the same subject:
MASTER MUSIC PRODUCTION
Expert-led courses designed to take you from fundamentals to finished tracks.

HOUSEFrom bouncy bass and solid kicks, this course teaches you the most modern House music production techniques needed to succeed and stand out.

TRAPQuit sounding like generic Trap and produce something World with hints of the Far East. Create ethnic soundscapes to put your Trap ahead of the curve.

AMBIENTProduce relaxing, sophisticated psy-influenced ambient. Psychedelic and relaxing to listen to, create meditative soundscapes to put your listeners in Zen.