Create a Tech House Bassline in SoundBridge Using Vital
Last Edited: Jun 9, 2024
In this article, we will explore the importance of basslines and discuss some of their key characteristics. In Electronic Dance Music (EDM), a bassline is more than just a series of low-end notes; it's the track's heartbeat. Today, we're diving into the art of bassline synthesis, exploring how these powerful undercurrents not only drive the rhythm but also define the very identity of a genre.
Whether you're an experienced producer or a seasoned music enthusiast, understanding the role of the bassline will elevate your appreciation and skill in crafting compelling EDM tracks. The bassline itself, along with the drum section, can drive the entire track. While drums provide short impulses that maintain the rhythm of a song, the bassline serves a broader purpose. In addition to conveying emotion and setting energy levels, it can vary across different song sections. Together with the drums, the bassline is the most repeated element in a track, adding significant value.
Key Points:
The Foundation of Rhythm and Energy:
The bassline in EDM acts as the foundation, providing rhythm and energy that propels the track forward. It's essential for maintaining the groove that keeps the dance floor alive.
Genre-defining Elements:
-
A chopped and short-noted bassline with a bit more shuffle can characterize the track and specify its subgenre as TechHouse.
-
A rolling and hypnotic repetitive bassline will mark a track to be recognized as Melodic Techno or Progressive House.
Synthesis Techniques:
When synthesizing basslines, the most common method is subtractive synthesis, which involves removing information from the sound source or waveform. This is typically achieved using various types of filters, with LowPass Filters being a primary choice for basslines to remove high-frequency content. FM Synthesis, on the other hand, differs from subtractive synthesis. In subtractive synthesis, we combine oscillators and voices by summing them to synthesize the desired elements. In FM Synthesis, at least two waveforms are used—one oscillator acts as the carrier, while the other functions as the modulator, adding information to the carrier waveform.
FM Synthesis
FM, or Frequency Modulation, is distinct from Subtractive synthesis and requires at least two oscillators. In FM Synthesis, one oscillator acts as the carrier (typically the bass oscillator), while the other functions as the modulator. The modulator affects the frequency of the carrier oscillator, resulting in complex waveforms. In Subtractive Synthesis, by contrast, two oscillators are typically summed together to produce the final waveform. The difference lies in how the waveforms are combined: FM involves modulating the carrier oscillator, while Subtractive involves directly summing oscillators to create the desired sound.
Let's Make the Rolling Bassline!
We will start composing the Rolling Bassline based on this drum beat:
~Drum Beat - Solo
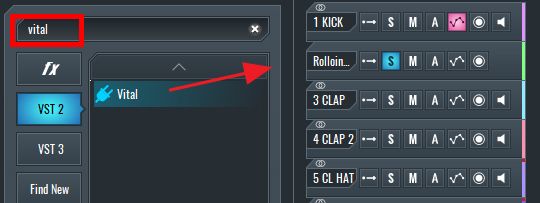
First, create a new channel in SoundBridge by dropping the Vital VST from the Browser panel into the Track List.
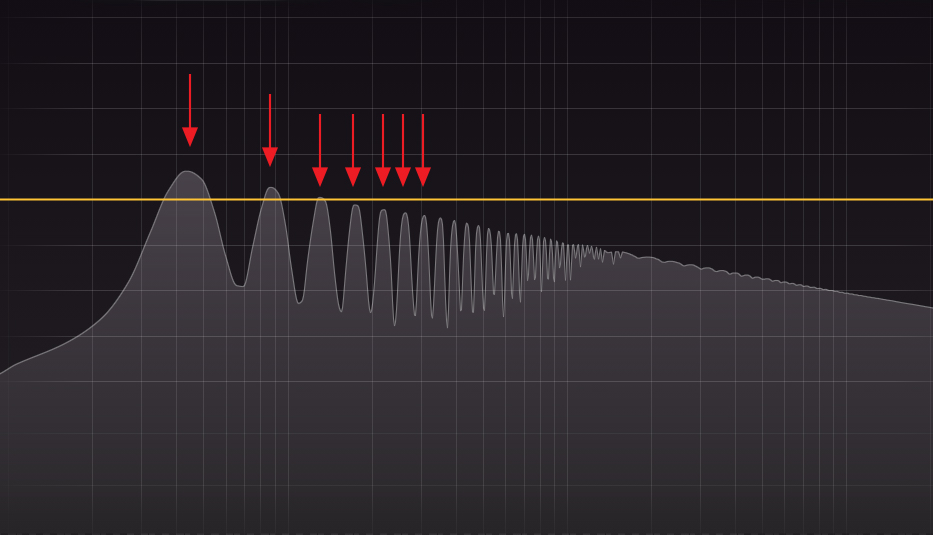
Now, let's synthesize the Rolling Bassline and use the default Saw oscillator from Vital.
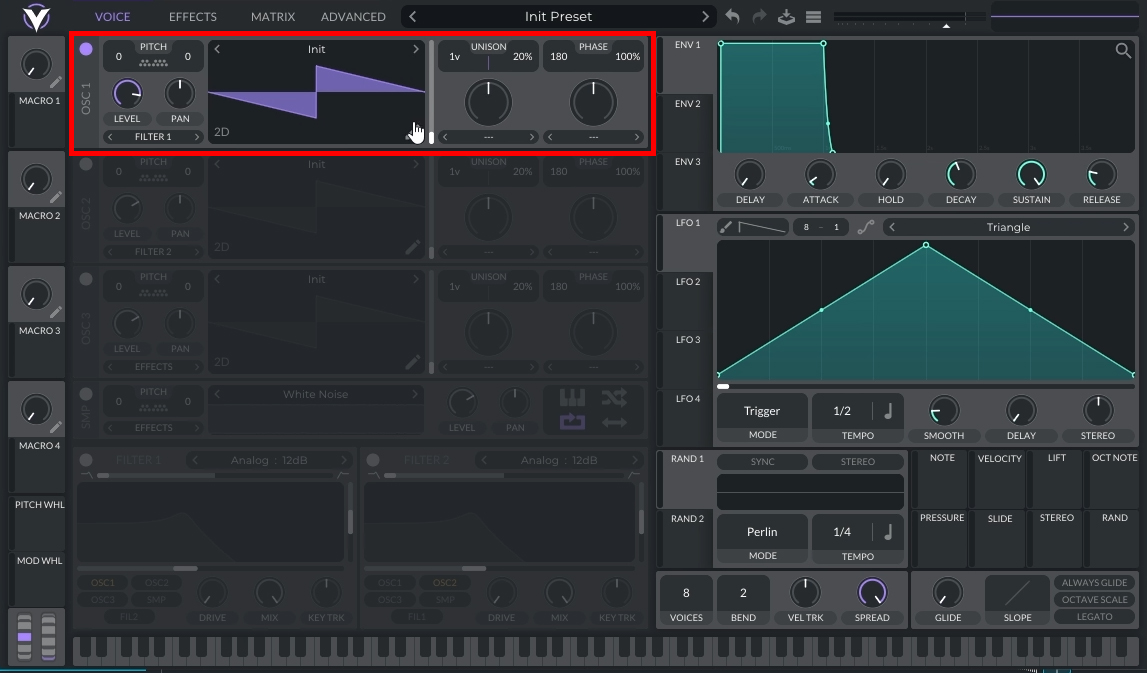
The main characteristic of the Saw waveform is that it is rich in harmonics, which is noticeable in the image below.
In Vital, we have control over the random phase position. By default, this setting is at 100%, which means that each time the oscillator is triggered, it starts oscillating from a random position, resulting in a different waveform each time. To set a specific phase start position and eliminate randomness, we can adjust this setting to 0%.
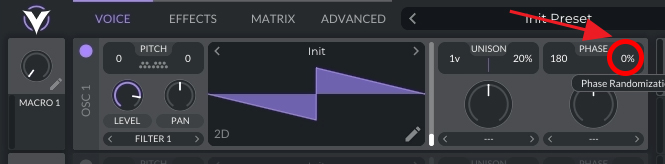
A second important parameter is the Phase Position. This setting controls where the oscillation will start. We can choose from 0° to 360°.

The Unison field is related to voicing. We can set the number of voices, with each voice representing a duplication of the oscillation. In addition to determining the number of voices, we can control the amount of unison. Unison introduces a slight variation in the pitch of each voice. This feature is crucial because if we choose 4 voices with 0 unison, the signals will be identical and simply added on top of each other, resulting in no perceptible differences. By adjusting the pitch of the voices slightly, each voice becomes distinct, resulting in a richer sound.
Setting the Rolling Bassline to 2 voices will achieve good results, and adjusting the unison to around 5% will create a stereo bassline that complements Rolling Basslines effectively.

Using Filters to Adjust the Cutoff of the Bassline
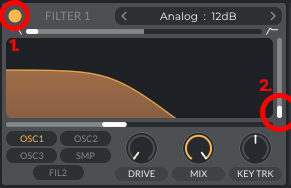
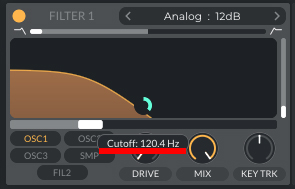
In the next step, let's turn on Filter 1 on Vital and set the Resonance to 0.
Now, let's connect Envelope 2 to the Filter's Cutoff. By doing this, we will modulate the Filter's Cutoff frequency based on the Envelope's settings. This will add a dynamic effect to the bassline, allowing us to control the duration and intensity of the modulation. To achieve this, click and drag the arrows from ENV 2 to the Filter 1 Cutoff parameter and then release it.
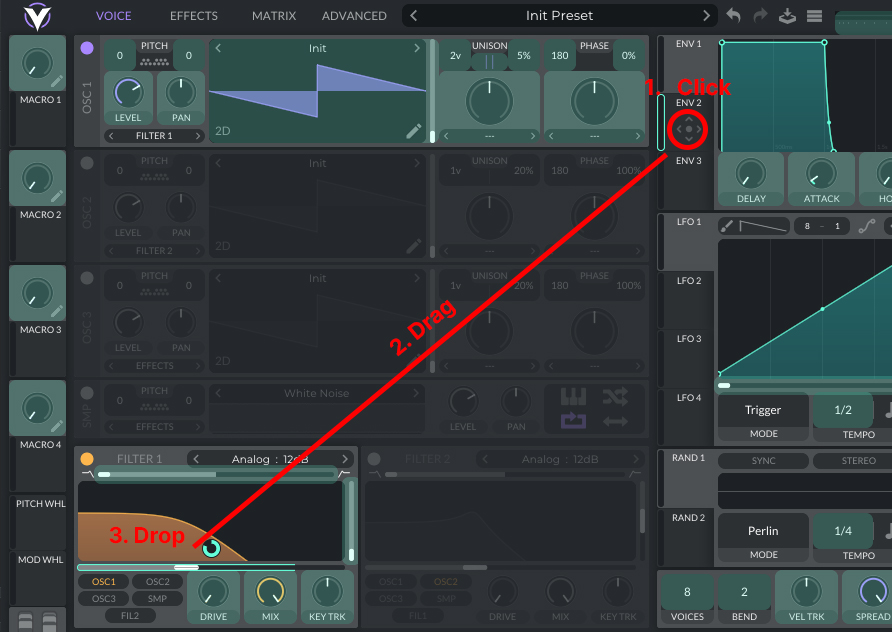
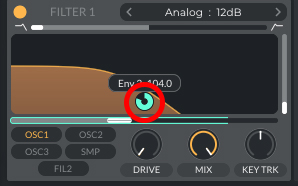
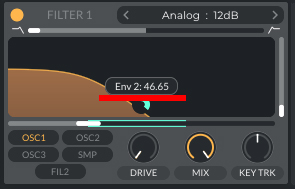
We can control the amount of modulation applied to the Filter's Cutoff by adjusting the green circle that appears after connecting ENV2 to the Filter 1 Cutoff.
Set the Cutoff position to 120hz.
Set the ENV 2 amount to around 46.
ENV 2 settings: Set Attack to 0, Hold to 0, Decay to around 200ms, Sustain to 0, and Release to 0. You can keep it as it is, as it won't have any effect when Sustain is set to 0.
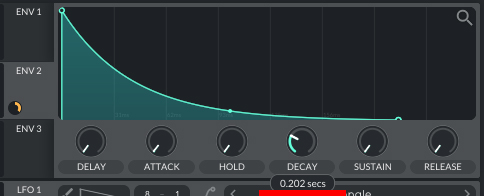
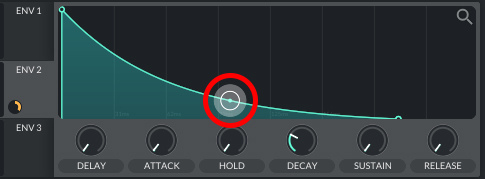
You can adjust the curve to look like the one in the image by holding the middle dot on the curve and pulling it down.
We can also apply some distortion from the FX section to make a bassline richer.
-
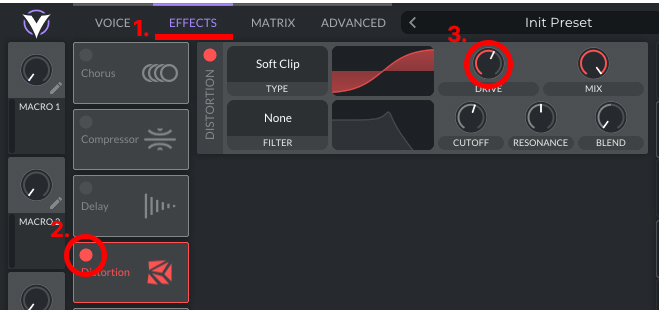
Click on the Effects Section.
-
Turn on the Distortion.
-
Set the Drive to around 60%.
Let's Create a MIDI Track for the Bassline
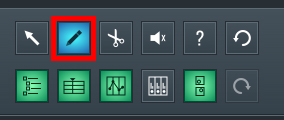
Now we need to create a MIDI block and use an F note to create 3 sequential notes. Select the Draw tool or press 'D' on your keyboard.
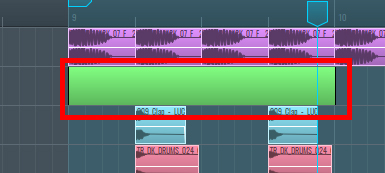
Draw an empty MIDI Block that is 1 bar long in the Sequencer.
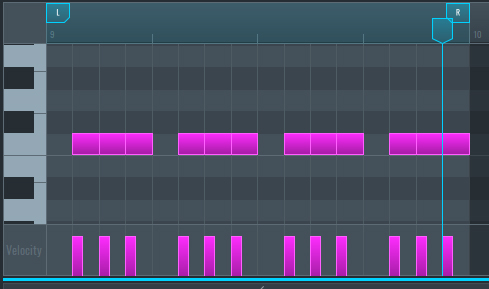
Now, let's add MIDI notes to the block by double-clicking on the empty block. Then, using the Draw tool, let's create 1/16th notes.
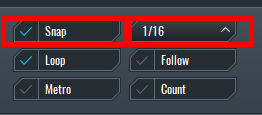
Note that if you're unable to draw 1/16th notes and your notes are longer, make sure to set 1/16th on the Snap Beat Selector and enable Snap.
Now the Rolling Bassline is Complete!
~Rolling Bassline - Solo
~Rolling Bassline within the context of the track.
Making a Tech House Bassline
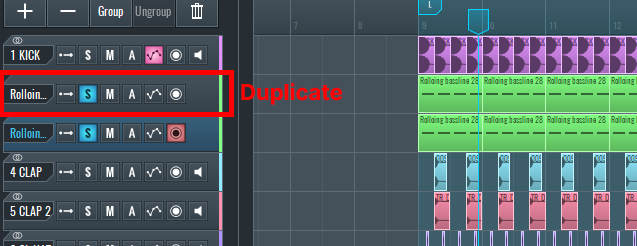
We can duplicate the Rolling Bassline and make some adjustments to achieve the Tech House bassline. First, let's duplicate the Rolling Bassline channel by selecting it and then using (Ctrl + D) on Windows or (Cmd + D) on Mac.
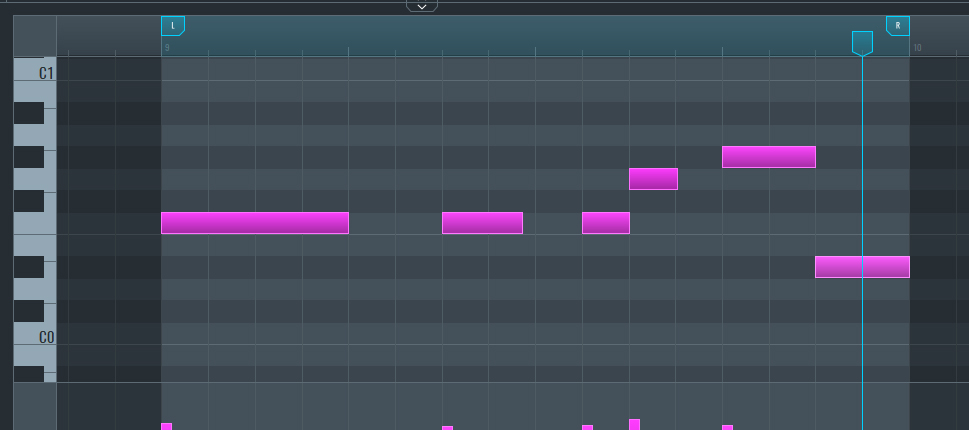
Let's change the MIDI notes to something else. You can use the notes shown in the image below to achieve the same result.
Select all the notes by pressing (Ctrl + A) in Windows or (Cmd + A) in Mac.

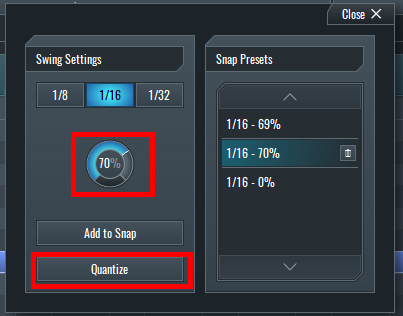
Let's add a bit of swing to create a groove different from the bassline. Click on the Swing button.
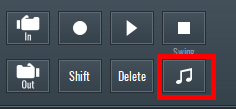
Add 70% of the Swing and press Quantize.
Let's Adjust a Few Parameters in Vital
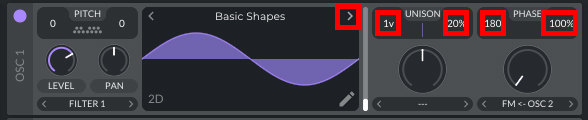
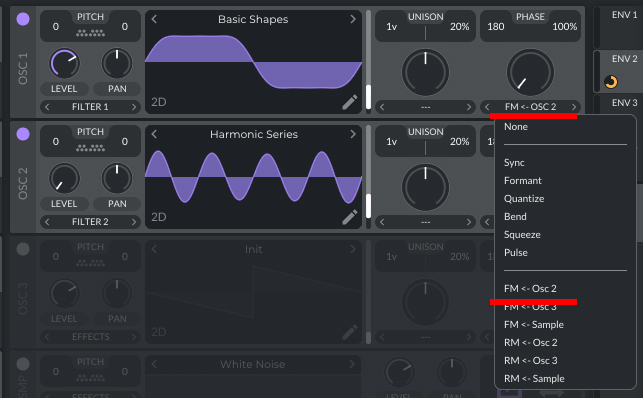
First, open Vital in the duplicated channel. Change the waveform on the first oscillator by clicking the arrow next to the "INIT" text and set it to "Basic Shapes."
Set voicing to 1 voice, unison to 20%, phase position to 180, and 100% randomization for the Tech House bassline.
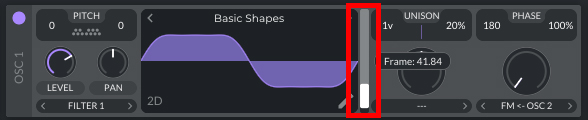
Move the slider up to choose the next Basic Waveform with a Frame of about 41.
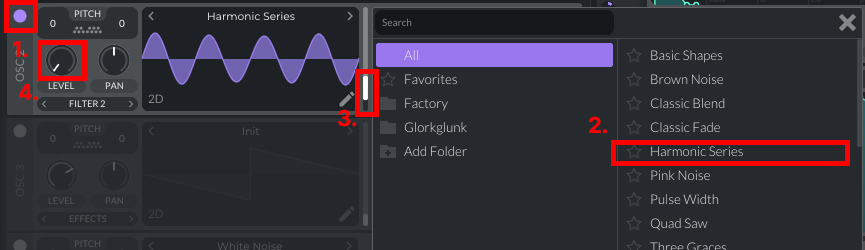
Turn on oscillator number 2. Choose the "Harmonic Series" waveform. Move the slider up until you get around four cycles of the oscillation, and set the level to 0, as we will use it for FM synthesis to modulate Oscillator 1.
Now select FM <- OSC 2 from the modulation section and set the Level knob to zero.
Now connect Envelope 3 to the FM amount knob, as we will use Envelope 3 to control the amount of the Frequency Modulation on Oscillation 1.
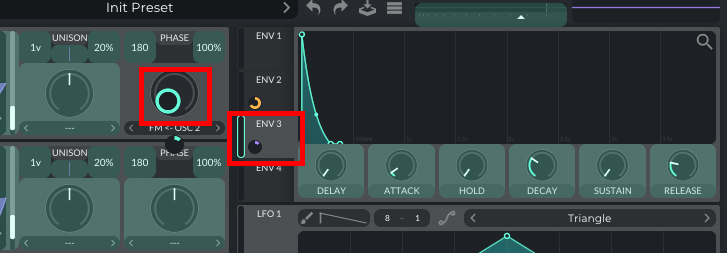
And set the Envelope 3 settings: Delay - 0, Attack - 0.01, Hold - 0, Decay - 0.300, Sustain - 0, Release - 0.089, and adjust the curve.
Now the Tech House Bassline is Complete!
~Tech House Bassline - Solo
~Tech House Bassline within the context of the track.
If you liked this article on sound design, here are some more on the same subject:
精通音乐 制作
专家授课的课程,带你从基础到成片。

HOUSE从弹跳贝斯与扎实踢鼓出发,本课程教授最现代的 House 制作技术,助你成功并脱颖而出。

TRAP别再像千篇一律的 Trap,做出带东方点缀的“世界感”。打造民族音景,让你的 Trap 领先一整条街。

AMBIENT制作放松、精致的 psy 风格 ambient。迷幻又耐听,打造冥想音景,把听众带进Zen。