Mastering Talkback Communication for Better Studio Sessions
Last Edited: May 21, 2026
Many pro studios attribute session efficiency not just to gear or talent, but to how naturally talkback systems keep the control room and live room in sync. It’s the invisible infrastructure of a great session. Yet most guides treat talkback as an afterthought, a simple mic-to-console connection that barely warrants attention. The reality? Overlooked talkback nuances cost studios real time, creative momentum, and performer trust every single day. This guide breaks down everything you need to know, from setup and routing to advanced protocols and mode selection, so that you can run tighter, faster, and more inspiring sessions.
Key Takeaways
| Point | Details |
|---|---|
| Talkback drives session flow | Effective talkback streamlines communication and keeps studio sessions on track. |
| The best setup is dynamic, switched. | Use dynamic microphones with switches to minimize noise and maximize control. |
| Etiquette prevents confusion | Clear protocols keep recordings efficient and minimize distractions or misunderstandings. |
| Push-to-talk mode reduces leakage | Activating talkback only when needed cuts floor noise and enhances focus. |
Why Talkback Matters in Studio Recording
Having introduced the significance of communication, let’s examine what talkback actually accomplishes in busy studio settings.
Talkback is not just about telling a vocalist to try the chorus again. It’s the real-time nerve system of any recording session. When the engineer spots a timing issue, a talkback system lets you flag it immediately rather than waiting for a take to finish. That speed saves takes, tape (or drive space), and energy. Fast, clear feedback keeps everyone focused on the creative goal instead of guessing what the control room wants.
Misunderstandings in the live room are surprisingly expensive. A performer who misinterprets a direction may run three or four takes in the wrong direction before anyone realizes the issue. A clear, confident talkback message at the right moment instantly corrects course. That’s the difference between a two-hour session and a six-hour grind. Strong communication literally shapes the creative outcome because performers take direction, adjust their energy, and deliver stronger performances when they feel guided rather than abandoned.
Think about morale, too. A performer standing alone in a live room, unsure if anyone in the control room is even listening, will tighten up. Regular, encouraging talkback messages, even short ones, remind performers they are supported. That psychological boost translates directly to looser, more expressive takes.
Here are the core benefits that a solid talkback system delivers in any professional session:
- Speed: Instant direction cuts wasted takes dramatically
- Clarity: Precise communication eliminates guesswork for performers
- Morale: Regular check-ins build confidence and energy in the live room
- Technical troubleshooting: Fast detection of buzz, hum, or level issues before they ruin a take
- Creative direction: Real-time coaching shapes the performance arc of an entire song
“Talkback mic setup is a foundational step for seamless studio sessions.” — Audio Drama Production
As Audio Drama Production explains, a proper talkback setup involves connecting a mic via XLR to the console, positioning it for easy access, testing for feedback, and routing signals to specific headphone mixes or room speakers. That process may sound simple, but each step has meaningful implications for session quality. You can also explore music production news for up-to-date insights on studio workflow and communication tools shaping modern recording environments.
Essential Talkback Setup and Routing Techniques
Understanding why talkback matters, producers and engineers must know how to set up and route systems correctly.
The mic choice is your first critical decision. Dynamic microphones are the standard choice for talkback because they efficiently reject off-axis sound. You don’t want the talkback mic picking up monitor bleed, keyboard clicks, or background chatter in the control room. Dynamic mics with a built-in momentary switch give you tactile, reliable control. Condenser mics can work in quieter control rooms, but they risk picking up too much ambient noise and creating a distraction in performers’ headphones.
Routing matters as much as the mic itself. Your talkback signal typically goes from the mic, through your console or audio interface, and into specific headphone mixes in the live room. You may also route it to room speakers for overdub sessions where performers aren’t wearing headphones. The key is selective routing: not every performer needs to hear every message. A string ensemble session, for example, might benefit from routing talkback only to the section leader’s mix, keeping other performers focused and undistracted.
Here’s a comparison of common mic types and how they perform for talkback use:
| Mic type | Off-axis rejection | Built-in switch | Best use case |
|---|---|---|---|
| Dynamic (cardioid) | Excellent | Often included | Standard control room talkback |
| Condenser (cardioid) | Moderate | Rarely included | Quiet control rooms, broadcast |
| Ribbon | Good | No | High-end studio vocal communication |
| Headset (dynamic) | Good | Via boom arm | Mobile or remote session setups |
Follow these steps for a reliable talkback setup every time:
- Connect the mic via XLR to a dedicated talkback input on your console or interface
- Position the mic at an arm’s reach from your main position, angled toward your mouth
- Set the gain conservatively at first, then increase gradually while someone monitors the live room feed
- Test for feedback by activating the talkback with the headphone mix at the session volume
- Route selectively by assigning talkback to specific aux sends feeding only the headphone mixes that need it
- Label everything in your console or DAW, so you never activate the wrong route mid-session
Pro Tip: Always test your talkback setup before the performer enters the live room. What sounds fine through control room monitors may ring badly in a closed-back headphone mix. A quick pre-session sweep saves you from interrupting creative momentum once recording begins.
Once you’ve nailed the physical setup, explore headphone mix techniques to optimize what performers actually hear during takes. A great talkback message delivered through a badly mixed headphone feed still loses its impact.
Talkback Etiquette and Advanced Communication Protocols
With setup covered, the next challenge is maximizing studio efficiency through professional communication protocols.
Even a perfectly configured talkback system can derail a session if nobody follows communication etiquette. The most common mistake? Jumping straight in the direction without identifying yourself. In larger sessions with multiple engineers, assistants, or producers, a performer may hear a voice in their headphones and not know who’s speaking or whether the message is even directed at them. Simply saying your name or role before a message, “engineer here, let’s try the verse again,” cuts through ambiguity immediately.
Keep messages concise. The live room is a focused creative space. Long-winded explanations break the performer’s concentration and can feel like criticism rather than guidance. Short, direct instructions, delivered with a warm, confident tone, land far better. “Great energy, try it slightly softer on the bridge” works. A 90-second breakdown of why the dynamics aren’t working does not.
According to Church Production’s detailed guide, identifying yourself before speaking is a key protocol detail that prevents confusion, especially in complex multi-person sessions. That same source notes that dynamic mics are preferred for their off-axis rejection. That careful volume adjustment is essential to avoid feedback or the dreaded howlround effect, the painful squeal that kills trust instantly.
Here are the essential session protocols every studio team should adopt:
- Set a communication language before recording starts: agree on terms like “standby,” “rolling,” and “that’s a take” so there’s no ambiguity
- Use sign-off phrases: a simple “back to you” or “over” tells performers the message is complete, and they can respond
- Assign performer talkback buttons: In two-way setups, label and test performer communication buttons at the session start.
- Limit control room chatter: keep off-topic conversation quiet when the talkback is live or when performers may hear the room.
- Give positive reinforcement frequently: saying “that’s sounding great” costs nothing and builds enormous creative energy.
Two-way talkback is worth investing in for serious recording environments. Two-way communication via performer buttons lets musicians signal questions, flag technical issues, or request mix adjustments without removing their headphones or breaking their focus. It’s a small feature that adds significant polish to the session.
Pro Tip: Calibrate your talkback volume before every session, not just once at setup. Monitor levels change throughout a session as mixes get adjusted. A message that starts at a comfortable level can become intrusive after a tweak to the headphone mix. Make volume checks part of your session routine, not an afterthought.
You can also check out these lead communication methods for creative inspiration on how vocal and instrumental direction techniques connect to broader production decisions.
Push-To-Talk vs Open Talkback: Choosing the Right Mode
Clear etiquette and protocols lay the foundation; now it’s important to select the best communication mode for your needs.
The mode you choose for talkback operation shapes the entire feel of a session. Push-to-talk (PTT) means the talkback mic is only live when you physically hold or press a button. Open talkback means the mic is continuously active. Each has a real place in studio work, and choosing wrong can cost you in ways that are hard to diagnose.
Here’s a direct comparison to help you decide:
| Feature | Push-to-talk (PTT) | Open talkback |
|---|---|---|
| Floor noise leakage | Minimal | High risk |
| Distraction for performers | Low | Potentially high |
| Session awareness | Limited to active messages | Continuous, natural |
| Best for | Tracking, overdubs, focused sessions | Rehearsals, collaborative creative work |
| Engineer effort | Requires manual activation | Hands-free, passive |
| Feedback risk | Lower | Higher |
Push-to-talk is widely recognized as best practice for minimizing open mic leakage and floor noise bleeding into the talkback signal. In a recording studio context, this matters enormously. Keyboard clicks, mouse movements, background conversation among producers, and even HVAC noise can leak into an open talkback mic and feed directly into a performer’s headphones. PTT keeps the signal clean.
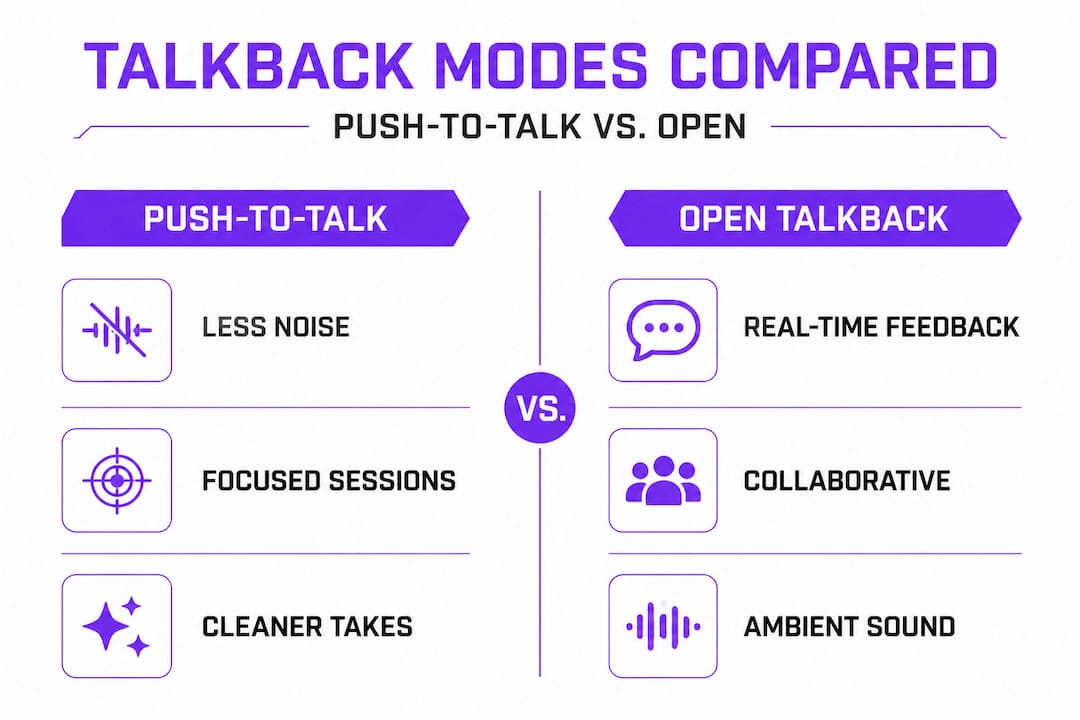
Open talkback, however, has a genuine role in collaborative and experimental sessions. When you’re working creatively with a performer in real time, constantly pressing a button interrupts the natural flow of conversation. Broadcast production notes note that open talkback creates session-wide awareness, which can be adapted to music studio director-performer dynamics when the session is more workshop-like than performance-focused.
The best producers know when to switch modes mid-session. Start a tracking day in PTT mode to keep the takes clean. When you move to a collaborative arrangement or improvisation pass, flip to open for more natural conversation. Then return to PTT for final takes. That flexibility is a mark of a truly dialed-in session engineer. For more ideas on creative session references, explore this resource on referencing for inspiration to sharpen your overall production approach.
Our Perspective: What Most Guides Miss About Talkback
After mastering technical strategies, it’s time to rethink how talkback influences the creative and collaborative process, beyond cables and gain knobs.
Most guides on talkback stop at the technical. Connect the mic. Set the gain. Route to headphones. Done. But the studios that consistently pull extraordinary performances out of artists aren’t just technically correct. They use talkback as a trust-building tool, one that most engineers never consciously consider.
Think about what a performer experiences. They walk into a live room, a controlled, somewhat isolating space, and put on headphones that cut them off from the world. They are alone with their instrument and their nerves. The talkback mic becomes their only connection to the humans in the control room. How you use that connection is as important as any technical detail.
Fast, confident talkback communication tells performers that someone is in control and cares about the performance. Slow, hesitant, or absent talkback creates anxiety. Performers wonder if their take was good, bad, or even recorded. That anxiety shows up in the next take as tension, second-guessing, and a loss of spontaneity. You can hear it in the waveform.
We also believe that talkback issues are early indicators of larger technical or communication breakdowns in a session. When talkback starts feeding back, cutting out, or routing to the wrong mix, it signals that something upstream in your signal chain may be drifting. Treating talkback problems as minor annoyances rather than diagnostic signals is a missed opportunity. A smart engineer checks the talkback system first when something feels wrong, because it touches nearly every part of the session’s communication infrastructure.
Finally, the idea of “the invisible hand” in session quality is real. The best talkback moments go unnoticed because they’re seamless. A performer hears “let’s go again,” and they go again, energized and focused, without any friction. That invisibility is the goal. Explore reChord workflow insights for a deeper look at how workflow design, including communication tools, contributes to seamless creative output.
Take Your Studio Sessions to the Next Level With SoundBridge
Having explored the full scope of talkback communication, here’s how you can build on these techniques using SoundBridge’s resources.
SoundBridge is built for producers and engineers who demand more from their sessions. With zero-latency remote recording and integrated talkback functionality, SoundBridge keeps communication tight whether you’re tracking in-room or collaborating across cities. You don’t have to compromise session quality for flexibility.
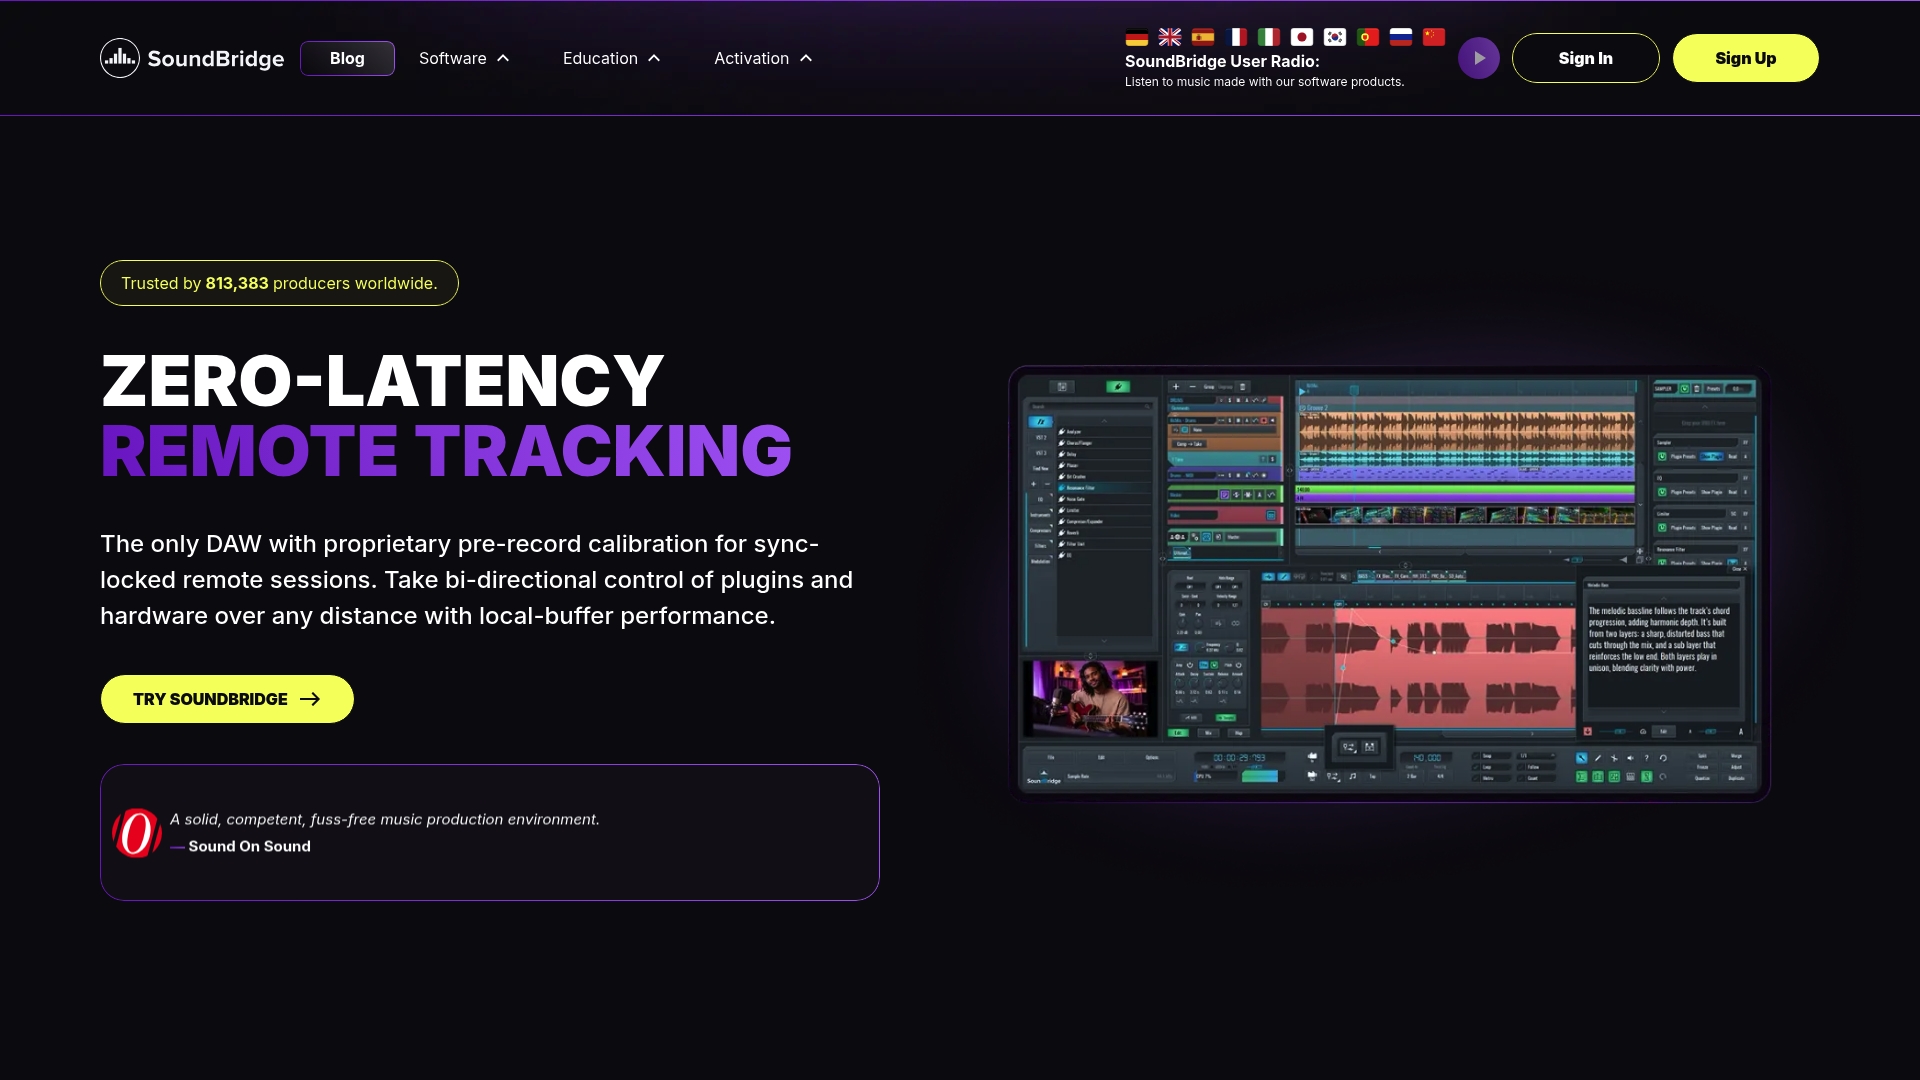
Dive deeper into your studio craft with SoundBridge’s learning resources. From parallel processing tips to detailed tutorials on sound effect creation, there’s a full ecosystem of knowledge waiting to sharpen your production skills. Every session you run becomes smoother, faster, and more creative when your communication and production tools work together seamlessly. SoundBridge is where that connection happens.
Frequently Asked Questions
How do I avoid feedback when using talkback microphones?
Position the mic correctly, use a dynamic type, and carefully adjust volume during setup. Testing for feedback before performers enter the live room is the most reliable way to catch problems early.
Can performers communicate back through talkback, or is it one-way?
Modern systems support full two-way communication via dedicated performer buttons, allowing musicians to flag issues or request mix changes without interrupting a take.
Is push-to-talk better than open talkback for recording studios?
For most studio tracking sessions, yes. Push-to-talk minimizes floor noise and unwanted leakage, keeping headphone mixes clean and performers focused.
What’s the basic protocol when using talkback in music sessions?
Always identify yourself before speaking and keep your message short and direct. Identifying yourself before giving direction prevents confusion in sessions with multiple engineers or producers in the control room.
Recommended
MASTER MUSIC PRODUCTION
基礎から完成曲まで導く、専門家によるコース。

HOUSE弾むベースと堅いキックから、このコースは成功し際立つために必要な最先端のHouse制作テクを教えます。

TRAP凡庸なTrapから脱却し、東洋の香りを混ぜた“World”なサウンドへ。エスニックな音風景でTrapを一歩先へ。

AMBIENTリラックスできる洗練されたサイ寄りAmbientを制作。聴いて落ち着く、禅へ誘うメディテーション系サウンドスケープを作ろう。